background image

11

12

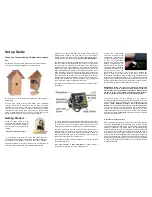
Plug


USB Cable

 into the back of the camera 

and loop the cable around the rings; continue 
looping the cable if necessary.

Mount the camera to the back plate and align 
the white dot to the left of the screw at the 
tail of the white arrow and rotate camera 
counter-clockwise to lock.

Manage the cable with optional 

Conduit

1) Attach the 

Back Plate Cover

 to the back 

plate if conduit is not used. 2) Attach conduit 
then the 

Conduit Cover 

on top.

Tighten the security screw with 

hexagonal wrench. 

Do not over-tighten the security screw

.

Press lens down with fingers to turn the lens to 
desired position. 

Attach 

Visor

 to the top of the camera lens.

Position camera and use 

Cable Clips

 to man-

age the cable if necessary.

1

4

2

5

6

7

3

4. Toucan Installation                                                     

STEP 3   

Camera body installation

LO
C

K

Back Plate

Cover

Conduit

Cover

Содержание Toucan TSK200KU

Страница 1: ...Toucan Surveillance Kit 2 0 Camera Smart Socket USER S MANUAL Model TSK200KU...

Страница 2: ...and high fidelity speaker for clear audio communication 100dB Siren Alarm Sound the alarm instantly to unwanted visitors Durable Design Withstands high humidity and house maintenance year round Wirele...

Страница 3: ...f the lights Free app to receive automatic notifications view live video and speak directly to those at your door Events captured up to 2 hours and stored in Cloud Server Never miss a moment User inte...

Страница 4: ...le when installing lamp sconce on fixture Mount Screws 2pcs Wall mount purpose Wall Inserts 2pcs Wall mount purpose Washers 2pcs Wall mount purpose Hexagonal Wrench Lock and unlock the camera on back...

Страница 5: ...bulb please consider changing to a smaller light bulb We recommend positioning the camera beneath the light fixture If the camera is placed approx 5 beneath the lamp base against the wall please inst...

Страница 6: ...llation for the steps below STEP 1 Socket installation Install Smart Socket to fixture Attach USB Cable to Smart Socket Thread in light bulb Reattach lamp sconce if necessary Remove USB cover Before i...

Страница 7: ...optional Conduit 1 Attach the Back Plate Cover to the back plate if conduit is not used 2 Attach conduit then the Conduit Cover on top Tighten the security screw with hexagonal wrench Do not over tigh...

Страница 8: ...ontrol Bluetooth Light bulb Dimensions Operating temperature Socket type E26 DC5V 1A AC120V 60Hz On Off Scheduling through BLE Mesh Network Bluetooth BLE 4 0 Support maximum 40W standard bulb Recommen...

Страница 9: ...Toucan is offline All Toucan units come standard with a two hour download and look back window With premium subscription plans you can go back in time to access every event that your Toucan generated...

Страница 10: ...not cause harmful interference 2 This device must accept any interference received including interference that may cause undesired operation The transmitter must not be co located or operated in conju...

Страница 11: ...www toucan solutions...

Отзывы: