36
Answering System Operation
Audible Indicators
This system gives you voice prompts for feature operations and voice confirmations
when you press a button or complete an operation.
Answering System
Operation
• NOTE: You can press and hold CHANGE to advance the minutes in increments of ten.
About Mailboxes
This answering system has three voice mailboxes. Callers using a touch tone
phone can select the mailbox in which their messages will be recorded by pressing
1 , 2 , or 3 . All other messages will be recorded in Mailbox 1.
About Announcements
•
You can record up to two different announcements — one for normal answering
and one for when you’ve set the system to play the announcement only.
•
Use normal answering mode (Annouce Only OFF) when you want the system
to record callers’ messages. Use Announce Only mode (set to ON) when you
want to give information to callers without accepting messages.
•
If you choose not to record an announcement, the system answers with a pre-
recorded announcement.
•
The normal answering pre-recorded announcement says: “Hello. I’m unable
to answer your call right now. Please leave your name, number and a message
after the tone.” The Announce Only pre-recorded announcement
says: “Hello, I’m unable to answer your call right now. Please call again. Thank you.”
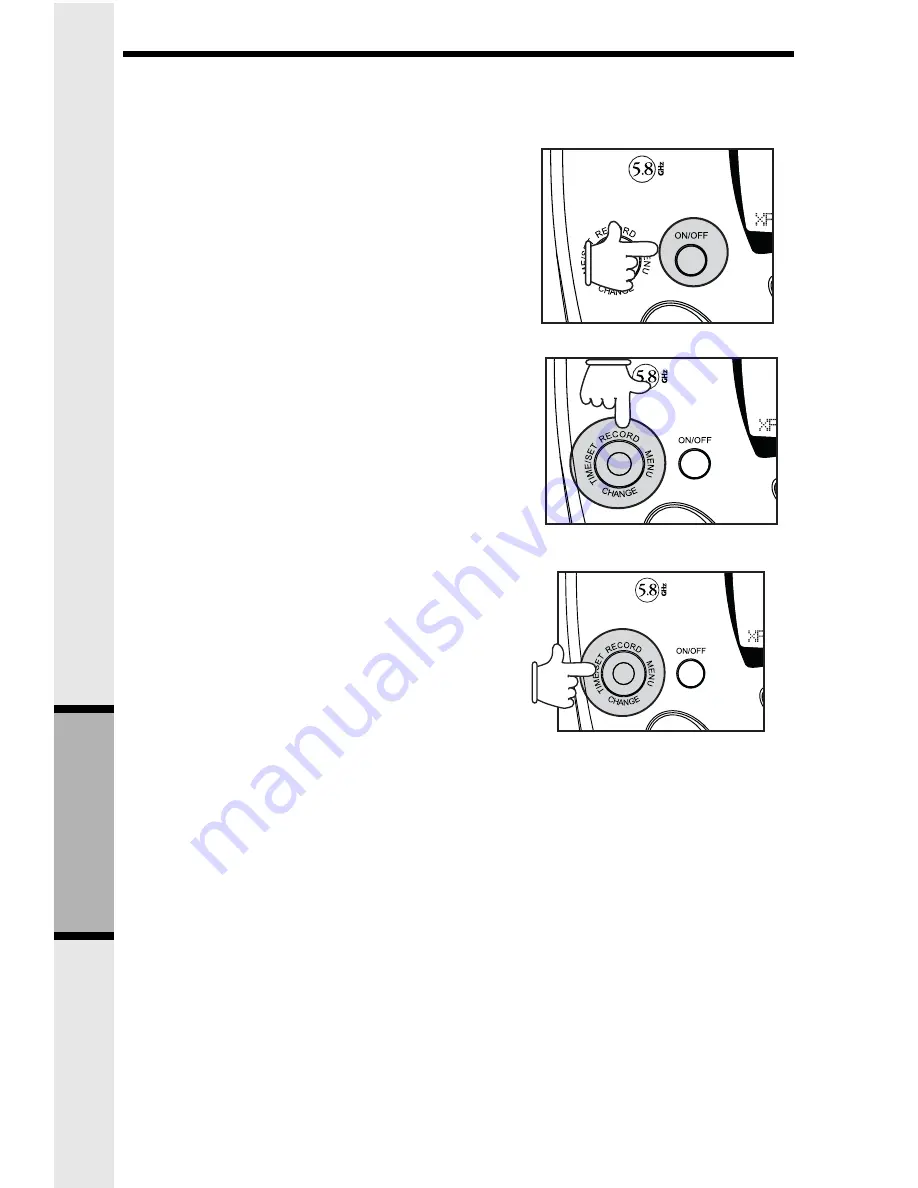
Turn Answering System On/Off
When you supply power to the Base Unit, the
answering system is automatically turned ON.
Press ON/OFF to manually turn the system off
or on. A voice prompt will confirm your
selection. When the answering system is ON,
the light inside the button will glow steadily.
The system will operate using the default settings
and pre-recorded announcements set at the
factory, until you program the unit.
4-Way Multi-Function Selector
Use this selector for Answering System feature setup.
Press the selector Up to RECORD (announce-
ments and memos).
Press the selector Down to CHANGE the current setting.
Press the selector to the Right to access the
feature MENU.
Press the selector to the Left for TIME/SET
(adjust the Day/Time and Confirm settings).
Set the Clock
1
Make sure the answering system is on.
2
Press TIME/SET . The system announces
the clock setting, then announces “To
set Date and Time, press TIME/SET .”
3
Press TIME/SET .
4
Press CHANGE until the system announces
the correct day, then press TIME/SET.
5
Press CHANGE until the system announces
the correct hour, then press TIME/SET.
6
Press CHANGE until the system announces
the correct minutes, then press TIME/SET.
The system announces the current
clock setting.


