34
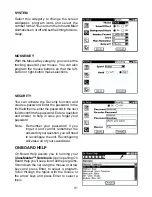
3. Complete the User Information form.
4. Enter your User Name.
5. If you want to protect your User Account with a password, click the option box to set
Security On.
6. Then, enter your password into the password box.
7. And enter your password again to confirm.
8. Personal folder is where your uploaded files are saved. Click the Set Personal Folder
icon to change your folder, if necessary. Click OK to save and back to the User
Information form screen.
9. Click OK to save your User Account information or click Cancel to quit without saving.
Syncing Your ClassMaster™ Notebook with Your
Computer
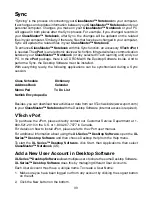
1. Make sure your vPort is connected properly to your PC.
2. Make sure the IR Lens of vPort and
ClassMaster™ Notebook
are in an effective
position.
3. Make sure the
XL Series™ Desktop Software
is installed on your computer.
4. Make sure the
VTech
®
vPort Manager is installed and running on your computer.
Press the Sync button on your
ClassMaster™ Notebook
.
Adding New Activities into Your ClassMaster™
Notebook
Visit
www.vport.com
frequently so you’ll be up-to-date with the new learning activities and
games created for your
ClassMaster™ Notebook
. While you’re in the
XL Series™
Desktop Software
, you can click on the vPort icon to automatically go to the website.
Then you can download the new information into your
ClassMaster™ Notebook
.
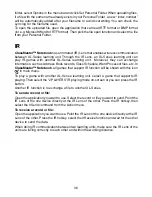
Before adding new activities, please make sure that:
1. Your vPort is connected properly to your PC.
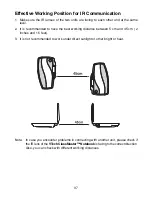
2. The IR Lens of vPort and
ClassMaster™ Notebook
are in an effective working position.
(You may refer to the following section for information).
3. The vPort Manager (or vPort Application Launcher) is running.
4. You have enough memory available on your
ClassMaster™ Notebook
.
Here’s what you do to load in the activities:
1. Open the
XL Series™ Desktop Software
and log in to your account.
2. Click the Download button in the
XL Series™ Desktop Software
.
Содержание ClassMaster XL Series
Страница 1: ...User s Manual ClassMaster Notebook ...

