background image

www.vtechphones.com

48

Important safety instructions

When using your telephone equipment, basic safety precautions should always be followed:

1.  Read and understand all instructions. 

2.  Follow all warnings and instructions marked on the product.

3.  Unplug this product from the wall outlet before cleaning. Do not use liquid or aerosol cleaners. Use a damp cloth for cleaning. 

4.  Do not use this product near water (for example, near a bathtub, kitchen sink, or swimming pool).

5.  Do not place this product on an unstable surface such as a table, shelf or stand. This product may fall, causing serious damage.

6.  Slots and openings in the back or bottom of the telephone base and handset are provided for ventilation. To protect them from  


overheating, these openings must not be blocked by placing the product on a soft surface such as a bed, sofa or rug. This product    


should never be placed near or over a radiator or heat register. This product should not be placed in an area where proper ventilation is  


not provided. 

7.  This product should be operated only from the type of power source indicated on the marking label. If you are not sure of the type of   


power supply in your home, consult your dealer or local power company. 

8.  Do not allow anything to rest on the power cord. Do not install this product where the cord may be walked on. 

9.  Never push objects of any kind into this product through slots in the telephone base or handset as they may touch dangerous voltage  


points or create a short circuit that could result in a risk of fire or electric shock. Never spill liquid of any kind on the product. 

10. To reduce the risk of electric shock, do not disassemble this product, but take it to an authorized service facility. Opening or removing    


parts of the telephone base or handset other than specified access doors may expose you to dangerous voltages or other risks. Incorrect  


reassembling can cause electric shock when the product is subsequently used. 

11.  Do not overload wall outlets and extension cords as this can result in the risk of fire or electric shock. 

12. Unplug this product from the wall outlet and refer servicing to an authorized service facility under the following conditions:


A. When the power supply cord or plug is damaged or frayed.


B.  If liquid has been spilled onto the product. 


C. If the product has been exposed to rain or water.


D. If the product does not operate normally by following the operating instructions. Adjust only those controls that are covered by the  


  operation instructions, as improper adjustment of other controls may result in damage and often requires extensive work by an    


  authorized technician to restore the product to normal operation.


E.  If the product has been dropped and the telephone base and/or handset has been damaged.


F.  If the product exhibits a distinct change in performance.

13.  The power unit is intended to be correctly oriented in a vertical or floor mount position. The prongs are not designed to hold the plug in  


place if it is plugged into a ceiling, under-the-table or cabinet outlet.

14. Avoid using a telephone (other than cordless) during an electrical storm. There is a remote risk of electric shock from lightning.

15. Do not use the telephone to report a gas leak in the vicinity of the leak.

16. Only put the handset of your telephone next to your ear when it is in normal talk mode.
CAUTION: Use only the power adapter provided with this product. To purchase, visit our website at www.vtechphones.com or call  


1 (800) 595-9511. In Canada, go to www.vtechcanada.com or dial 1 (800) 267-7377.

SAVE THESE INSTRUCTIONS

Содержание 3111-2

Страница 1: ...ure proper installation and operation of this innovative and feature rich VTech product For support shopping and everything new at VTech visit our website at www vtechphones com In Canada go to www vtechcanada com Congratulations on purchasing your new VTech product Before using this telephone please read the Important safety instructions on page 48 of this manual ...

Страница 2: ...inger volume 12 Ringer tone 12 Key tone 13 Language 13 Clear voicemail 14 Voicemail setup 15 Basic operation 17 Make answer and end calls 17 Speakerphone 17 Mute 17 Call waiting 18 Volume 18 Ringer mute 18 Multiple handset use 18 Voicemail 19 Find handset 19 Intercom 20 Answer an incoming call during an intercom call 20 Transfer an external call 21 Switch between external and internal calls 22 Adv...

Страница 3: ...ntry to the directory 30 Delete from the call log 31 Call log display screen messages 31 Redial 32 Review redial 32 Dial from redial 32 Delete from redial 32 Handset display screen messages 33 Handset indicators 36 Telephone base indicators charger indicator 37 Battery 38 Troubleshooting 39 Important safety instructions 48 Operating range 49 Maintenance 49 About cordless telephones 50 Warranty 50 ...

Страница 4: ... go to www vtechcanada com or call 1 800 267 7377 Handsets 2 for DS3111 2 TM3111 2 3 for DS3111 3 4 for DS3111 4 User s manual Batteries 2 for DS3111 2 TM3111 2 3 for DS3111 3 4 for DS3111 4 Telephone base Chargers 1 for DS3111 2 TM3111 2 2 for DS3111 3 3 for DS3111 4 Charger adapters 1 for DS3111 2 TM3111 2 2 for DS3111 3 3 for DS3111 4 Telephone base power adapter Telephone line cord Belt clips ...

Страница 5: ...is selected install the telephone base and the charger as shown below The telephone base is designed for desk or tabletop use only Make sure that the electrical outlet is not controlled by a wall switch Telephone wall jack Electrical outlet not controlled by a wall switch Telephone base power adapter Charger adapter Telephone line cord MANUFACTURED IN CHINA COMPLIES WITH 47 CFR PART 68 REGISTRATIO...

Страница 6: ...equired if you have DSL high speed Internet service MANUFACTURED IN CHINA COMPLIES WITH 47 CFR PART 68 REGISTRATION NO US EW7W401B80 565600 RINGER EQUIVALENCE 0 1B USOC JACK RJ11C RJ11W HAC FCC ID EW780 5656 00 THIS DEVICE COMPLIES WITH PART 15 OF THE FCC RULES OPERATION IS SUBJECT TO THE FOLLOWING TWO CONDITIONS 1 THIS DEVICE MAY NOT CAUSE HARMFUL INTERFERENCE AND 2 THIS DEVICE MUST ACCEPT ANY IN...

Страница 7: ...Installation Battery installation Install the handset battery by following these steps Press the tab and slide the battery compartment cover down Align the two holes of the battery plug with the socket pins in the handset battery compartment matching the red and black wires of the color coded label Place the battery in the compartment with the wires in the lower right corner Align the cover flat a...

Страница 8: ... VTech telephone Installation Battery charging The battery may have enough charge for short calls For best performance charge the battery for at least 16 hours before use When the battery power is low LOW BATTERY will be displayed and the battery indicator will flash on the handset screen When fully charged the handset battery provides approximately eight hours of talk time and four days of standb...

Страница 9: ... it with the telephone base Each handset must be registered separately To register a handset to your telephone base When first purchased all optional accessory handsets show NOT REGISTRED on the screen The handset may need to be charged for at least five minutes before registering to the telephone base To register a handset Place the unregistered handset in the telephone base or charger If PRESS F...

Страница 10: ...bout four seconds until the red IN USE light on the telephone base turns on and then release the button The handset will show PLEASE WAIT and it will take about 10 seconds to complete the registration process The handset will show REGISTERED and will beep if registration is successful When the registration is complete the newly registered handset will be assigned the next available handset registr...

Страница 11: ...is successful After deleting the registrations of all handsets you will need to individually register each handset with the telephone base see page 6 for registration instructions 1 2 3 Replacing a handset When you are replacing rather than adding a handset for your handsets to be numbered sequentially you need to delete all the handset registrations on the telephone base then register all handset...

Страница 12: ... mm headset into the jack on the side of the handset beneath the small rubber flap IC xxxxX xxxxxxxx FCC ID XXxxx xxxx xx IC xxxxX xxxxxxxx FCC ID XXxxx xxxx xx To release the belt clip from the handset carefully pry one side up from the notch The belt clip will now easily detach from the handset IC xxxxX xxxxxxxx FCC ID XXxxx xxxx xx IC xxxxX xxxxxxxx FCC ID XXxxx xxxx xx To purchase a headset vi...

Страница 13: ...2 5mm page 9 4 CID caller ID page 28 PLAY page 15 5 FLASH 6 Dialing keys 0 9 7 VOICEMAIL page 19 8 REDIAL PAUSE page 32 9 Microphone 10 Handset display 11 VOL volume page 18 12 directory page 23 ERASE page 15 13 speakerphone page 17 14 OFF CLEAR 15 page 29 16 INT intercom page 20 17 MUTE REMOVE page 17 17 ...

Страница 14: ...www vtechphones com 11 Installation Basic operation Installation Telephone base layout 1 CHARGE light page 37 2 IN USE light page 37 3 VOICEMAIL light page 37 4 FIND HANDSET page 19 1 2 3 4 ...

Страница 15: ...VOLUME then press MENU SELECT 3 Press or to adjust the volume A sample of each ringer volume will be played when scrolling through the choices 4 Press MENU SELECT to save and you will hear a confirmation tone Ringer tone This feature allows you to choose one of the ringer tones To choose a ringer tone Press MENU SELECT when the handset is not in use Press or to select RINGER TONE then press MENU S...

Страница 16: ... you press any of the handset keys Press MENU SELECT when the handset is not in use Press or to select KEY TONE then press MENU SELECT Press or to choose between ON or OFF Press MENU SELECT to save and you will hear a confirmation tone Language The language menu allows you to select between ENGLISH FRANÇAIS or ESPAÑOL to be used in all menus and screen displays To change the language Press MENU SE...

Страница 17: ...ash when you have a new voicemail message To turn off these indicators Press MENU SELECT when the handset is not in use Press or to select CLR VOICE MAIL and then press MENU SELECT The screen displays TURN INDICATOR OFF Press MENU SELECT to confirm and you will hear a confirmation tone The clear voicemail feature only turns off the handset display and the VOICEMAIL lights on the telephone base and...

Страница 18: ... need the codes to play skip and erase your messages Contact your local telephone company for more information To program the ACCESS NUMBER button Press MENU SELECT when the handset is not in use Press or to select VOICEMAIL SETUP then press MENU SELECT Press or to select ACCESS NUMBER then press MENU SELECT Use the dial pad to enter the access number Press MUTE REMOVE to delete characters if nece...

Страница 19: ...m a pause Press MENU SELECT when the handset is not in use Press or to select VOICEMAIL SETUP then press MENU SELECT twice The blinking cursor should be at the end of your access number Press and hold the REDIAL PAUSE button until a P appears Press MENU SELECT You will hear a confirmation tone To reset all codes to the default ones Press MENU SELECT when the handset is not in use Press or to selec...

Страница 20: ...peakerphone and normal handset use Mute This feature allows you to silence the microphone during a conversation You can still hear the caller but the caller cannot hear you Toactivatethemutefeatureduringacall pressMUTE REMOVE on the handset The screen will display MUTE Press MUTE REMOVE again to resume the conversation PHONE 00 00 01 MUTED MUTE The screen displays the elapsed time as you talk in h...

Страница 21: ...me to a comfortable level Ringer mute This feature allows you to mute the ringer temporarily when the telephone is ringing Press OFF CLEAR or MUTE REMOVE on the handset to temporarily silence the ringer The next call will ring normally Multiple handset use While on a call with one handset any other system handset can join the call Press FLASH or on another handset to join the conversation Press OF...

Страница 22: ...nd the icon Press the VOICEMAIL button and the handset will dial the telephone number for access to your voicemail messages Use the PLAY SKIP or ERASE buttons as you listen to your messages To setup the voicemail buttons see the Voicemail setup section on page 15 Contact your local telephone company for more information about voicemail service Find handset This feature allows the telephone base to...

Страница 23: ...lays HANDSET X IS CALLING Press FLASH INT or any dialing keys 0 9 on the ringing handset to answer the intercom call To end an intercom call press INT OFF CLEAR or place the handset back in the telephone base or charger Answer an incoming call during an intercom call During an intercom call there will be an alert tone to signify an incoming external call Toanswertheincomingcall press FLASHonthehan...

Страница 24: ... handset screen displays TRANSFER TO Dial the destination handset number The originating handset screen displays CALLING HANDSET X The destination handset rings and displays HANDSET X IS CALLING To answer a call at the destination handset press FLASH INT or any dialing keys 0 9 Now the party at the originating handset can have a conversation with the party at the destination handset and the screen...

Страница 25: ...riginating handset screen displays TRANSFER TO Dial the number associated with the handset you are trying to intercom The originating handset screen displays CALLING HANDSET X The destination handset rings and displays HANDSET X IS CALLING Press FLASH INT or any dialing keys 0 9 on the destination handset to answer the internal call Press INT on the originating handset to switch between the extern...

Страница 26: ...g pause Press MENU SELECT to confirm The screen displays ENTER NAME Use the dial pad see the Character chart on page 24 to enter the name Press MUTE REMOVE to backspace and erase characters Press and hold MUTE REMOVE to erase the entire entry Press MENU SELECT to confirm 1 2 3 4 5 6 7 Advanced operation DIRECTORY CALL LOG ENTER NUMBER 800 595 95_ If a handset attempts to enter the directory while ...

Страница 27: ...e characters to be displayed in the following order When you enter a name the handset will automatically display the first character of each word in uppercase Number key Characters by number of key presses 1 2 3 4 5 6 7 8 9 1 1 2 A B C 2 a b c 3 D E F 3 d e f 4 G H I 4 g h i 5 J K L 5 j k l 6 M N O 6 m n o 7 P Q R S 7 p q r s 8 T U V 8 t u v 9 W X Y Z 9 w x y z 0 0 space ...

Страница 28: ...r chart on page 24 For example if you have Jenny Kristen and Linda in the directory press 5 JKL once to find Jenny Press 5 JKL twice to find Kristen Press 5 JKL three times to find Linda Press 5 JKL a fourth time to return to Jenny Dial a directory entry Press to enter the directory when the handset is not in use Press or to scroll to the desired entry or use the alphabetical search to find it Pre...

Страница 29: ...ECT to confirm The screen displays EDIT NAME Use the dial pad see the Character chart on page 24 to enter the name Press MUTE REMOVE to backspace and erase characters Press and hold MUTE REMOVE to erase the entire entry Press or to move the cursor right or left Press MENU SELECT to confirm Delete from the directory Press to enter the directory or press MENU SELECT three times to enter the director...

Страница 30: ...aller ID service and if both telephone companies use compatible equipment Contact your local telephone company if you have both caller ID and call waiting but as separate services you may need combined service you have only caller ID service or only call waiting service you do not subscribe to caller ID or call waiting services but wish to subscribe There may be fees for these services and they ma...

Страница 31: ...mation will be stored in the call log and shared by all handsets The call log can store up to 50 entries You can review dial and copy the entry into the directory Entries are displayed in reverse chronological order from the latest to the earliest entry When the call log is full the earliest entry will be deleted to make room for new incoming call information XX MISSED CALLS and the NEW icon will ...

Страница 32: ...een There will be an error tone when the list reaches the beginning or end of the call log Make CID entries ready to dial Although the call log entries you receive have 10 digits the area code plus the seven digit number in some areas you may need to dial only the seven digits or a 1 plus the seven digits or a 1 plus the area code plus the seven digits You can change the number of digits that you ...

Страница 33: ...entry If the entry has a name and a number the screen will display SAVED If the entry already exists in the directory the screen will display ALREADY SAVED If the entry only has a name or a number EDIT NAME or EDIT NUMBER will be displayed Use the dial pad to enter the name or number and then press MENU SELECT to save the entry If there is no caller ID information the attempt to save will be rejec...

Страница 34: ...ME This caller s name is unavailable UNKNOWN NUMBER This caller s number is unavailable UNKNOWN CALLER No information is available about this caller LONG DISTANCE This is a long distance call Delete from the call log While in the call log press or to scroll to the desired entry Press MUTE REMOVE to delete an entry OR Press and hold MUTE REMOVE to delete all entries and the screen displays DELETE A...

Страница 35: ...ical order i e from the most recent to the earliest entry Review redial Press REDIAL PAUSE when the handset is not in use Press or or press REDIAL PAUSE repeatedly to browse through the entries Dial from redial Press REDIAL PAUSE when the handset is not in use Press or to scroll to the desired entry Press FLASH or to dial the number Delete from redial Press REDIAL PAUSE when the handset is not in ...

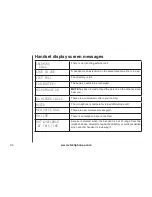
Страница 36: ...ING A handset with low battery has been placed in the telephone base or charger to recharge CONNECTING The cordless handset is searching for the telephone base DIRECTORY EMPTY There is no directory entry ENDED You have just ended a call HANDSET X IS CALLING Handset X is calling INTERCOM The handset is on an intercom call INTERCOM ENDED An intercom call is terminated INTERCOM TO The INT button is p...

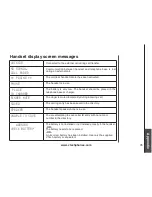
Страница 37: ...erson on the other end can hear you XX MISSED CALLS There are un reviewed calls in your call log MUTED The microphone is temporarily turned off during a call NEW VOICE MAIL There are new voicemail message s NO LINE There is no telephone line connected NOT AVAILABLE AT THIS TIME Access is denied when the handset is out of range from the telephone base Attempt to review the directory or call log is ...

Страница 38: ...ow The handset should be placed in the telephone base or charger RINGER MUTE The ringer is muted temporarily during incoming call SAVED The call log entry has been saved in the directory SPEAKER The handset speakerphone is in use UNABLE TO SAVE You are attempting to save caller ID entry with no name or number in the directory WARNING CHECK BATTERY The battery is not installed or not installed prop...

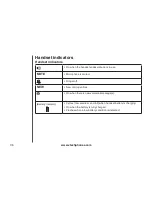
Страница 39: ...akerphone is in use MUTE Microphone is muted Ringer off NEW New call log entries On when there is new voicemail message s Battery indicator Cycles low medium and full when handset battery is charging On when the battery is fully charged Flashes when a low battery condition is detected ...

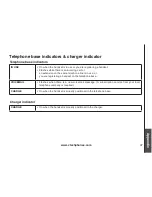
Страница 40: ...ephone line is in use or you are registering a handset on the telephone base VOICEMAIL Flashes when there is a new voicemail message A subscription service from your local telephone company is required CHARGE On when the handset is properly positioned in the telephone base Telephone base indicators charger indicator Charger indicator CHARGE On when the handset is properly positioned in the charger...

Страница 41: ...all 1 800 595 9511 In Canada go to www vtechcanada com or call 1 800 267 7377 Do not dispose of the battery ies in a fire They may explode Check with local waste management codes for special disposal instructions Do not open or mutilate the battery ies Released electrolyte is corrosive and may cause burns or injury to the eyes or skin The electrolyte may be toxic if swallowed Exercise care in hand...

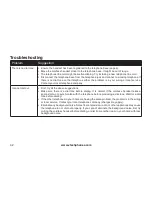
Страница 42: ...y into the telephone base and the modular wall jack Unplug the unit s electrical power Wait for approximately 15 seconds then plug it back in Allow up to one minute for the cordless handset and telephone base to synchronize Charge the battery in the cordless handset for at least 16 hours Remove and re insert the battery If that still does not work it may be necessary to purchase a new battery If y...

Страница 43: ... Make sure that the telephone base and handset s are in idle mode when registering a handset Follow the steps on page 47 for the common cure for electronic equipment Low Battery is displayed on screen Place the handset in the telephone base or charger for recharging Remove and re install the battery and use it normally until fully discharged then recharge the handset in the telephone base or charg...

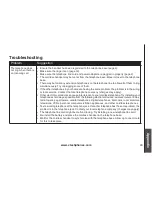
Страница 44: ...ours If the cordless handset is in the charger or in the telephone base but the CHARGE light is not on refer to the steps on this page for The charge light is off It may be necessary to purchase a new battery Please refer to the Battery section page 38 of this user s manual The CHARGE light is off Clean the charging contacts on the cordless handset s telephone base and charger each month using a p...

Страница 45: ...ne company I cannot dial out First try all the above suggestions Make sure there is a dial tone before dialing It is normal if the cordless handset takes a second or two to synchronize with the telephone before producing a dial tone Wait for a dial tone before dialing If the other telephones in your home are having the same problem the problem is in the wiring or local service Contact your local t...

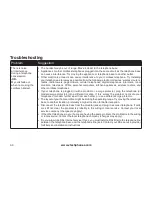
Страница 46: ... local telephone company charges may apply Other electronic products can cause interference to your cordless telephone Try installing your telephone as far away as possible from the following electronic devices wireless routers radios radio towers pager towers cellular telephones digital telephones intercoms room monitors televisions VCRs personal computers kitchen appliances and other cordless te...

Страница 47: ...s plugged in with a modem or a surge protector plug the telephone or modem surge protector into a different location If this solves the problem re locate your telephone or modem farther apart from each other or use a different surge protector The layout of your home or office might be limiting the operating range Try moving the telephone base to another location preferably a higher location for be...

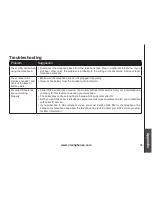
Страница 48: ...ecurely Remove the battery from the handset and re install it My caller ID features are not working properly Caller ID is a subscription service You must subscribe to this service from your local telephone company for this feature to work on your telephone The caller may not be calling from an area which supports caller ID Both you and the caller s telephone companies must use equipment which are ...

Страница 49: ...lter to the telephone line between the telephone base and the telephone line jack Contact your DSL service provider for filter information Caller ID entries do not match the numbers I need to dial Although the call log entries you receive have 10 digits the area code plus the seven digit number in some areas you may need to dial only the seven digits or a 1 plus the seven digits or a 1 plus the ar...

Страница 50: ...stalling your telephone as far away from these electronic devices as possible wireless routers radios radio towers pager towers cellular telephones intercoms room monitors televisions personal computers kitchen appliances and other cordless telephones Common cure for electronic equipment If the unit is not responding normally try putting the cordless handset in the telephone base or the charger If...

Страница 51: ...o an authorized service facility Opening or removing parts of the telephone base or handset other than specified access doors may expose you to dangerous voltages or other risks Incorrect reassembling can cause electric shock when the product is subsequently used 11 Do not overload wall outlets and extension cords as this can result in the risk of fire or electric shock 12 Unplug this product from...

Страница 52: ...ance Taking care of your telephone Your cordless telephone contains sophisticated electronic parts so it must be treated with care Avoid rough treatment Place the handset down gently Save the original packing materials to protect your telephone if you ever need to ship it Avoid water Your telephone can be damaged if it gets wet Do not use the handset outdoors in the rain or handle it with wet hand...

Страница 53: ...his limited warranty cover The manufacturer of this VTech Product warrants to the holder of a valid proof of purchase Consumer or you that the Product and all accessories provided in the sales package Product are free from defects in material and workmanship pursuant to the following terms and conditions when installed and used normally and in accordance with the Product operating instructions Thi...

Страница 54: ...urther repair activity You must pay for the cost of repair and return shipping costs for the repair of Products that are not covered by this limited warranty What must you return with the Product to get warranty service 1 Return the entire original package and contents including the Product to the VTech service location along with a description of the malfunction or difficulty and 2 Include valid ...

Страница 55: ...and used such that parts of the user s body other than the hands are maintained at a distance of approximately 20 cm 8 inches or more If you choose to use a clipping device please make sure to only use the supplied VTech belt clip This Class B digital apparatus complies with Canadian ICES 003 FCC Part 68 and ACTA This equipment complies with Part 68 of the FCC rules and with technical requirements...

Страница 56: ...company is required to inform you of your right to file a complaint with the FCC Your telephone company may make changes in its facilities equipment operation or procedures that could affect the proper functioning of this product The telephone company is required to notify you if such changes are planned If this product is equipped with a corded or cordless handset it is hearing aid compatible If ...

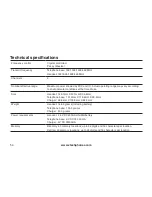
Страница 57: ...ironmental conditions at the time of use Size Handset 149 7mm X 53 1mm X 36 8mm Telephone base 101 2mm X 118 6mm X 98 5mm Charger 88 8mm X 105 6mm X 84 5mm Weight Handset 148 9 grams including battery Telephone base 155 0 grams Charger 90 0 grams Power requirements Handset 2 4V DC 600mAH NiMH battery Telephone base 6V DC 300mA Charger 6V DC 200mA Memory Directory 50 memory locations up to 32 digit...

Страница 58: ... Call waiting 18 Character chart 24 Charger indicator 37 Clear voicemail 14 D Delete from redial 32 Delete from the call log 31 Delete from the directory 26 De register all handsets 8 Dial a call log entry 30 Dial a directory entry 25 Dial from redial 32 Dialing options 29 Directory 23 DSL filter 3 E Edit a directory entry 26 F FCC ACTA and IC regulations 52 Find handset 19 H Handset display scree...

Страница 59: ...Ringer tone 12 Ringer mute 18 Ringer volume 12 S Save an entry to the directory 30 Search the directory 25 Speakerphone 17 Store a directory entry 23 Switch between external and internal calls 22 T Technical specifications 54 Telephone base charger installation 2 Telephone base indicators charger indicator 37 Telephone base layout 11 Telephone settings 12 The RBRC Seal 53 Transfer an external call...

Страница 60: ... VTECH GROUP OF COMPANIES Distributed in the U S A by VTech Communications Inc Beaverton Oregon Distributed in Canada by VTech Technologies Canada Ltd Richmond B C Copyright 2008 for VTECH TELECOMMUNICATIONS LTD Printed in China 91 001410 080 100 ...

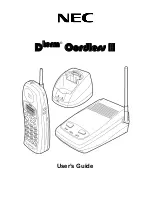
Страница 61: ...User s manual www v te ch ph o ne s c o m Models DS3111 2 TM3111 2 DS3111 3 DS3111 4 ...

Отзывы: