background image

vSync924 & 1624i User Guide 

                         © vSync DVR December 2007


Rev A.


December 2007              


Specifications and content are subject to change without notice. 

50

6. Firmware Upgrade 


6-1

. Preparing USB storage device with Upgraded Firmware 

1.  Before upgrading the system with your USB storage device, create the following directory 

E:\upgrade

” (E:\ is just an example, your drive letter may be different). 

2.  Copy the firmware file to the \upgrade folder. 

3.  Double-check the name of the firmware file. The filename should be “app9.bin” for the vSync924i (9 

Channel DVR) and “app16.bin” for the vSync1624i (16 channel DVR). 


6-2. 

Steps to Complete Upgrade 

1. Press the 

Setup

 button and enter the password. Default password is 

1111


2. Select 

Security

 menu from the Setup Screen. 

3. Select 

Admin Password

 followed by “

12341234

” and the 

SEL

 button. 

4. The DVR will reboot in Test Mode. 

5. Plug in the USB storage device containing the upgrade firmware. 

6. Select the 

USB UPGRADE

 option to start the upgrade. 

7. After the upgrade is finished, select the 

BOOT APPLICATION

 option and the DVR will restart to 

launch the new, upgraded firmware. 


6-3. 

Verifying Software Installation. 

 1. 

Press 

Setup

 and log on. 

 2. 

Select 

System

 and press 

SEL

 3. 

Select 

Description

 and press 

SEL

4. Check the version displayed.   

The version number should match the new firmware version you have installed.

Содержание 0924i

Страница 1: ...vSync924 1624i User Guide vSync DVR December 2007 Rev A December 2007 Specifications and content are subject to change without notice...

Страница 2: ...3 1 Alphabet Input with Remote Controller 16 3 Getting Started Setting Up the DVR 17 3 1 Setup Main Screen 17 3 2 Setup Live 18 3 3 Setup Recording Mode 19 3 3 1 Motion Zone Set Up 21 3 3 2 Record Sc...

Страница 3: ...notice 3 5 Archiving Video via USB or CD RW 46 5 1 Capturing images or video 46 5 2 Transferring still images or video onto USB or CD RW 47 6 Firmware Upgrade 50 6 1 Preparing USB memory with upgrade...

Страница 4: ...room ambient Therefore consideration should be given to installing the equipment in an environment compatible with the maximum ambient temperature Tma specified by the manufacturer B Reduced Air Flow...

Страница 5: ...vSync DVR set and Install the CD RW inside the DVR 2 Fasten the screws on both side of CD RW as indicated in red circle below 3 Connect the IDE CD RW 40pin cable and Power cable to the point on both...

Страница 6: ...e 1 Mount the bracket to the hard disk using the supplied HDD mounting bracket screws 2 Connect the supplied IDE HDD 80pin cable and Power cable to the hard disk and mount the hard disk to the unit us...

Страница 7: ...up to 80 cameras Locally via video outputs Remotely via vSync network client software and viSync Central Monitoring Software 3 Play Back or File archiving via USB 2 0 port and CD RW Or 1 Video Record...

Страница 8: ...unication Remote DVR management via embedded Web Browser for easy adjustments Mobile phone PDA viewing integration Network via LAN DDNS DHCP ADSL Dynamic and Static IP addresses Full duplex 4 Channel...

Страница 9: ...5 400 frames sec 25 frames sec Ch NTSC 240 frames sec Hidden Record Function 352x240 resolution Recording Frame Rate Quad PAL 200 frames sec 352x288 resolution NTSC 60 frame sec total 704 x 480 resolu...

Страница 10: ...sta Client PC S W vSync Live Connection Customizable Camera Layout up to 80 channels Embedded Web Server Remote Configuration of all vSync DVRs Full Duplex Bi directional Audio 2 way Communication Rec...

Страница 11: ...2007 Rev A December 2007 Specifications and content are subject to change without notice 11 HDD Mounting Brackets 2ea Preinstalled when unit is shipped with HDD s 2 Product Description 2 1 Front Pane...

Страница 12: ...plit screens in live display mode SEQ Press to start auto sequencing in 1 Ch 4 Ch 9 Ch or 16 Ch display modes AUDIO Press to select audio mode Disable or Mute all 4 channels or selected channels only...

Страница 13: ...s in setup mode Also used as the number 3 when entering a password LEFT Press to move left in the menu or to change values in setup mode Also used as the number 4 when entering a password SEL Surround...

Страница 14: ...connector for Ethernet connection RS 485 422 For Pan Tilt Zoom control SENSOR IN Connector for external alarm sensor contact devices alerts the vSync DVR and allows it to respond to events 9 16 senso...

Страница 15: ...Play Pause F ADV Jump 60 Seconds Forwards FREEZE CAP Freeze Screen Capture FF Fast Forward ALARM Silence Mute Alarm Operation SETUP Setup Menu ARCHIVE Displays Archive List AUDIO Disable Mute or High...

Страница 16: ...same pattern of a telephone keypad For example press the number 2 continuously to change the input value to 2 A B C a b c 2 This mode is useful for assigning channel names DDNS or ADSL configuration i...

Страница 17: ...nput the default password by pressing the Up button 4 times followed by the SELECT button We recommend that you protect your DVR system by assigning a new password Refer to section 3 6 for instruction...

Страница 18: ...em Description OSD Enables disables on screen display SEQUENCE Enables disables sequential video channels display in full screen mode SEQ DWELL TIME Sets dwell time for each channel in sequential disp...

Страница 19: ...reen Table 3 3 1 Menu Items in Record Mode Setup Menu item Description RESOLUTION Configures resolution as 704x480 704x240 or 352x240 NTSC CHANNEL Selects channel to apply settings FRAME RATE Configur...

Страница 20: ...Sets motion detection sensitivity for selected channel from 1 to 9 9 is the most sensitive setting SENSOR RECORDING Configures Alarm Sensor Inputs for triggered recording There are 16 sensors total 9...

Страница 21: ...nes will trigger motion recording Figure 3 3 1 Motion Zone selection screen 3 3 2 Record Schedule Records video based on a defined schedule The following table 3 3 3 defines button functions within th...

Страница 22: ...ble recording setting PLAY PAUSE Use to enable Motion detection triggered recording FF Use to enable Sensor triggered recording UP Move up in menu item RIGHT Move right in menu item DOWN Move down in...

Страница 23: ...Set the sensor motion video loss and options for each alarm PTZ Sets the camera s pan speed number type and ID SPOT OUT Configures the spot monitor output type sequential or quad and channel select KE...

Страница 24: ...OUT Setup Screen Item Description ALARM OUT Select alarm outputs from 1 to 8 SENSOR IN Enable up to 4 sensors out of a total of 16 MOTION ON Enable up to 4 cameras out of a total of 16 VIDEO LOSS ON E...

Страница 25: ...m the PTZ Control setting setup menu select set the protocol for the camera manufacturer you wish to control If the camera uses a specific camera ID select the camera ID by using the Left or Right but...

Страница 26: ...T OUT Setup Screen Item Description SPOT TYPE Configure the display mode either full or quad view for the spot monitor output SPOT ON EVENT Enable disable spot monitor upon events SPOT EVENT DWELL TIM...

Страница 27: ...Navigate through the position for each alphanumeric character by using the left and right buttons Up down buttons change characters DESCRIPTION Displays system information Firmware Version Storage Si...

Страница 28: ...4 1624i User Guide vSync DVR December 2007 Rev A December 2007 Specifications and content are subject to change without notice 28 Figure 3 5 2 DVR ID Setup Screen Figure 3 5 3 DVR Information Display...

Страница 29: ...and time After changing press the SEL button and select CONFIRM DAYLIGHT SAVINGS Configures automatic adjustment for Daylight Savings Time Use the LEFT or RIGHT buttons to enable disable After selecti...

Страница 30: ...the DVR will prompt for the current password and new password Follow the prompts The numbers 1 2 3 and 4 can be input by using direction keys UP RIGHT DOWN and LEFT respectively The keypad can be use...

Страница 31: ...e used to input all characters from 0 9 The default user ID is root and the default password is 1111 3 7 Setup Network Mode Configures network parameters used for remote clients that connect to the DV...

Страница 32: ...il Setting this value to ON initiates e mail transmission as follows through the designated email server Set to ON and press SEL button to BEGIN e mail configuration For use with DHCP Dynamic IP serve...

Страница 33: ...rea network you do not need to change the RTSP and HTTP port numbers unless other IP sharing devices establish in between the client and the DVRs To access the DVR you must have the following informat...

Страница 34: ...ons to ADSL modems without a router The following information is required If you do not have this information contact your network administrator Table 3 7 2 2 Network Parameters for ADSL Item Descript...

Страница 35: ...d the DVR will continue recording and overwrite the oldest existing recorded data once the hard drive is full When disabled recording will stop once the hard drive is full FORMAT Formats the hard disk...

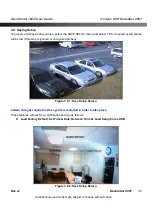
Страница 36: ...t the SAVE SETUP menu and select YES Unsaved setup values will be lost if this step is ignored or not applied properly Figure 3 9 1 Save Setup Screen Certain changes require that the system is restart...

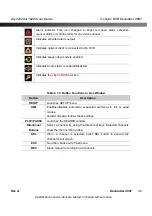
Страница 37: ...Window Video from connected cameras are displayed on the Live Setup configuration screen Symbols indicate the DVR s status Refer to Table 4 1 1 for a legend Figure 4 1 1 Live Window Table 4 1 1 Indica...

Страница 38: ...Audio status is enabled disabled Indicates the vSync DVR is locked Table 4 1 2 Button Functions in Live Window Button Description SETUP Launches SETUP menu SEQ Enables disables automatic sequential sw...

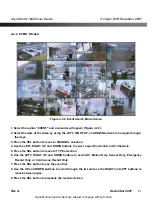
Страница 39: ...to change without notice 39 4 2 Search Window Press PLAY PAUSE button to launch the search menu The screenshot shown in Figure 4 2 will appear Select TIMELINE EVENT or DIRECT to initiate a search for...

Страница 40: ...o select a starting time period on the 24 hour timetable NOTE The modes used during recording are indicated below C Continuous M Motion S Sensor R Emergency Record 5 Once you have selected the date pr...

Страница 41: ...e through the days 3 Press the SEL button to move to CHANNEL selection 4 Use the LEFT RIGHT UP and DOWN buttons to select a specific channel or All Channels 5 Press the SEL button to move to TYPE sele...

Страница 42: ...e subject to change without notice 42 Table 4 2 2 1 ICONS in Event Search Mode Screen Icon Description A Select All recording M Select Motion alarm recording only S Select Sensor alarm recording only...

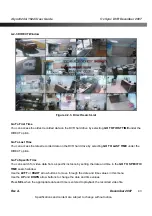
Страница 43: ...To Last Time You can access the latest recorded data on the DVR hard drive by selecting GO TO LAST TIME under the DIRECT option Go To Specific Time You can search for video data from a specific insta...

Страница 44: ...de Button Description ESC Returns to the previous menu screen or exits from the setup menu REW Rewinds Pressing repeatedly adjusts playback speed Reverse playback speeds are indicated as 1x 2x 4x and...

Страница 45: ...e channels SEL Change to full quad or 9 16 split display by using the SEL button CAP USB Press to launch the archive feature 4 4 PTZ Control NOTE Requires previous configuration of PTZ devices in SETU...

Страница 46: ...ample Figure 5 1 1 Archive Mode Screen The still image is stored on the hard disk drive and may be transferred to a USB storage device by selecting YES or a CD RW disk by selecting CD RW User can sele...

Страница 47: ...rieve a list of archived images or video clips for the selected date 2 Select a file from the archive list by using the UP or DOWN buttons and the RIGHT or LEFT buttons to move between pages 3 Press t...

Страница 48: ...rly review archived video files saved on the USB storage device or CD 5 2 1 How to install Codec 1 Insert the vSync installation CD provided with vSync DVR into the CD drive of your computer 2 Open Co...

Страница 49: ...hen check Show local captions when present as shown below Figure 6 2 3 Setup Screen for Window Media Player 10 Caution Always backup the contents of your USB storage device before archiving data from...

Страница 50: ...ync1624i 16 channel DVR 6 2 Steps to Complete Upgrade 1 Press the Setup button and enter the password Default password is 1111 2 Select Security menu from the Setup Screen 3 Select Admin Password foll...

Страница 51: ...DVR to the Network via the Ethernet Port on the rear of the DVR 4 The vSync Network Client Software features are explained in a separate manual When recording is in progress vSync streams transmits vi...

Страница 52: ...http port admin htm in Microsoft Internet Explorer ex http xxx xxx xxx xxx admin htm Only Microsoft Internet Explorer is supported we do not support other third party browsers i e FireFox Before load...

Страница 53: ...DVR December 2007 Rev A December 2007 Specifications and content are subject to change without notice 53 Figure 8 1 Live Control Setup Page After finishing the set up on the page click on APPLY for te...

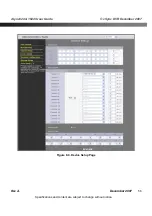
Страница 54: ...vSync924 1624i User Guide vSync DVR December 2007 Rev A December 2007 Specifications and content are subject to change without notice 54 Figure 8 2 Record Setup Page...

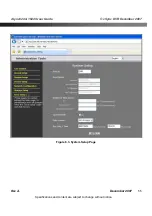
Страница 55: ...vSync924 1624i User Guide vSync DVR December 2007 Rev A December 2007 Specifications and content are subject to change without notice 55 Figure 8 3 System Setup Page...

Страница 56: ...vSync924 1624i User Guide vSync DVR December 2007 Rev A December 2007 Specifications and content are subject to change without notice 56 Figure 8 4 Device Setup Page...

Страница 57: ...vSync924 1624i User Guide vSync DVR December 2007 Rev A December 2007 Specifications and content are subject to change without notice 57 Figure 8 5 Network Configuration Page...

Страница 58: ...vSync924 1624i User Guide vSync DVR December 2007 Rev A December 2007 Specifications and content are subject to change without notice 58 Figure 8 6 Storage Setup Page...

Страница 59: ...vSync924 1624i User Guide vSync DVR December 2007 Rev A December 2007 Specifications and content are subject to change without notice 59 Figure 8 7 Save Setup Page...

Отзывы: