background image

vSync412i User Guide 

                         © vSync DVR December 2007


Rev A.  

                                   December 2007           


Specifications and content are subject to change without notice. 

9


2. Product Description 

2.1. Operation Panel 


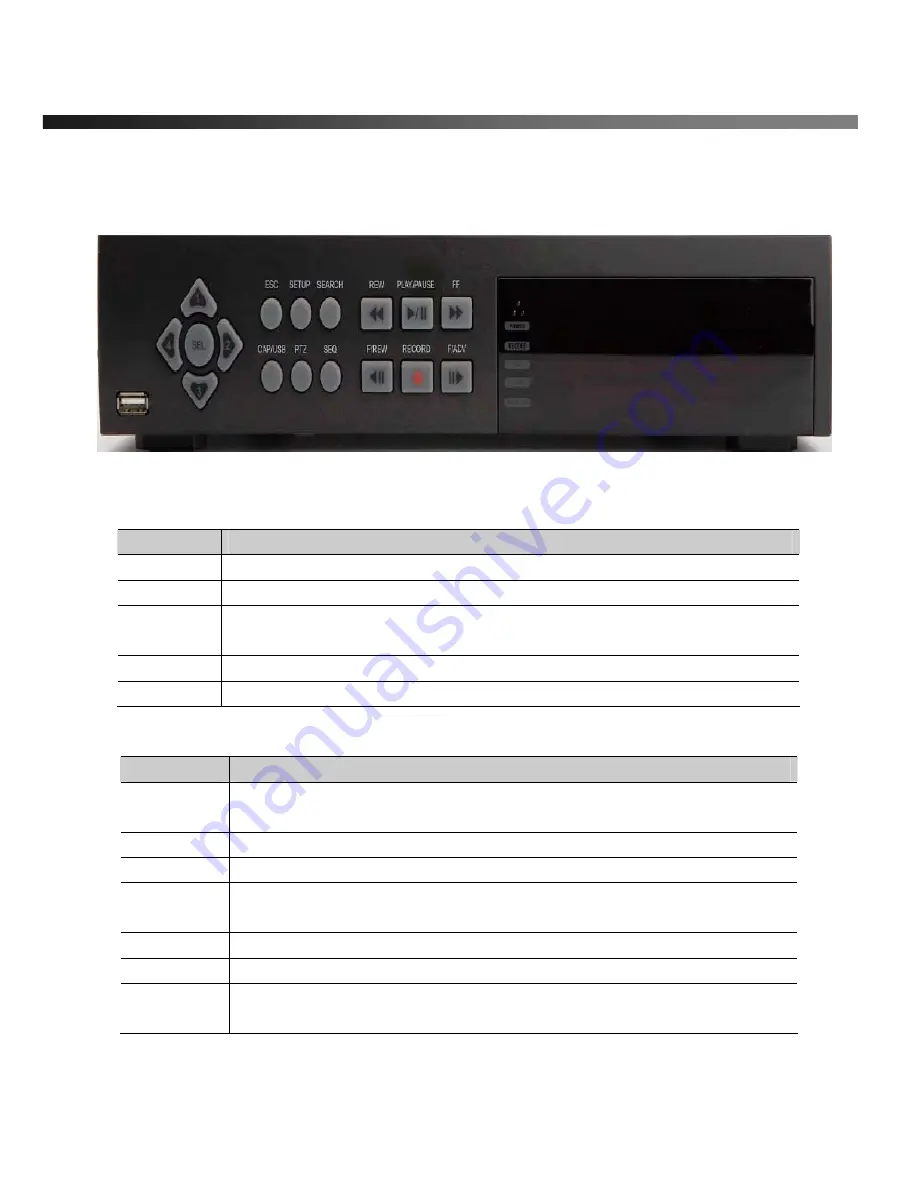
Figure 2.1 

Front Panel of vSync412i 


Table 2.1.1. Indication LEDs 

Name 

Description 

HDD 

LED illuminates when system is accessing the hard disk drive. 

REC 

LED illuminates when recording is enabled. 

ALARM 

LED illuminates when alarm sensor(s) is/are triggered or detects video motion. 
(Alarm sensor(s) and/or video motion detection must be configured first). 

NETWORK 

LED illuminates when clients connect through 

vSync

 software via network port. 

POWER 

LED illuminates when the DVR unit is on. 


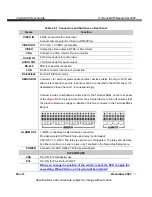
Table 2.1.2. Buttons on the Front panel 

Name 

Description 

ESC 

Press for temporary storage of the changed value or to return to the previous 
menu screen. 

SETUP 

Press to launch SETUP menu. 

SEARCH 

Press to review the ARCHIVE LIST and LOG DATA in live display mode. 

CAP/USB 

Press to take a snapshot, or capture still images (JPEG format), during live or 
playback modes. 

PTZ 

Press to initiate PTZ control 

SEQ 

Press to start auto-sequencing in quad (4Ch) or full (1Ch) display modes. 

REW 

(During Playback) Press to rewind video footage at 1x, 2x, 4x, and 8x speeds or 
to see the LOG LIST in live display mode. 

Содержание 0412i

Страница 1: ...vSync412i User Guide vSync DVR December 2007 Rev A December 2007 Specifications and content are subject to change without notice...

Страница 2: ...the Specifications of VSync412i 7 1 3 Packing List 8 2 PRODUCT DESCRIPTION 9 2 1 Operation Panel 9 2 2 Rear Panel 10 2 3 Remote Controller 12 3 GETTING STARTED SETTING UP THE DVR 13 3 1 Setup Main Sc...

Страница 3: ...SEARCH Window 32 4 2 2 TIMELINE Window 34 4 2 3 LOG Window 35 4 3 Play Mode 36 5 ARCHIVING VIDEO VIA USB STORAGE DEVICE 37 5 1 Capturing Images or Video Clip 37 5 2 Transferring Still Images or Video...

Страница 4: ...eration should be given to installing the equipment in an environment compatible with the maximum ambient temperature Tma specified by the manufacturer B Reduced Air Flow Installation of the equipment...

Страница 5: ...ally via video outputs Remotely via vSync network client software and viSync Central Monitoring Software 3 Play Back or File archiving via USB 2 0 port Or 1 Video Recording 2 Remote Playback via vSync...

Страница 6: ...l Presets relay sensor control eMAP and 2 way communication Remote DVR management via embedded Web Browser for easy adjustments Mobile phone PDA viewing integration Network via LAN DDNS DHCP ADSL Dyna...

Страница 7: ...rames sec Ch NTSC 120 frames sec Hidden Record Function 352x240 resolution Recording Frame Rate Quad PAL 100 frames sec 352x288 resolution NTSC 30 frame sec total 704 x 480 resolution Recording Frame...

Страница 8: ...tion Customizable Camera Layout up to 80 channels Embedded Web Server Remote Configuration of all vSync DVRs Full Duplex Bi directional Audio 2 way Communication Recording on Client PC Alarm Motion In...

Страница 9: ...t NETWORK LED illuminates when clients connect through vSync software via network port POWER LED illuminates when the DVR unit is on Table 2 1 2 Buttons on the Front panel Name Description ESC Press f...

Страница 10: ...to change values in setup mode Also used as the number 1 when entering a password RIGHT Press to scroll right in the menu or to change values in setup mode Also used as the number 2 when entering a p...

Страница 11: ...ws it to respond to events 4 sensors can be connected to the DVR sensor 1 4 dedicated to Video Channel 1 4 correspondingly Connect 2 wires to activate a sensor input to the Terminal Block on the rear...

Страница 12: ...List AUDIO Disable Mute or Highlighted Channel Only LOCK Locks front panel and remote for all functions SEQ Sequences Full or Quad View RECORD Manual Recording SEARCH Search Menu Screen ID DVR ID ID...

Страница 13: ...the default password by pressing the Up button 4 times followed by the SELECT button We recommend that you protect your DVR system by assigning a new password Refer to section 3 6 for instructions Aft...

Страница 14: ...s sequential video channels display in full screen mode SEQ DWELL TIME Sets dwell time for each channel in sequential display mode Event Beep Enables Disables beep sound upon Motion Detection Alarm or...

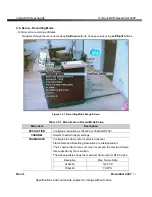
Страница 15: ...e Set up Screen Table 3 3 1 Menu Items in Record Mode Setup Menu item Description RESOLUTION Configures resolution as 704x480 or 352x240 NTSC CHANNEL Selects channel to apply settings FRAME RATE Confi...

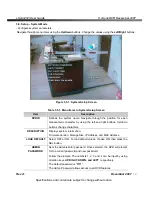
Страница 16: ...channel from 1 to 9 9 is the most sensitive setting SENSOR RECORDING Configures Alarm Sensor Inputs for triggered recording There are 4 sensors total A maximum of 4 sensor alarm inputs may be assigne...

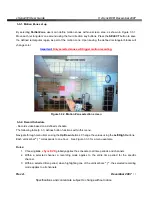
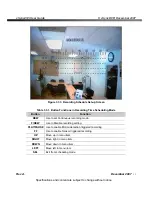
Страница 17: ...s will trigger motion recording Figure 3 3 2 Motion Zone selection screen 3 3 2 Record Schedule Records video based on a defined schedule The following table 3 3 1 defines button functions within this...

Страница 18: ...utton Functions in Recording Time Scheduling Mode Button Function REW Use to set Continuous recording mode F REW Use to Disable recording setting PLAY PAUSE Use to enable Motion detection triggered re...

Страница 19: ...gh the position for each alphanumeric character by using the left and right buttons Up down buttons change characters DESCRIPTION Displays system information Firmware Version Storage Size IP Address a...

Страница 20: ...FORMAT Configures the preferred display style for the date and time SET DATE TIME Set date and time Launches new menu as shown in Figure 3 5 4 PTZ CONTROL Configure the PTZ camera protocol speed came...

Страница 21: ...ect to change without notice 21 Figure 3 5 3 DVR Information Display Screen Figure 3 5 4 Set Date Time Setup Screen Table 3 5 4 Menu Items in Date Time Setup SET DATE TIME Warning Changing this settin...

Страница 22: ...he PTZ Control setting setup menu select set the protocol for the camera manufacturer you wish to control If the camera uses a specific camera ID select the camera ID by using the Left or Right button...

Страница 23: ...device control features for a selected channel See Figure 3 6 1 Select a menu item for the respective control features Table 4 4 1 PTZ Control Menus Item Description PAN TILT Select menu and use the...

Страница 24: ...sing the Up Down buttons Change the values using the Left Right buttons If you do not understand the following settings consult your network administrator Figure 3 7 1 Network Setup Screen Table 3 7 1...

Страница 25: ...Send E mail Setting this value to ON initiates e mail transmission as follows through the designated email server Set to ON and press SEL button to BEGIN e mail configuration For use with DHCP Dynami...

Страница 26: ...twork you do not need to change the RTSP and HTTP port numbers unless other IP sharing devices are established in between the client and the DVRs To access the DVR you must have the following informat...

Страница 27: ...ns to ADSL modems without a router The following information is required If you do not have this information contact your network administrator Table 3 7 2 2 Network Parameters for ADSL Item Descripti...

Страница 28: ...rmat Navigate through menu items using the Up Down buttons Change the values using the Left Right buttons Figure 3 8 1 Storage Setup Screen Table 3 8 1 Menus in Storage Setup Item Description OVERWRIT...

Страница 29: ...he SAVE SETUP menu and select YES Unsaved setup values will be lost if this step is ignored or not applied properly Figure 3 9 1 Save Setup Screen Certain changes require that the system is restarted...

Страница 30: ...the Live Setup configuration screen Symbols indicate the DVR s status Refer to Table 4 1 1 for a legend Figure 4 1 1 Live Window Table 4 1 1 Indicator ICONS in Live Window Icon Description C Indicates...

Страница 31: ...es Audio status is enabled disabled Indicates the vSync DVR is locked Table 4 1 2 Button Functions in Live Window Button Description SETUP Launches SETUP menu SEQ Enables disables automatic sequential...

Страница 32: ...e without notice 32 4 2 SEARCH Window Press SEARCH button to launch the search menu The screenshot shown in Figure 4 2 1 will appear Select EVENT SEARCH TIMELINE LOG or ARCHIVE to initiate a search fo...

Страница 33: ...ion 4 Use the LEFT RIGHT UP and DOWN buttons to select a specific channel or All Channels 5 Press the SEL button to move to TYPE selection 6 Use the LEFT RIGHT UP and DOWN buttons to select All Motion...

Страница 34: ...ADV buttons to select a starting time period on the 24 hour timetable NOTE The modes used during recording are indicated below C Continuous M Motion S Sensor R Emergency Record 5 Once you have selecte...

Страница 35: ...r Guide vSync DVR December 2007 Rev A December 2007 Specifications and content are subject to change without notice 35 4 2 3 LOG Window Figure 4 2 3 Log Search Mode Screen Figure 4 2 4 Log List Search...

Страница 36: ...ated as 1x 2x 4x and 8x for normal twice 4 and 8 times normal speed The current speed is shown on the bottom right hand corner of the screen F REW Jumps Step Backward The playback position moves 60 se...

Страница 37: ...ample Figure 6 1 1 Archive Mode Screen The still image is stored on the hard disk drive and may be transferred to a USB storage device by selecting YES or a CD RW disk by selecting CD RW User can sele...

Страница 38: ...trieve a list of archived images or video clips for the selected date 2 Select a file from the archive list by using the UP or DOWN buttons and the RIGHT or LEFT buttons to move between pages 3 Press...

Страница 39: ...y review archived video files saved on the USB storage device or CD 5 2 1 How to install Codec 1 Insert the vSync installation CD provided with vSync DVR into the CD drive of your computer 2 Open Code...

Страница 40: ...n check Show local captions when present as shown below Figure 6 2 3 Setup Screen for Window Media Player 10 Caution Always backup the contents of your USB storage device before archiving data from vS...

Страница 41: ...1612i 16 channel DVR 6 2 Steps to Complete Upgrade 1 Press the Setup button and enter the password Default password is 1111 2 Select Security menu from the Setup Screen 3 Select Admin Password followe...

Страница 42: ...R to the Network via the Ethernet Port on the rear of the DVR 4 The vSync Network Client Software features are explained in a separate manual When recording is in progress vSync streams transmits vide...

Страница 43: ...port admin htm in Microsoft Internet Explorer ex http xxx xxx xxx xxx admin htm Only Microsoft Internet Explorer is supported we do not support other third party browsers i e FireFox Before loading th...

Страница 44: ...December 2007 Rev A December 2007 Specifications and content are subject to change without notice 44 Figure 8 1 Live Control Setup Page After finishing the set up on the page click on APPLY for tempo...

Страница 45: ...vSync412i User Guide vSync DVR December 2007 Rev A December 2007 Specifications and content are subject to change without notice 45 Figure 8 2 Record Setup Page...

Страница 46: ...vSync412i User Guide vSync DVR December 2007 Rev A December 2007 Specifications and content are subject to change without notice 46 Figure 8 3 System Setup Page...

Страница 47: ...vSync412i User Guide vSync DVR December 2007 Rev A December 2007 Specifications and content are subject to change without notice 47 Figure 8 5 Network Configuration Page...

Страница 48: ...vSync412i User Guide vSync DVR December 2007 Rev A December 2007 Specifications and content are subject to change without notice 48 Figure 8 6 Storage Setup Page Figure 8 7 Save Setup Page...

Отзывы: