background image


OPERATION: 

1.  Connect the device with an electric outlet (220-240VAC / 50Hz), or operate with a fully charged Battery. It 

is possible to use the unit while charging the battery. 


LINE INPUT (DVD, CD-player etc.): 

1.  Connect the source (DVD-player, CD-player etc.) to the line input (13) on the rear panel. 
2.  Select by pressing  input selector switch (4) LINE mode. 


USB/SD/BT: 

1.  Push the input selector (4) to USB / SD or BT mode.  
2.  Press PLAY button, MP3 begin to play. 


BT:

 Visible as BT2101B, no password needed. 


MICROPHONE: 

1.  Inset the Jack 6.3mm (¼”) microphone cable to MIC1 or MIC2 (1). 
2.  Adjust the microphone volume (8) and tone control (10 / 11). 
3.  Adjust the echo level control (9). 

 
Adjust the output signal with the master volume control (12). Make sure, the volume control will be turned to 
minimum when power switch on. Turn the volume control never to MAXIMUM. Adjust the Master Equalizer (2) to 
get a clear sound. 
 

RECHARGEABLE BATTERY 

This unit can be powered internally using the built-in rechargeable battery. When AC power is connected, 
CHARGE LED indicator will light red. The rechargeable battery is being charged. If FULL LED indicator light green, 
the battery is fully charged and ready to power the unit alone. 
 
Turn off the power switch and disconnect the AC power. Turn the unit back ”ON” and the rechargeable battery will 
power the unit alone. 
 

Note

: Turning off the unit power switch will allow the battery to be charged more quickly. 


ATTENTION: 


Before the device the first time is actuated, please charge the battery at least 12 hours and max. 72 hours!  


Battery should be regularly charged. For optimal battery life the battery should be charged at least 1x per 
month. 


Please note that if you do not load within 6 weeks, the battery becomes defective!! 


TROUBLESHOOTING 

One certain method of determining if a speaker is faulty is to substitute a speaker that is known to work correctly for 
the suspected problem speaker. If the “normally correct speaker” is experiencing the same difficulties or problems 
as the suspected problem speaker, use the information below to isolate the problem. 


Failure 

Possible cause 

No power 

The power line is cut off or not connected 
No power on the electric outlet 

No sound 

Wrong input, check input selector 
The connect line was broken 
The volume knob at lowest 

Microphone no sound 

The microphone not complete connected 
Adjust the microphone volume 
Change microphone 

Microphone howl 

The microphone is too close to the speaker 
Master volume adjust too big  


Содержание 170.062

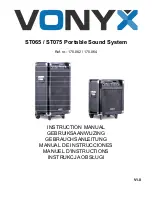
Страница 1: ...ST065 ST075 Portable Sound System Ref nr 170 062 170 064 INSTRUCTION MANUAL GEBRUIKSAANWIJZING GEBRAUCHSANLEITUNG MANUAL DE INSTRUCCIONES MANUEL D INSTRUCTIONS INSTRUKCJA OBS UGI V1 0...

Страница 2: ...2...

Страница 3: ...seek advice from a specialist Do not force the controls If this unit is with speaker inside which can cause magnetic field Keep this unit at least 60cm away from computer or TV If this unit is with bu...

Страница 4: ...Guitar volume control 7 Microphone priority On Off switch 8 Microphone volume control 9 Echo level control 10 Treble level control 11 Bass level control 12 Master volume control BACKPANEL 13 Line inp...

Страница 5: ...ry is fully charged and ready to power the unit alone Turn off the power switch and disconnect the AC power Turn the unit back ON and the rechargeable battery will power the unit alone Note Turning of...

Страница 6: ...richtlijnen en moeten de aanwijzingen waarschuwingen worden gevolgd Het apparaat buiten bereik van kinderen houden Bovendien mag het apparaat nooit onbeheerd gelaten worden Gebruik geen schoonmaakspra...

Страница 7: ...ctor 6 Gitaar volume regelaar 7 Microfoon prioriteit Aan Uit schakelaar 8 Microfoon volume regelaar 9 Echo niveau regelaar 10 Treble niveau regelaar 11 Bass niveau regelaar 12 Master volume regelaar A...

Страница 8: ...dicator groen wordt is de accu helemaal opgeladen en kan het systeem worden gebruikt Zet de netschakelaar op OFF en verwijder het netsnoer Controleer of de volumeregelaar minimaal staat Zet het systee...

Страница 9: ...z hintereinander ein und ausschalten Dadurch verk rzt sich die Lebensdauer erheblich Das Ger t au erhalb der Reichweite von Kindern halten Das Ger t niemals unbeaufsichtigt lassen Die Regler nicht mit...

Страница 10: ...ngang 6 3mm Klinkeneingang 6 Gitarren Lautst rke Regler 7 Mikrofon Priorit t Ein Aus Schalter 8 Mikrofon Lautst rke Regler 9 Echo Regler 10 Treble Regler 11 Bass Regler 12 Master Lautst rke Regler R C...

Страница 11: ...n wird Wenn die FULL LED gr n leuchtet ist die Batterie vollst ndig geladen und das System kann verwendet werden Schalten Sie die Stromversorgung OFF und ziehen Sie das Netzkabel Stellen Sie die Posit...

Страница 12: ...caso de mal funcionamiento siempre consultar a un especialista No forzar los controles Si la unidad lleva altavoz en el interior que puede causar campo magn tico Mantenga esta unidad al menos 60 cm de...

Страница 13: ...arra 7 Prioridad Micr fono interruptor On Off 8 Control Vol men Micr fono 9 Control nivel Echo 10 Control nivel Agudos 11 Control nivel Graves 12 Control Vol men Master PANEL TRASERO 13 Entrada Linea...

Страница 14: ...a LED se ilumina en verde la bater a est completamente cargada y lista para alimentar la unidad por s sola Apague el interruptor de alimentaci n y desconecte la alimentaci n Encienda la unidad ON y la...

Страница 15: ...ours les mains propres pour utiliser l appareil Ne forcez pas les r glages Cet appareil utilise un haut parleur qui peut engendrer un champ magn tique Placez toujours l appareil 60 cm au moins d un or...

Страница 16: ...7 Interrupteur on off micro prioritaire 8 R glage volume microphone 9 R glage niveau Echo 10 R glage niveau aigus 11 R glage niveau graves 12 R glage volume Master FACE ARRIERE 13 Entr e ligne 14 Born...

Страница 17: ...umulateur est totalement charg et pr t alimenter l appareil Eteignez l interrupteur secteur et d branchez l alimentation secteur Rallumez l appareil ON et l accumulateur alimentera seul l appareil Not...

Страница 18: ...u okolicy monta u Montuj sprz t w odleg o ci co najmniej 50cm od materia w atwopalnych i zachowuj co najmniej 1m wolnej przestrzeni z ka dej strony aby zapewni odpowiednie ch odzenie Urz dzenie posiad...

Страница 19: ...okr t o g o no ci gitary 7 Priorytet mikrofonu On Off 8 G o no mikrofonu 9 Poziom efektu echo 10 Pokr t o kontroli ton w wysokich 11 Pokr t o g o no ci ton w niskich 12 G wny poziom g o no ci PANEL TY...

Страница 20: ...aduje Po pe nym na adowaniu akumulatora zapali si zielona dioda LED Urz dzenie b dzie gotowe do pracy na baterii Wy cz urz dzenie oraz od cz zasilanie Uruchom ponownie a wbudowany akumulator b dzie za...

Страница 21: ...ut power 200W 250W Frequency Response 70Hz 20kHz 3dB 70Hz 20kHz 3dB VHF Mic Freq 200 175Mhz 200 175Mhz Input Sound Source Line Line Speaker 8 Woofer Tweeter 3 2x8 Woofer 2x3 Tweeter Card reader SD MMC...

Страница 22: ...CH Dieses Produkt darf nur in den NL und PT Lizenzfrei benutzt werden und in DK f r H rgesch digte in ES CH PL mit Beschr nkungen In DE mu der Endnutzer eine Einzelzuteilung beantragen bei einer ortli...

Страница 23: ...le Sound System 8 ST075 Portable Sound System 2x 8 Trade Name VONYX Regulatory Requirement EN 60065 2002 A12 2011 EN 301489 1 2011 09 EN 301489 9 2007 11 EN 300422 1 2011 08 EN 300422 2 2011 08 EN 624...

Страница 24: ...Specifications and design are subject to change without prior notice www tronios com Copyright 2016 by TRONIOS the Netherlands...

Отзывы: