Legal notice
This is a publication by Conrad Electronic SE, Klaus-Conrad-Str. 1, D-92240 Hirschau (www.conrad.com).
All rights including translation reserved. Reproduction by any method, e.g. photocopy, microfilming, or the capture in electronic data
processing systems require the prior written approval by the editor. Reprinting, also in part, is prohibited. This publication represent
the technical status at the time of printing.
© copyright 2015 by conrad Electronic SE.
G
DISPoSAL
a) Product
The product must not be disposed of in the household waste.
Please dispose of the product, when it is no longer of use, according to the current
statutory requirements.
b) rechargeable batteries
As the end user, you are required by law (Battery Ordinance) to return all spent rechargeable
batteries; disposal of them in the household waste is prohibited.
Rechargeable batteries containing hazardous substances are labelled with the sym-
bol shown to indicate that disposal in household waste is forbidden. The symbols of
the critical heavy metals are: Cd=cadmium, Hg=mercury, Pb=lead (the marking can
be seen on the rechargeable battery, e.g., underneath the refuse bin symbol shown
on the left).
You can return used rechargeable batteries free of charge to any collection facility in your
local authority, to our stores or to any other store where rechargeable batteries are sold. In so
doing you will fulfil your statutory obligations and contribute to the protection of the environ-
ment.
TEcHNIcAL DATA
Operating voltage .................................220 - 240 V/AC (50/60 Hz)
Charge end voltage ..............................14,7 V +/- 0,25 V
Charging current ...................................max. 4 A
Housing protection type ........................IP 52
Charging controls .................................Light bar (25% / 50% / 75% / 100%)
Operating conditions ............................. 0 °C to +40 °C, 10% to 95% relative humidity, non-
condensing
Storage conditions ................................ -10 °C to +50 °C, 10% to 95% relative humidity,
noncondensing
Dimensions (L x W x H) ........................220 x 65 x 49 mm
Weight ..................................................460 g
Length of mains cable ..........................approx. 140 cm
Length of charging cable ......................approx. 150 cm
Usable rechargeable batteries
Battery type ..........................................Lead-gel, lead-acid, lead-fleece
Battery voltage ......................................12 V
Battery capacity ....................................min. 4 Ah, max 120 Ah
coNNEcTIoN, STArTUP, cHArGING
1. Connect the charger to a mains socket (220 - 240 V/AC).
2. Now attach the red alligator clamp to the positive terminal, the black alligator clamp to the
negative terminal of the battery. Make sure the lock nuts attached to the alligator clamps
are securely seated.
Alternatively, instead of the alligator clamps for the mobile use, you can also unscrew
the charging cable from the alligator clamps and use the eyelet shoes to connect the
charging cable to the battery in the vehicle permanently. To do this, attach the black
cable with the eyelet shoe to the negative terminal, the red cable with the eyelet shoe
to the positive terminal of the battery to be charged. Proceed carefully when doing this;
avoid short circuits and pay attention to a secure contact.
With a permanent connection, make sure that neither the charger nor the connections
of the charging cable are exposed to moisture. Operation of the charger in the installed
state (permanent connection in the vehicle) is permitted only in dry, enclosed rooms
(e.g., a garage).
If the charger is not connected to the mains, a low reverse current flows and discharges
the battery. For this reason, we recommend the permanent connection only in vehicles
that are regularly moved and charged. The charger has two screw holes on the under-
side of the housing for installation in a vehicle.
3. When the rechargeable battery is connected with the correct polarity, not defective
(high-impedance/disconnected) and connected to the mains, it starts to charge after a
few seconds. Depending on the charge state and condition of the connected battery (e.g.,
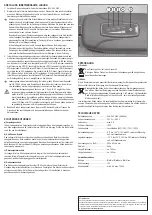
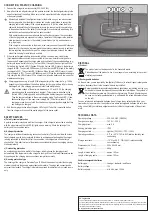
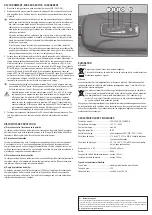
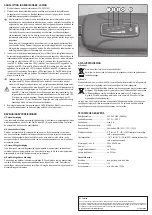
battery old or new; battery flat, etc.), the four LEDs (1 through 4) flash or light up. With a
flat battery, the first red LED (1) flashes. When the first red LED (1) stays lit, the battery is
charged to 25%. The next red LED flashes (2). When this red LED (2) stays lit, the battery
is charged to 50%. The next red LED (3) flashes. When this red LED (3) stays lit, the bat-
tery is charged to 75%. The next LED flashes green (4). When the rechargeable battery is
fully charged, this LED (4) stays lit. The charger now gives the battery only low current for
maintenance charging.
Charging processes vary in length. With a large battery with a capacity of e.g., 120 Ah,
depending on the condition of the battery (battery is old or new; battery is flat or deeply
discharged, etc.), the charging process can in fact take multiple days.
If the no-load voltage of the battery is between min. 3 V and 10.5 V, the charging
process begins with a special refresh program. This program is indicated by the
first red LED (1) flashing quickly and conditions the battery through pulse charging.
Then the charger switches to the normal charging mode. The first red LED (1) now
flashes slowly again. If the open-circuit voltage of a 12V battery is under 3 V, the
charging process does not start. Such batteries are generally so damaged that they
can no longer be charged.
4. End the charging process when the green LED stays lit. To do this, remove the battery
from the charger and then pull the mains plug out of the mains outlet.
SAFETY DEVIcES
a) Polarity reversal protection
A polarity reversal protection is built into the charger. If the charger is connected to a battery
with the poles reversed, the red LED (5) lights up as a warning. Check the polarity of the
battery and the connection cable.
b) Anti-spark protection
The charger is still deactivated during connection to a battery. Therefore, unlike with conven-
tional chargers, sparks do not normally form due to a charge equalization when the charger
is being connected to the battery. After the connection, the charge state of the battery is
checked first. Only after this test of the already connected battery does the charging process
start automatically.
c) overheating protection
An overheating protection is built into the charger, which reduces the charging current
automatically if the temperature in the charger is too high. When the internal temperature has
dropped again, the charging process continues completely normally.
d) Housing protection type
The housing of the charger is Protection Type IP 52 and thus serves to protect the charging
electronics built into the housing against dust and moisture. The plugs and connections do
not meet this standard. The charger is therefore approved for operation in dry, closed rooms
only.


