Page 10 of 15
Manual VENIA-6sp DDA - 2021-12 EN
Mounting X-Tension Kit
The X-Tension Kit can be mounted on any subwoofer or steel base
plate with M20 threaded mounting.
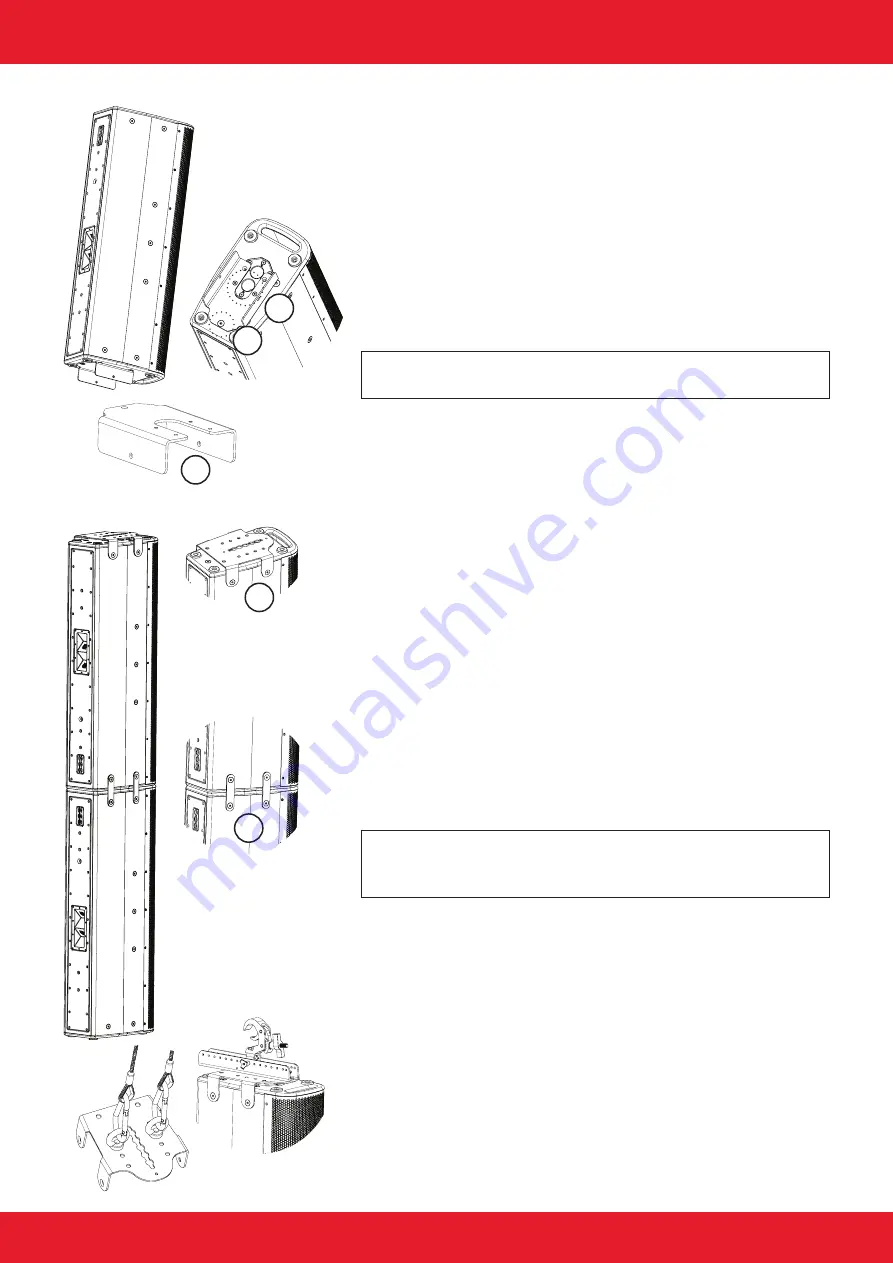
1. To connect the X-Tension Kit to the VENIA column line array,
mount the stacking adapter (A) to the bottom of the speaker.
2. Use the M10 countersunk screw (B) at the rear and two M6
countersunk screws (C) of the dual-tilt flange.
3.
Place the column line array with the stacking adapter on the
X-Tension Kit and secure it with the two locking pins inside the
X-Tension Kit.
Note:
Make sure that both locking pins are engaged to prevent
the column line array from tipping down.
Headstacking flying equipment mounting
The headstacking flying equipment allows the installation of two
VENIA column line arrays connected at the top using the EasyFly
mechanism, ring eyes and self-lock hooks.
1. Rotate a column line array 180°.
2.
Mount the headstacking flying equipment to the bottom of
the rotated column line array using the four M10 countersunk
screws (D) on the sides.
3.
Place the rotated column line array on top of the other column
line array so that they sit flush head to head.
4. Connect the column line arrays using the four headstacking
connectors (E). Again, use the M10 countersunk screws on the
sides of the column line arrays.
Note:
Please note that the column line arrays only have rub-
ber feet on the underside. To avoid damaging the housing, you
should use underlays when mounting.
Working with VENIA-6sp DDA
A
B
D
E
C


