


11
12.
CROSSFADER/VIDEO TOGGLE
- The CROSSFADER
allows the user to fade the music out from one source and
in to another source, while simultaneously switching the
VIDEO TOGGLE between the two associated video inputs.
For example, a clean fade from one CDG to another is
possible, automatically cueing the lyrics for each disc on
your video monitor.
The KJ-7808RV eliminates manual video cueing from the
music source switching process. However, you have the
choice of cueing manually if you prefer or the situation
calls for it. Select either MANUAL or CROSSFADER from
the VIDEO SELECT toggle (pg 10,#1). Note: The crossfader
will only fade in/out from the two sources that have been
assigned to it.
13.
ASSIGN
- These buttons work in conjunction with the
CROSSFADER. Assigning channels
determines which inputs will be included in the crossfade.
For example, to fade between a track from STEREO
CHANNEL 1 to a track cued on STEREO CHANNEL 2, the
ASSIGN button on the left should be pressed to illuminate
the 1 LED, and the right pressed to illuminate the 2 LED.
You will hear that one input source “fades” out” while the
other fades in when the
CROSSFADER is moved from left to right.
Note: Make sure your STEREO CHANNEL SOURCE
toggle is set properly to the input type you are
using (see BACK PANEL for connections).
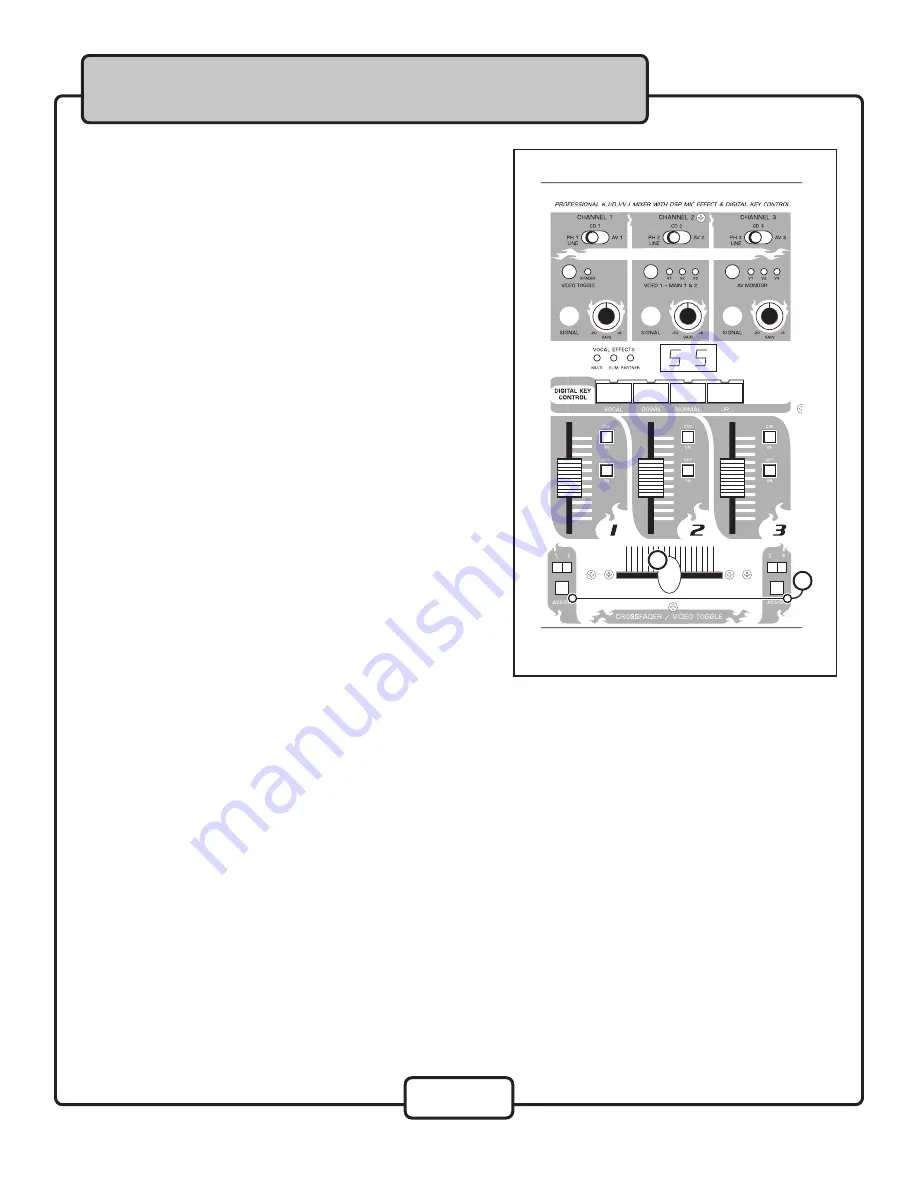
Front Panel Descriptions and Functions
12
13
Middle Panel of the KJ-7808RV


