background image

VIZIO VM190XVT/VM230XVT User Manual 
 

 24  

www.VIZIO.com


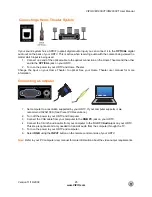
Connecting Your VCR or Video Camera  

 
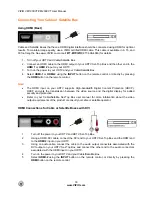
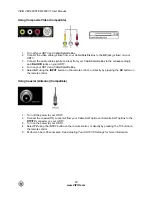
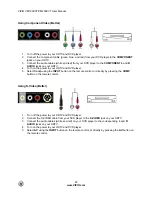
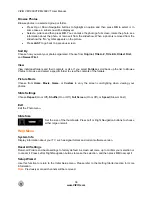
Using S-VIDEO 

1.  Turn off the power to your HDTV and VCR or Video Camera. 
2.  Connect the S-VIDEO cable from your VCR or video camera to the 

S-VIDEO

 jack on your HDTV. 

3.  Connect the audio cables on your VCR or video camera to the corresponding 

L

 and 

R


AUDIO


jacks on your HDTV. 

4.  Turn on the power to your HDTV and VCR or video camera. 
5. Select 

AV

 using the 

INPUT

 button on the remote control, or directly by pressing the 

AV

 button on 

the remote control. 


Note:

 Refer to your VCR or Video Camera user manual for more information about the video output 

requirements of the product. 
 

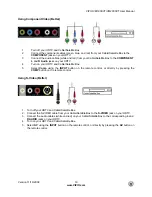
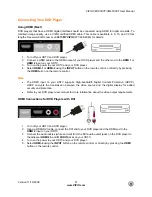
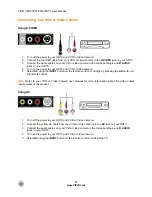
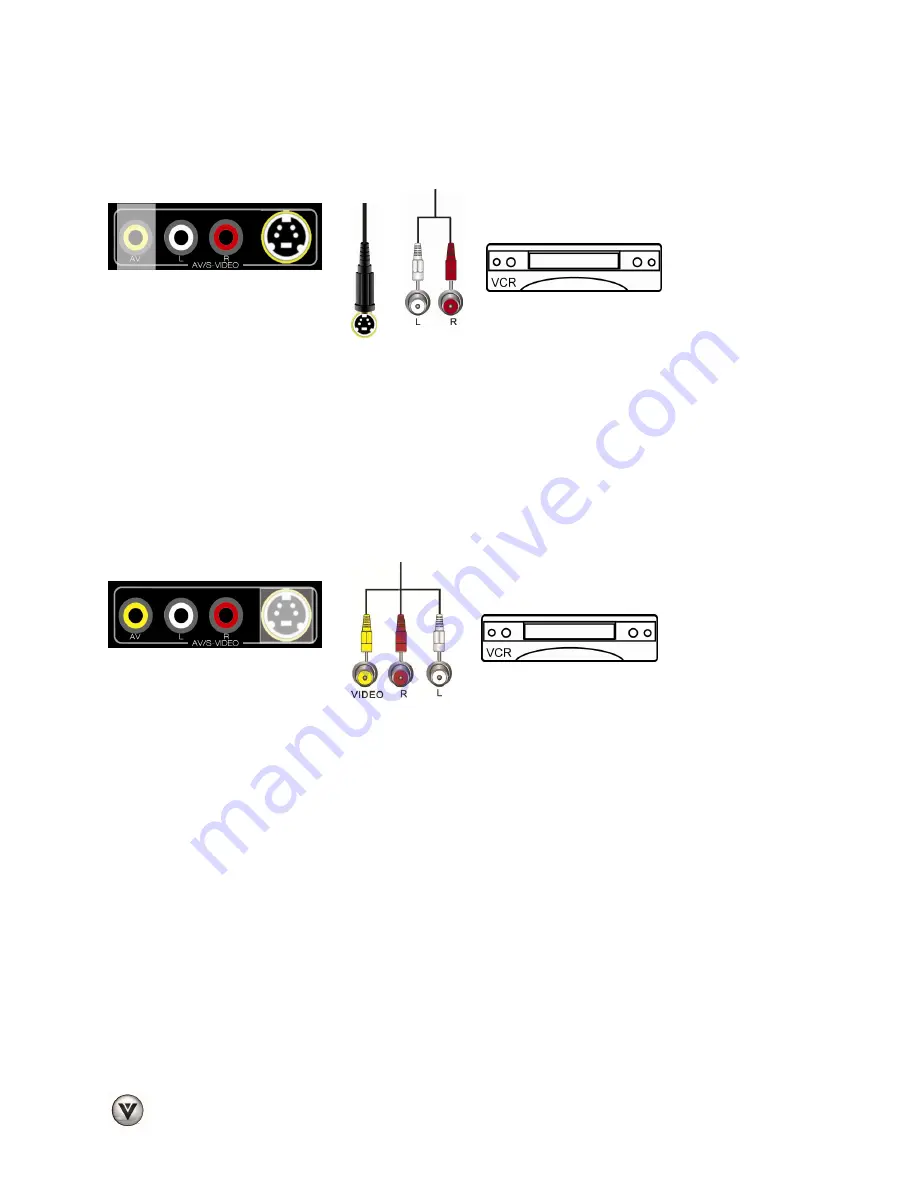
Using AV 


1.  Turn off the power to your HDTV and VCR or Video Camera. 
2.  Connect the yellow AV cable from your VCR or video camera to the 

AV

 jack on your HDTV. 

3.  Connect the audio cables on your VCR or video camera to the corresponding 

L

 and 

R


AUDIO


jacks on your HDTV. 

4.  Turn on the power to your HDTV and VCR or Video Camera. 
5. Select 

AV

 using the 

INPUT 

button on the remote control or side of the TV. 


Содержание VM230XVT - XVT-Series 1080p LED LCD HDTV

Страница 1: ...the serial number located on the back of your HDTV for easy reference when obtaining warranty support Serial _____________________ Purchase Date _____________________ VIZIO is a registered trademark...

Страница 2: ...t are provided for ventilation To ensure reliable operation of your HDTV and to protect it from overheating be sure these openings are not blocked or covered Do not place your HDTV in a bookcase or ca...

Страница 3: ...iately Do not try to repair your HDTV yourself Avoid using dropped or damaged appliances If your HDTV is dropped and the housing is damaged the internal components may function abnormally Unplug the p...

Страница 4: ...power lines or circuits Remember the screen of the coaxial cable is intended to be connected to earth in the building installation Advisory of the DTV Transition The nationwide switch to digital tele...

Страница 5: ...15 Pause Live TV PLT 16 Viewing Digital TV Program Information 16 INFO Button 16 CHAPTER 6 CONNECTING EQUIPMENT 17 Which Video Connection Should I Use 17 Using HDMI Best 18 HDMI Connections for Cable...

Страница 6: ...u 36 Ambient Light Sensor 36 Picture Mode 36 Backlight 36 Brightness 36 Contrast 36 Color 36 Tint 36 Sharpness 36 Noise Reduction 36 More 36 Photo Menu 37 Start Slideshow 37 Browse Photos 38 Sort By 3...

Страница 7: ...VM230XVT Stand with thumb screw VIZIO remote control VR9 AAA batteries for the remote control 2 AC DC power adapter This user manual Cleaning cloth Quick Setup Guide Registration Card Caution Do not a...

Страница 8: ...ith the VIZIO logo at the bottom to prevent poor ventilation and excessive component damage If you want to mount your HDTV on the wall see below for additional information Read this user manual carefu...

Страница 9: ...TV b Place your HDTV face down on a soft flat surface to prevent damage to the screen c Flip the base 90 degrees In this manner the stand neck will be out of view after the base is removed d Loosen th...

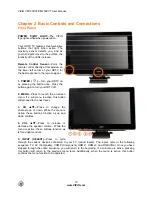
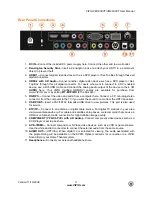
Страница 10: ...ENU Press to launch the on screen menu If a sub menu is active this button will proceed to the next level 3 CH Press to change the channels up or down While the menu is active these buttons function a...

Страница 11: ...rom a computer here Connect a 1 8 mini plug stereo connector from the computer to the TV if you want the sound to come from the HDTV speakers 6 USB PORT Insert a FAT FAT32 formatted USB drive to view...

Страница 12: ...ontrol Range Point the remote control directly at this sensor for the best response to the remote signal Do not place any obstacles between the remote control and the remote control sensor The effecti...

Страница 13: ...tedly to go to the previous level or out of the On Screen Menu completely Number Button Pad Press to select a channel or enter a password INPUT Press to cycle through the various devices connected to...

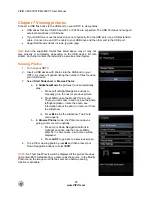
Страница 14: ...and then plug the AC DC Power Block into an AC wall socket 3 Connect your devices to your HDTV see Chapter 2 for detailed steps 4 Turn on your TV The Setup App will automatically play and guide your t...

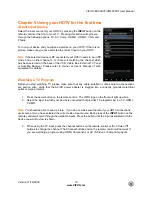
Страница 15: ...fore you start watching TV please make sure that any cable satellite or off air antenna connections are secure Also verify that the AC DC power adapter is plugged into a correctly grounded electrical...

Страница 16: ...minutes A count down timer will be displayed resumes the playback and skips forward and rewinds in 15 second increments exits back to live TV You can also press TV AV COMP or HDMI to exit this featur...

Страница 17: ...so you can use the TV as your monitor Better analog Component consists of three cables for transmitting video and two cables for transmitting audio one red and one white Component video provides a sh...

Страница 18: ...your HDTV supports High bandwidth Digital Content Protection HDCP HDCP encrypts the transmission between the video source and the digital display for added security and protection Refer to your Cable...

Страница 19: ...our HDTV and Cable Satellite Box 5 Select Comp using the INPUT button on the remote control or directly by pressing the COMP button on the remote control Using S Video Better 1 Turn off your HDTV and...

Страница 20: ...V and Cable Satellite Box 5 Select AV using the INPUT button on the remote control or directly by pressing the AV button on the remote control Using Coaxial Antenna Compatible 1 Turn off the power to...

Страница 21: ...directly by pressing the HDMI button on the remote control Note The HDMI input on your HDTV supports High bandwidth Digital Content Protection HDCP HDCP encrypts the transmission between the video so...

Страница 22: ...ur HDTV and DVD player 5 Select Comp using the INPUT button on the remote control or directly by pressing the COMP button on the remote control Using S Video Better 1 Turn off the power to your HDTV a...

Страница 23: ...and DVD Player 5 Select AV using the INPUT button on the remote control or directly by pressing the AV button on the remote control Connecting Coaxial RF Using Your Antenna or Digital Cable for Standa...

Страница 24: ...AV using the INPUT button on the remote control or directly by pressing the AV button on the remote control Note Refer to your VCR or Video Camera user manual for more information about the video outp...

Страница 25: ...r Home Theater to optical See your Home Theater user manual for more information Connecting a Computer 1 Set computer to a resolution supported by your HDTV If your computer supports it we recommend 1...

Страница 26: ...er of files found on your USB device 3 Select Start Slideshow or Browse Photos a In Slideshow Mode the pictures found automatically play i Press Left or Right Navigation buttons to manually go to the...

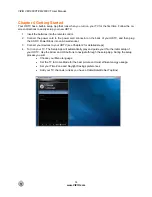
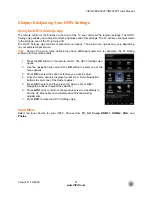
Страница 27: ...submenus for example the TV Rating submenu for Parental Controls 1 Press the OK button on the remote control The HDTV Settings App opens 2 Use the navigation keys around the OK button to select one o...

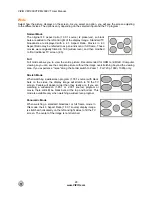
Страница 28: ...he entire picture Recommended for HDMI and RGB Computer viewing so you can see the complete picture without the image overstretching beyond the viewing area If you experience noise along the border sw...

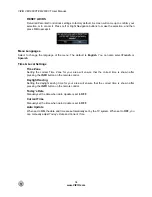
Страница 29: ...tal CC Style feature is available when watching digital TV Select either As Broadcaster or Custom If Custom is selected then you can customize the way Closed Caption is displayed The options available...

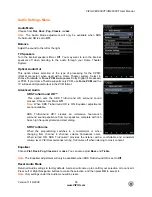
Страница 30: ...nation of each setting Audio The Audio menu allows you to adjust the same settings as the Audio Settings menu option on the main menu See Audio Settings Menu below for a detailed explanation of each s...

Страница 31: ...option can only be selected when you are in the VGA input mode Auto Adjust The TV will automatically position and tune the display for optimum performance Horiz Position Adjust the horizontal left rig...

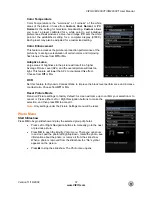
Страница 32: ...ed password has been entered and accepted by the TV To select the options in the Parental sub menu press OK and then create and or enter a password Note The Parental menu does not appear when the inpu...

Страница 33: ...8 years or older G General Programming suitable for all audiences PG Parental guidance 14 Viewers 14 years or older 18 Adult programming CAN French Note When Rating Enable is OFF Canadian French Ratin...

Страница 34: ...cal Settings Time Zone Setting the correct Time Zone for your area will ensure that the correct time is shown after pressing the INFO button on the remote control Daylight Saving Setting the daylight...

Страница 35: ...TruSurround HD surround sound process Choose from On or Off Note When SRS TruSurround HD is ON Equalizer adjustments are not available SRS TruSurround HD creates an immersive feature rich surround so...

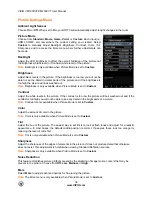
Страница 36: ...ntrast is too low the picture will look washed out and if the contrast is too high you will not be able to see any detail in the bright parts of a picture Note Contrast is only available when Picture...

Страница 37: ...icture will look too light This feature will lower the APL to counteract this effect Choose from Off or On DCR Set this feature for Dynamic Contrast Ratio to improve the black level performance and in...

Страница 38: ...Photos to browse and select a specific folder to view the contents of the folders Picture Mode Choose from Home Movie Game or Custom to vary the screen color lighting when viewing your photos Slide S...

Страница 39: ...cleaning solution which can be purchased at any major retailer 3 Wring liquid out of the cloth before cleaning to prevent water from penetrating into the housing 4 Wipe the TV and remote control with...

Страница 40: ...securely to the TV and move the antenna around the room or close to a window If the screen is black Make sure the power button is ON VIZIO Logo glows white Press the INPUT button on the remote contro...

Страница 41: ...and move the antenna around the room or close to a window The display image does not cover the entire screen If you are in RGB mode Computer make sure that H Size and V Position in the on screen menu...

Страница 42: ...with the supported format bit rate and or profile Also check the file for damage Some files that comply with the supported format may not play back or display properly Slideshow doesn t start Make sur...

Страница 43: ...in a particular installation If this equipment does cause harmful interference to radio or television reception which can be determined by turning the equipment off and on the user is encouraged to tr...

Страница 44: ...640x480 800x600 1024x768 1360x768 via RGB or 1920x1080 via HDMI 3 D comb filter 3 2 or 2 2 reverse pull down ATSC with 8VSB QAM demodulation ATSC with MPEG 2 decoding NTSC video decoding via Video AV...

Страница 45: ...4x768 1360x768 via RGB or 1920x1080 via HDMI 3 D comb filter 3 2 or 2 2 reverse pull down ATSC with 8VSB QAM demodulation ATSC with MPEG 2 decoding NTSC video decoding via Video AV S Video or Componen...

Страница 46: ...Pixel Format Horz Freq kHz Horz Polarity Vert Freq Hz Vert Polarity Pixel Clk MHz 1 640 x 480 60Hz 31 469 59 94 25 175 2 640 x 480 72Hz 37 861 72 809 31 5 3 640 x 480 75Hz 37 5 75 31 5 4 800 x 600 56H...

Страница 47: ...Hz 37 861 72 809 31 5 3 640 x 480 75Hz 37 5 75 31 5 4 800 x 600 56Hz 35 156 56 25 36 5 800 x 600 60Hz 37 897 60 317 40 6 800 x 600 72Hz 48 077 72 188 50 7 800 x 600 75Hz 46 875 75 49 5 8 1024 x 768 60...

Страница 48: ...and date of purchase VIZIO Technical Support is available from 6 00AM to 9 00PM Pacific Time Monday through Friday and 10 00AM to 2 00PM Pacific Time Saturday and Sunday Please note that holiday hour...

Страница 49: ...riginal purchaser during the initial thirty 30 day period following the date of purchase A VIZIO return authorization number must first be obtained as provided below The refund will be the purchase pr...

Страница 50: ...efects in materials and or workmanship and or at VIZIO s option and sole discretion the customer will be provided with a return authorization number and replacement instructions Proof of purchase is r...

Страница 51: ...er Connecting 21 DVI Cable Box 18 DVD Player 21 Satellite Box 18 Dynamic Contrast Ratio 37 Getting Started 14 Grounding 4 HDMI 17 Help Menu Reset All Settings 38 Setup Wizard 38 System Info 38 Help Me...

Страница 52: ...annel 31 Tuner Mode 30 TV Menu 27 TV Settings App 27 CC Menu 29 Input Menu 27 Sleep Timer Menu 29 TV Settings Menu 30 Wide Menu 28 TV Settings Menu Input Source Menu 30 Menu Language 34 Name Input 31...

Отзывы: