vivtek dh558 series Скачать руководство пользователя страница 18

 9 


S

ETUP AND 

O

PERATION


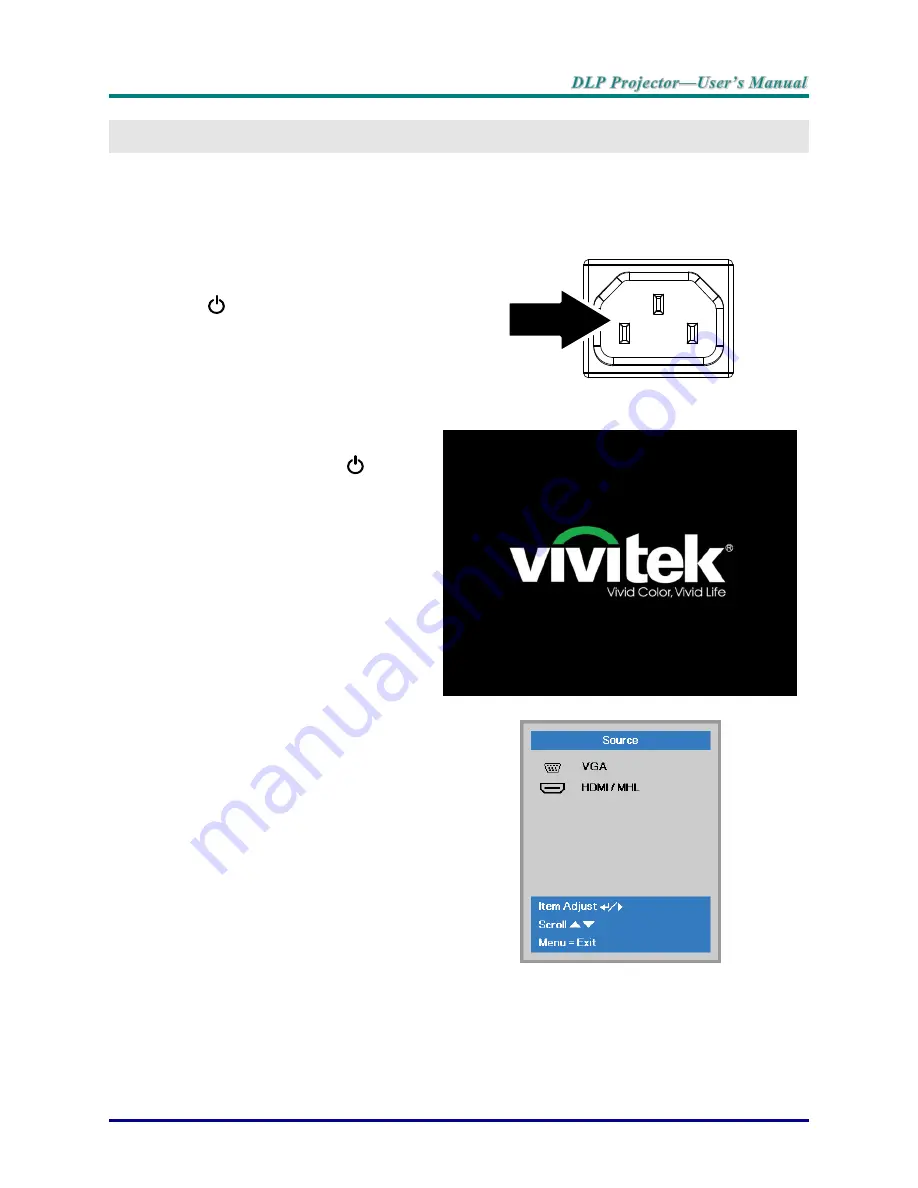
Starting and Shutting down the Projector 


1.  

Connect the power cord to the 
projector. Connect the other end to 
a wall outlet. 
The 


POWER 

LED on the 

projector light. 


2.  

Turn on the connected devices. 

3.  

Ensure the POWER LED not a 
flashing. Then press the 


POWER


button to turn on the projector.  
 
The projector splash screen displays 
and connected devices are 
detected. 
 
See 

Setting an Access Password 

(Security Lock)

 on page 

11

 if 

security lock is enabled. 


4.  

If more than one input device is 
connected, press the 

SOURCE


button and use ▲▼ to scroll among 
devices. 
(Component is supported through 
the RGB to COMPONENT 
ADAPTER.) 


VGA: Analog RGB 


HDMI/MHL: High-Definition Multimedia Interface and 

Mobile High-Definition Link compatible  

Содержание dh558 series

Страница 1: ......

Страница 2: ...ufacturer reserves the right to revise this publication and to make changes from time to time in the content hereof without obligation of the manufacturer to notify any person of such revision or chan...

Страница 3: ...ning Alerts you to situations that may damage the unit create a hazardous environment or cause personal injury Throughout this manual component parts and items in the OSD menus are denoted in bold fon...

Страница 4: ...ust vent When operating the projector in an enclosed space ensure that the surrounding air temperature within the enclosure does not exceed operation temperature while the projector is running and the...

Страница 5: ...nnected to the AUDIO IN port and CANNOT be connected to AUDIO OUT or other ports like BNC RCA otherwise it will lead to mute output and even DAMAGE the port Install the projector above 200cm to avoid...

Страница 6: ...ur face away from the exhaust vent so that you do not suffer from the gas and broken shards of the lamp Cleaning the Projector Unplug the power cord before cleaning See Cleaning the Projector page 40...

Страница 7: ...Line of vision projections remain square with advanced keystone correction for angled projections Input source automatically detected About this Manual This manual is intended for end users and descri...

Страница 8: ...15 Navigating the OSD 15 SETTING THE OSD LANGUAGE 16 OSD MENU OVERVIEW 17 IMAGE MENU 20 Computer Menu 21 Advanced Feature 22 White Balance 23 Color Manager 24 SETTINGS 1 MENU 25 Audio 26 Advanced 1 F...

Страница 9: ...47 PROJECTION DISTANCE VS PROJECTION SIZE 48 Projection Distance and Size Table 48 TIMING MODE TABLE 49 PROJECTOR DIMENSIONS 51 REGULATORY COMPLIANCE 52 FCC WARNING 52 CANADA 52 SAFETY CERTIFICATIONS...

Страница 10: ...ASE OPTIONAL CD ROM THIS USER S MANUAL QUICK START GUIDE WARRANTY CARD Contact your dealer immediately if any items are missing appear damaged or if the unit does not work It is recommend that you kee...

Страница 11: ...ection Lens 3 Focus ring Focuses the projected image 14 4 Zoom ring Enlarges the projected image 5 Function keys See Top view On screen Display OSD buttons and LEDs 3 Important Ventilation openings on...

Страница 12: ...tings in the OSD Enter the Source menu 4 Keystone Navigates and changes settings in the OSD Quick Menu For Keystone 5 AUTO Navigates and changes settings in the OSD Optimizes image size position and r...

Страница 13: ...t thru micro USB an extra cable adaptor may be required 3 RS 232C Connect RS 232 serial port cable for remote control 4 COMPUTER IN Connect the RGB cable from a computer 5 COMPUTER OUT Connect the RGB...

Страница 14: ...Listed ceiling mounts For ceiling installations use approved mounting hardware and M4 screws with a maximum screw depth of 6 mm 0 24 inch The construction of the ceiling mount must be of a suitable s...

Страница 15: ...Available in different model 8 Freeze Freeze unfreezes the on screen picture 9 Source Detects the input device 10 Auto Auto adjustment for frequency tracking size position RGB only 11 Keystone top Co...

Страница 16: ...direction of the arrow A Pull out the cover B 2 Insert the battery with the positive side facing up 3 Replace the cover Caution 1 Only use a 3V lithium battery CR2025 2 Dispose of used batteries accor...

Страница 17: ...unctions based on the remote control Remote Control Operating Range The remote control uses infrared transmission to control the projector It is not necessary to point the remote directly at the proje...

Страница 18: ...the POWER button to turn on the projector The projector splash screen displays and connected devices are detected See Setting an Access Password Security Lock on page 11 if security lock is enabled 4...

Страница 19: ...n the Power Off Press Power again message appears press the POWER button The projector turns off Caution Do not unplug the power cord until the POWER LED stops flashing indicating the projector has co...

Страница 20: ...assword in a safe place Without the password you will not be able to use the projector If you lose the password contact your reseller for information on clearing the password 1 Press the MENU button t...

Страница 21: ...cursor buttons in any order to set the password Push the MENU button to exit the dialog box 6 The password confirm menu appears when user presses the power on key in case the Security Lock is enabled...

Страница 22: ...rojector table or stand should be level and sturdy Position the projector so that it is perpendicular to the screen Ensure the cables are in a safe location You could trip over them To adjust the angl...

Страница 23: ...he projected image 3 Use the KEYSTONE buttons the remote control to correct image trapezoid wider top or bottom effect 4 The keystone control appears on the display Adjusting the Volume 1 Press the Vo...

Страница 24: ...Press the cursor button to move through the menus 3 Press the cursor button to move up and down in a menu 4 Press to change values for settings 5 Press MENU to close the OSD or leave a submenu Note D...

Страница 25: ...e cursor button to navigate to Settings 1 Press the cursor button to move to the Advanced 1 menu 2 Press Enter to enter the Advanced 1 sub menu Press the cursor button until Language is highlighted 3...

Страница 26: ...k Frequency 0 31 Tracking 5 5 Auto Image Advanced Brilliant Color 1 10 Sharpness 0 31 Gamma 1 8 2 0 2 2 2 4 B W Linear Color Temperature Warm Normal Cold Video AGC Off On Video Saturation 0 100 Video...

Страница 27: ...ish Fran ais Deutsch Espa ol Portugu s Italiano Norsk Svenska Nederlands Polski Suomi Magyar e tina T rk e Vi t Security Lock Off On Blank Screen Blank Red Green Blue White Splash Logo On Off Closed C...

Страница 28: ...rs ECO Normal Software Version Advanced 1 Menu Position Center Down Up Left Right Translucent Menu 0 25 50 75 100 Low Power Mode Off On Fan Speed Normal High Lamp Hour Reset Projector ID 0 98 Advanced...

Страница 29: ...utton to enter and set the Display Mode Brightness Press the cursor button to enter and adjust the display brightness Contrast Press the cursor button to enter and adjust the display contrast Computer...

Страница 30: ...e Computer menu ITEM DESCRIPTION Horizontal Position Press the cursor button to enter and adjust the display position to left or right Vertical Position Press the cursor button to enter and adjust the...

Страница 31: ...d adjust the display Sharpness Gamma Press the cursor button to enter and adjust the gamma correction of the display Color Temperature Press the cursor button to enter and adjust the color temperature...

Страница 32: ...Press the buttons to adjust the Red Gain G Gain Press the buttons to adjust the Green Gain B Gain Press the buttons to adjust the Blue Gain R Offset Press the buttons to adjust the Red Offset G Offse...

Страница 33: ...ger Press the buttons to adjust the Hue Saturation and Gain Blue Select to enter the Blue Color Manager Press the buttons to adjust the Hue Saturation and Gain Cyan Select to enter the Cyan Color Mana...

Страница 34: ...ection Press the cursor button to enter and choose from four projection methods Aspect Ratio Press the cursor button to enter and adjust the video aspect ratio Keystone Press the cursor button to ente...

Страница 35: ...to the Settings 1 menu Press to move to the Audio menu and then press Enter or Press to move up and down in the Audio menu ITEM DESCRIPTION Volume Press the buttons to enter and adjust the audio volu...

Страница 36: ...nd enable or disable security lock function Blank Screen Press the cursor button to enter and select different color to blank the screen Splash Logo Press the cursor button t enter and o select splash...

Страница 37: ...ent from a 3D DVD or 3D media file 5 You need to enable the 3D source some 3D DVD content may have a 3D on off selection feature 6 You need DLP link 3D or IR 3D shutter glasses With IR 3D shutter glas...

Страница 38: ...press Enter or Press to move up and down in the Advanced 2 menu Press to enter and change values for setting ITEM DESCRIPTION Test Pattern Press the cursor button to enter and select internal test pat...

Страница 39: ...utomatic power On when AC power is supplied Lamp Mode Press the cursor button to enter and select the lamp mode for higher brightness or lower brightness to save lamp life Reset All Press Enter to res...

Страница 40: ...press Enter or to enter ITEM DESCRIPTION Active Source Display the activated source Video Information Displays resolution video information for RGB source and color standard for Video source Lamp Hour...

Страница 41: ...Press button to enter and select OSD background translucent level Low Power Mode Press to enter and turn Low Power Mode on or off Fan Speed Press the cursor button to enter and toggle between Normal...

Страница 42: ...33 Lamp Hour Reset Please refer to Resetting the Lamp on page 39 to reset the lamp hour counter...

Страница 43: ...PTION Sleep Timer Press the cursor buttons to enter and set Sleep timer The projector automatically turns off after the preset period of time Source Filter Press Enter to enter the Source Filter menu...

Страница 44: ...ENTER button to enter the Source Filter sub menu ITEM DESCRIPTION VGA Press the buttons to enter and enable or disable the VGA source HDMI MHL Press the cursor button to enter and enable or disable th...

Страница 45: ...ulb may burn out during normal operation and cause glass dust or shards to be discharged outward from the rear exhaust vent Do not inhale or do not touch glass dust or shards Doing so could result in...

Страница 46: ...Remove the lamp compartment cover 3 Disconnect the lamp connector 4 Remove the two screws from the lamp module 5 Lift the module handle up 6 Pull firmly on the module handle to remove the lamp module...

Страница 47: ...e lamp connector must be connected properly and place as drawing before Lamp compartment cover installation back Warning Lamp Connector must be installed flush with the connector base as shown in the...

Страница 48: ...en the OSD menu 2 Press the cursor button to move to the Settings 2 menu Press the cursor button to move down to Advanced 1 and press enter 3 Press the cursor button to move down to Lamp Hour Reset 4...

Страница 49: ...ced Cleaning the Lens You can purchase optic lens cleaner from most camera stores Refer to the following to clean the projector lens 1 Apply a little optic lens cleaner to a clean soft cloth Do not ap...

Страница 50: ...nt object with the Kensington slot and a security cable Note Contact your vendor for details on purchasing a suitable Kensington security cable The security lock corresponds to Kensington s MicroSaver...

Страница 51: ...attached Ensure the attached device is turned on Ensure a connected PC is not in suspending mode Ensure a connected notebook computer is configured for an external display This is usually done by pre...

Страница 52: ...FAN1 6 blinks 1 blinks Power Fan error FAN2 6 blinks 2 blinks Blower Fan error FAN3 6 blinks 3 blinks Case Open 7 blinks OFF DMD error 8 blinks OFF Color wheel error 9 blinks OFF In the event of an e...

Страница 53: ...correct order and check that the Power LED is on 4 If you have replaced the lamp recently try resetting the lamp connections 5 Replace the lamp module 6 Put the old lamp back in the projector and have...

Страница 54: ...iced Having the Projector Serviced If you are unable to solve the problem you should have the projector serviced Pack the projector in the original carton Include a description of the problem and a ch...

Страница 55: ...un HDMI cables longer than 10 meters There are many HDMI Adopters working on HDMI solutions that extend a cable s effective distance from the typical 10 meter range to much longer lengths These compan...

Страница 56: ...ility NTSC PAL SECAM H Sync 15 30 91 4KHz V Sync 24 30Hz 47 120Hz Safety Certification FCC B cUL UL UL AR CE CB KC NOM CCC Operation Temperature 5 40 C Dimensions 274 6 mm W x 212 mm D x 100 mm H Ac I...

Страница 57: ...9 5 35 3 89 7 76 6 194 5 91 6 232 7 134 5 80 69 7 177 0 39 2 99 6 85 1 216 1 101 8 258 6 149 4 84 73 2 185 9 41 2 104 6 89 3 226 9 106 9 271 5 156 9 90 78 4 199 1 44 1 112 0 95 7 243 1 114 5 290 9 168...

Страница 58: ...0 O O 800 x 600 48 1 72 2 O O 800 x 600 53 7 85 1 O O 800 x 600 76 3 120 0 O O 1024 x 768 48 4 60 0 O O 1024 x 768 56 5 70 1 O O 1024 x 768 60 0 75 0 O O 1024 x 768 68 7 85 0 O O 1024 x 768 97 6 120 0...

Страница 59: ...O 1024 x 768 60 2 74 9 O O 1152 x 870 68 7 75 1 O O SDTV 480i 15 734 60 0 O O 576i 15 625 50 0 O O EDTV 576p 31 3 50 0 O O 480p 31 5 60 0 O O HDTV 720p 37 5 50 0 O O 720p 45 0 60 0 O O 1080i 33 8 60 0...

Страница 60: ...51 Projector Dimensions 274 6mm 10 8 212mm 9 346 100 3mm 3 95 86mm 3 386...

Страница 61: ...y and if not installed and used in accordance with the instruction manual may cause harmful interference to radio communications Operation of this equipment in a residential area is likely to cause ha...

Страница 62: ...Power On P F VXXS0002 56h Xh Xh 53h 30h 30h 30h 32h 0Dh Power Off P F VXXS0003 56h Xh Xh 53h 30h 30h 30h 33h 0Dh Resync P F VXXG0004 56h Xh Xh 47h 30h 30h 30h 34h 0Dh Get Lamp Hours Pn F VXXS0005n 56...

Страница 63: ...0h 36h 0Dh Get Color Temperature 0 Warm 1 Normal 2 Cold Pn F VXXS0106n 56h Xh Xh 53h 30h 31h 30h 36h nh 0Dh Set Color Temperature 0 Warm 1 Normal 2 Cold P F VXXG0107 56h Xh Xh 47h 30h 31h 30h 37h 0Dh...

Страница 64: ...Box 4 Native 5 2 35 1 Pn F VXXS0301n 56h Xh Xh 53h 30h 33h 30h 31h nh 0Dh Set Scaling 0 Fill 1 4 3 2 16 9 3 Letter Box 4 Native 5 2 35 1 P F VXXG0302 56h Xh Xh 47h 30h 33h 30h 32h 0Dh Blank Pn F VXXS...

Страница 65: ...XXG0314 56h Xh Xh 47h 30h 33h 31h 34h 0Dh Adjust the horizontal lens shift n 20 20 Pn F VXXS0314n 56h Xh Xh 53h 30h 33h 31h 34h nh 0Dh Adjust the horizontal lens shift n 20 20 P F VXXG0315 56h Xh Xh 4...

Страница 66: ...Get the Red Gain n 100 100 Pn F VXXS0342n 56h Xh Xh 53h 30h 33h 34h 32h nh 0Dh Set the Red Gain n 100 100 P F VXXG0343 56h Xh Xh 53h 30h 33h 34h 33h 0Dh Get the Green Hue n 100 100 P F VXXS0343n 56h X...

Страница 67: ...0Dh Get the Yellow Hue n 100 100 P F VXXS0355n 56h Xh Xh 47h 30h 33h 35h 35h nh 0Dh Set the Yellow Hue n 100 100 Pn F VXXG0356 56h Xh Xh 47h 30h 33h 35h 36h 0Dh Get the Yellow Saturation n 100 100 Pn...

Отзывы: