


8
H
J
H
D
S=4mm
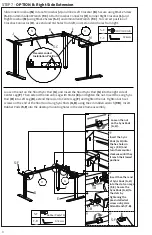
Installation steps for right
L
Rubber Pad(x19)
J
H
S=2mm
Recommended
Installation Position
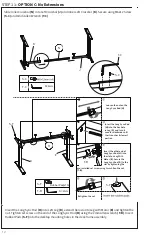
H
J
H
D
S=4mm
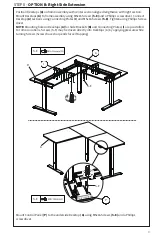
Installation steps for right
L
Rubber Pad(x19)
J
H
S=2mm
Recommended
Installation Position
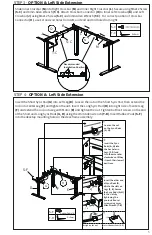
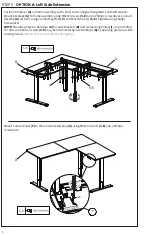
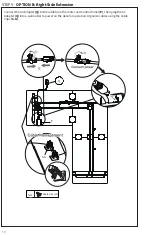
STEP 7 - OPTION B: Right Side Extension
Slide Inner Crossbar (N) into Left Crossbar (J) and Inner Left Crossbar (K). Secure using M6x12 Screw
(S-C) and 4mm Allen Wrench (T-C). Attach Crossbar Connector (O) to Inner Right Crossbar (L) and
Right Crossbar (M) using M6x12 Screw (S-C) and 4mm Allen Wrench (T-C). For correct position of
Crossbar Connector (O), use 2nd and 3rd holes from left, and 1st and 2nd holes from right.
O
N
S-C
T-C
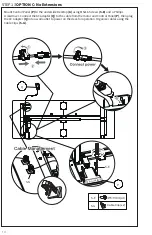
G
H
Loosen the nut on the Short Sync Rod (G), and Insert the Short Sync Rod (G) into the right side of
Center Leg (F). Then extend the rod onto Leg with Motor (E) and tighten the nut. Insert the Long Sync
Rod (H) into Left Leg (D), extend the rod onto Center Leg (F) and tighten the nut. Tighten both set
screws on the end of the Short and Long Sync Rods (G, H) using the 2mm Allen wrench (T-B). Insert
Rubber Pads (S-F) into the desktop mounting holes in the desk frame assembly.
S-F
T-B
J
K
S-C
L
M
F
E
D
S-F
S-F
T-B
T-B
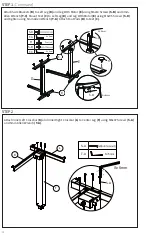
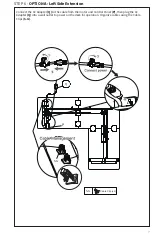
Loosen the nut
on the Sync Rods
(G, H).
Insert the Sync
Rods
(G, H)
into
the hex holes in
Legs
(F, D)
and
turn them counter
clockwise until they
it reach their lowest
postions.
Insert the other end
of Sync Rods
(G, H)
into the slots on Legs
(F, E)
. Secure the
Sync Rods
(G, H)
to
the slots by
tightening the
pre-installed set
screw using 2mm
Allen Wrench
(T-B).


