background image


44 

t

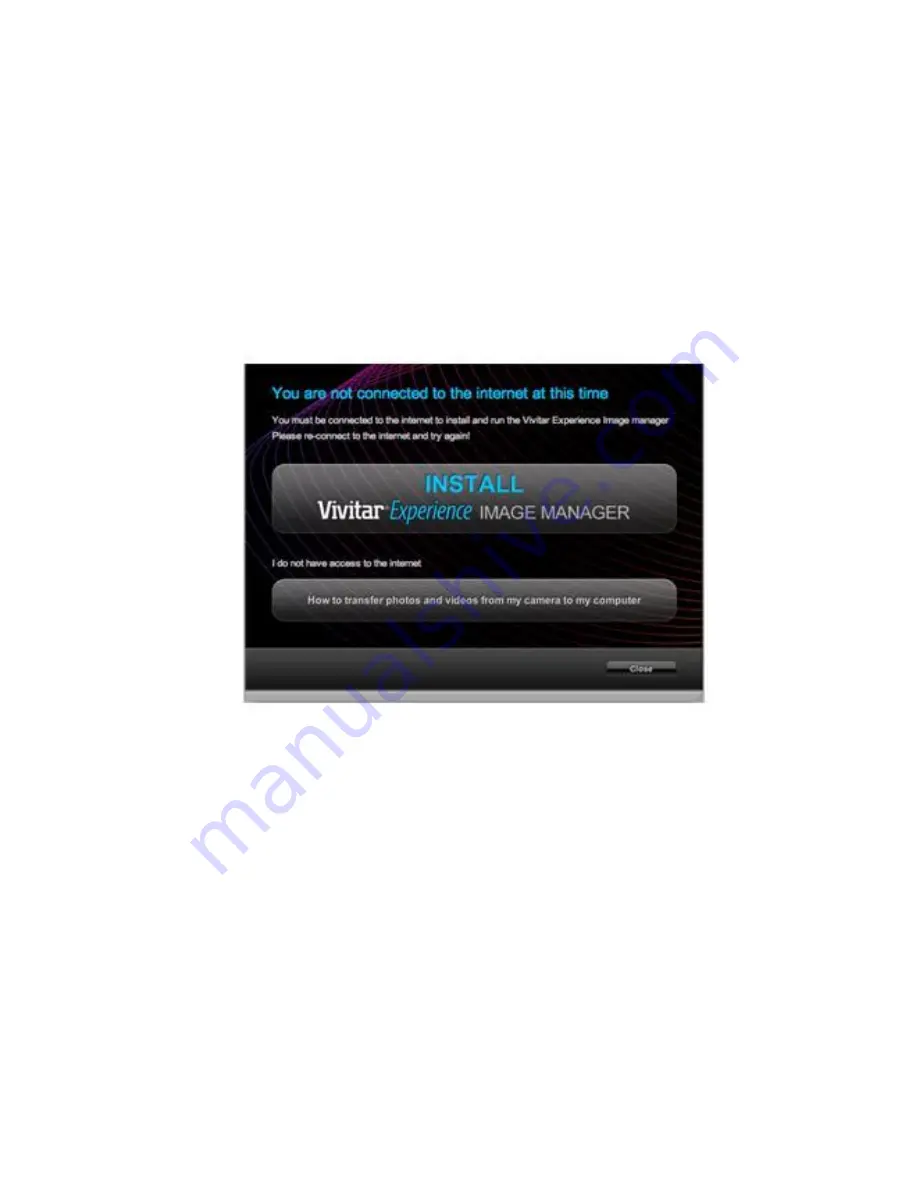
hen click the “Install Vivitar Experience Image Manager” button to begin the installation 

Note:

 If you do not have internet access, you can still download media from the camera. Click the 

“How to transfer photos and videos from my camera to my computer” button for instructions. 


5. 

If you have internet access, the 

“Choose your language” window opens, choose your language 

and click “Next” to open the next window. 

6. 

Select your camera model from the list and click “Next” to open the next window. 

7. 

Click “Next” to confirm your camera model selection and to install the application. 

8. 

Please wait while the application is being installed on your computer.                                         

9. 

Please review the license terms. 

Содержание ViviCam X024

Страница 1: ...l Camera User s Manual 2009 Sakar International Inc All rights reserved Windows and the Windows logo are registered trademarks of Microsoft Corporation All other trademarks are the property of their r...

Страница 2: ...arting Your Digital Camera 9 Camera Mode 10 Video Mode 30 Playback Mode 32 Install the Vivitar Experience Image Manager Software 43 Connect your camera to the computer 45 Get photos and videos from yo...

Страница 3: ...der to get the most out of your digital camera Key Features Digital Video resolutions 640x480 Pixels VGA 320x240 Pixels QVGA 10 1 mega pixels camera with choice of 7 digital camera resolutions 10M 364...

Страница 4: ...nload photos and videos to your PC you will need the following minimum configuration Pentium 4 processor or above with Windows XP service pack 2 512 MB RAM with 100MB of free disk space 1024 x 768 Rec...

Страница 5: ...t least 15GB of available space Support for Super VGA graphics Available USB Interface CD ROM drive QuickTime 6 or higher Microsoft Internet Explorer 7 or higher Internet connection required Computer...

Страница 6: ...5 A Quick Look at Your Camera...

Страница 7: ...e correct polarity facing up 3 Close the battery door 4 On powering on your camera the battery icon will appear on the bottom left of the LCD screen Full battery power Medium battery power Low battery...

Страница 8: ...tible SD memory card up to 8GB Adding a memory card will allow you to increase the capacity of your camera before you have to transfer test photos to your PC 1 Locate the Memory Card slot on the side...

Страница 9: ...before powering off 2 If there is a photo in the internal memory when you insert the card into your camera a Copy to card message will appear on the LCD with Yes or No options On selecting Yes the pho...

Страница 10: ...few seconds Mode selection Your digital camera has 3 main modes Camera mode Video mode and Playback mode The Camera mode is for you to take still photos adjust the camera settings and change the way...

Страница 11: ...e JPEG photo to memory After each photo is taken when the camera returns to icon mode the numbers of photos left to shoot at the selected resolution is displayed on the top right of the LCD screen Whe...

Страница 12: ...wing icon will appear on your LCD screen Macro Far shooting The camera has a function that allows you to capture objects up close or very far distances per your request Macro shooting up to 80cm 1 Sli...

Страница 13: ...er to use the flash 1 Press the Flash Up button 2 The icon appears on the LCD screen This will activate the automatic flash 3 The icon as well as the red LED will begin to flash indicating that the fl...

Страница 14: ...D for you to select Auto Night Portrait Night Scenery Portrait Scenery Sport Party Beach High Sensitivity Self timer Press the Selftimer button to toggle through the 4 selftimer options 2 sec 5 sec 10...

Страница 15: ...ons prevailing at the time of taken the photo 1 Press the MENU button 2 Press the Right Left button to select the Scene icon 3 The Scene menu appears in the center of the LCD 4 Press the Up Down butto...

Страница 16: ...menu appears in the center of the LCD 4 Press the Up Down buttons to select the image size you want to use 10M 3648X2736 8M 3264x2448 7M HD 3648x2048 5M 2592x1944 3M 2048x1536 2M HD 1920x1080 and VGA...

Страница 17: ...The Anti Shake menu appears in the center of the LCD 4 Press the Up Down button to select Anti Shake On or Off 5 Press the MENU button to confirm save and exit to the camera standby mode 6 The anti s...

Страница 18: ...ect icon selected will appear on the bottom of the LCD screen Self Timer You can include yourself in a photo by using this feature to delay the time between you pressing the Shutter button and when th...

Страница 19: ...he Shutter button until you see the self timer count down begin in the center of the green frame that appears on the LCD Your camera will count down 2 5 or 10 seconds as per your choice the LED will f...

Страница 20: ...ter of the LCD 4 Press the Up Down button to select one of the setup options Exposure This setting allows you to control the brightness of your images 1 Press the MENU button 2 Press the Up Down butto...

Страница 21: ...pensate the light conditions when the light source is not good and you also specifically do not wish to use a flash or tripod When using ISO sensitization please choose the low value ISO to prevent sp...

Страница 22: ...e Balance This setting allows the camera to adjust the color of your photos according to the color of your light source 1 Press the Up Down buttons to select the White Balance option in the Setup menu...

Страница 23: ...hite Balance option you selected Sharpness This setting allows you to adjust the sharpness of your images making edges more or less distinct 1 Press the Up Down buttons to select the Sharpness option...

Страница 24: ...The quality of your photos also affects the number of shots you can take A HIGH setting means you can take fewer photos but they will be of better quality The default value is Fine 1 Press the Up Down...

Страница 25: ...n the bottom left corner of the LCD Super quality Fine quality Normal quality Date This allows you to set the system time which will be displayed on the photos 1 Press the Up Down buttons to select th...

Страница 26: ...en will appear You will be able to change the date settings that will appear on the photo once it is taken To Set the date 1 Press the Up Down button to enter Set date option 2 Press the MENU button 3...

Страница 27: ...change this setting 1 Press the Up Down button to select the Auto Power Off option in Setup menu 2 Press the MENU button 3 Press the Up Down buttons to select an Auto Power Off option from the Menu th...

Страница 28: ...emory card and will erase all files in memory including files that have been protected Important Please use this function with caution Once formatted all the images stored in the memory will be erase...

Страница 29: ...firm and begin the format 8 Once the SD card is formatted all the images sitting on the card will be erased and the camera will revert to the camera standby mode Default Setting You can restore your c...

Страница 30: ...ess the MENU button to confirm 6 If you selected OK a Default Setting confirmation message will appear 7 Press the Right Left button to select Yes to reset to the default setting or No to exit the men...

Страница 31: ...appear on the top right of the LCD screen and the icon will flash on the LCD screen 4 Press the Shutter button again to stop the recording and save this file in AVI format Note 1 You can preview the A...

Страница 32: ...deo mode there are 3 setup options White Balance Size and Macro White Balance You can select 5 different White Balance light conditions for shooting videos 1 Press the MENU button 2 Press the Right Le...

Страница 33: ...A pixels 1 Press the MENU button 2 Press the Right Left button to select the option for the Size menu to appear 3 Press the Up Down buttons to select an Image Size option from the Menu that appears VG...

Страница 34: ...ar on the LCD screen if there are no photos or videos in your camera Press the MODE button to return to the camera or video mode and begin to take photos or videos Full screen to Thumbnail display Whe...

Страница 35: ...t before viewing to full screen or view the images one by one in your camera by pressing the Right Left buttons to toggle through the images that appear on the LCD Select the photo you wish to rotate...

Страница 36: ...oto will now be rotated and saved Note 1 You cannot rotate a protected file On attempting to rotate a protected file a This File is Write Protected message will appear on the screen 2 No card inserted...

Страница 37: ...ill appear at the top of the LCD for the photo or video selected Note To Unlock the current file follow steps 1 through 4 Select Unlock and press the MENU button to unlock the current file Delete Dele...

Страница 38: ...ncel to exit the Delete option if you do not wish to delete anything at this stage 4 Press the MENU button to confirm 5 A Delete confirmation message appears 6 Press the Right Left button to select Ye...

Страница 39: ...m in on an image and then save that part of the image as a new photo Note Only photos on the SD Card can be cropped 1 Press the MENU button 2 Press the Right Left button to select the Crop option 3 Pr...

Страница 40: ...0 A Saving screen appears before the cropped photo is saved as a new photo to your camera s memory card Print with Pictbridge You can print the photos directly from the camera with a Pictbridge compat...

Страница 41: ...nail Press the MENU button for the selected video to appear in full screen 3 Press the Shutter button to play the current AVI file 4 Press the Up button to pause and press it again to continue playing...

Страница 42: ...o unlock the current file Delete Delete unwanted videos at any time in order to free up memory You can delete one image or video clip at a time or delete all except the protected videos that are curre...

Страница 43: ...confirm 5 A Delete confirmation message appears 6 Press the Right Left button to select Yes or No 7 Press the MENU button to confirm and delete the image s Note You cannot delete files that are locked...

Страница 44: ...ert the installation CD into your CD ROM drive The installation screen should automatically open 2 On PC The Vivitar Experience Image Manager Installer window appears If the window does not appear ope...

Страница 45: ...to my computer button for instructions 5 If you have internet access the Choose your language window opens choose your language and click Next to open the next window 6 Select your camera model from t...

Страница 46: ...ter 12 On PC Click the Close button when the installation is complete On Macintosh Click the Quit button when the installation is complete 13 Click the Launch Vivitar Experience Image Manager to open...

Страница 47: ...our camera to your computer An SD card needs to be inserted Do not disconnect the cable during transfer Doing so will cancel the transfer of any files on their way to your computer 1 Select the Get im...

Страница 48: ...puter A media download progress bar appears on the bottom left showing the number of media files downloading to your computer A message appears when the download is complete 9 The photo and video file...

Страница 49: ...om this folder into your computer Optionally select the files and choose Copy from the Edit menu Then select a folder and choose Paste from the Edit menu 5 We recommend that you copy the images into t...

Страница 50: ...he digital camera is a delicate device Please handle your camera with care to avoid damaging it Sakar Warranty Card This warranty covers for the original consumer purchaser only and is not transferabl...

Страница 51: ...e Department 195 Carter Drive Edison NJ 08817 TECHNICAL SUPPORT For technical support issues please visit our website at www vivitar com You can find manuals software and FAQ s at the website Can t fi...

Страница 52: ...Lens f 7 45mm F3 0 with Mechanical Shutter Zoom 8X Digital Zoom Exposure 3 0EV 3 0EV White Balance Auto Daylight Cloudy Incandescent Fluorescent ISO Auto 100 200 400 Scene Auto Night Portrait Night Sc...

Страница 53: ...Q How do I make sure I don t lose important pictures Your camera uses SDRAM memory which requires a constant electric current to store your test photos Should your camera lose power for instance if th...

Отзывы: