Page 5 of 16
3
3
.
.
1
1
C
C
a
a
m
m
e
e
r
r
a
a
M
M
o
o
d
d
e
e
The camera will always power-up in Camera Mode, and it will be prepared to capture
still images. Press the Mode Button to change between Camera-Mode and
Playback-Mode.
Within Camera Mode there are two additional camera functions: movie clip capture,
and burst capture.
To changing camera settings, use the Multi Selector button to navigate through the
setting options.
3.1.1 On-Screen Display (OSD) Information – Camera Mode:
3.1.1.1 The Multi Selector Button:
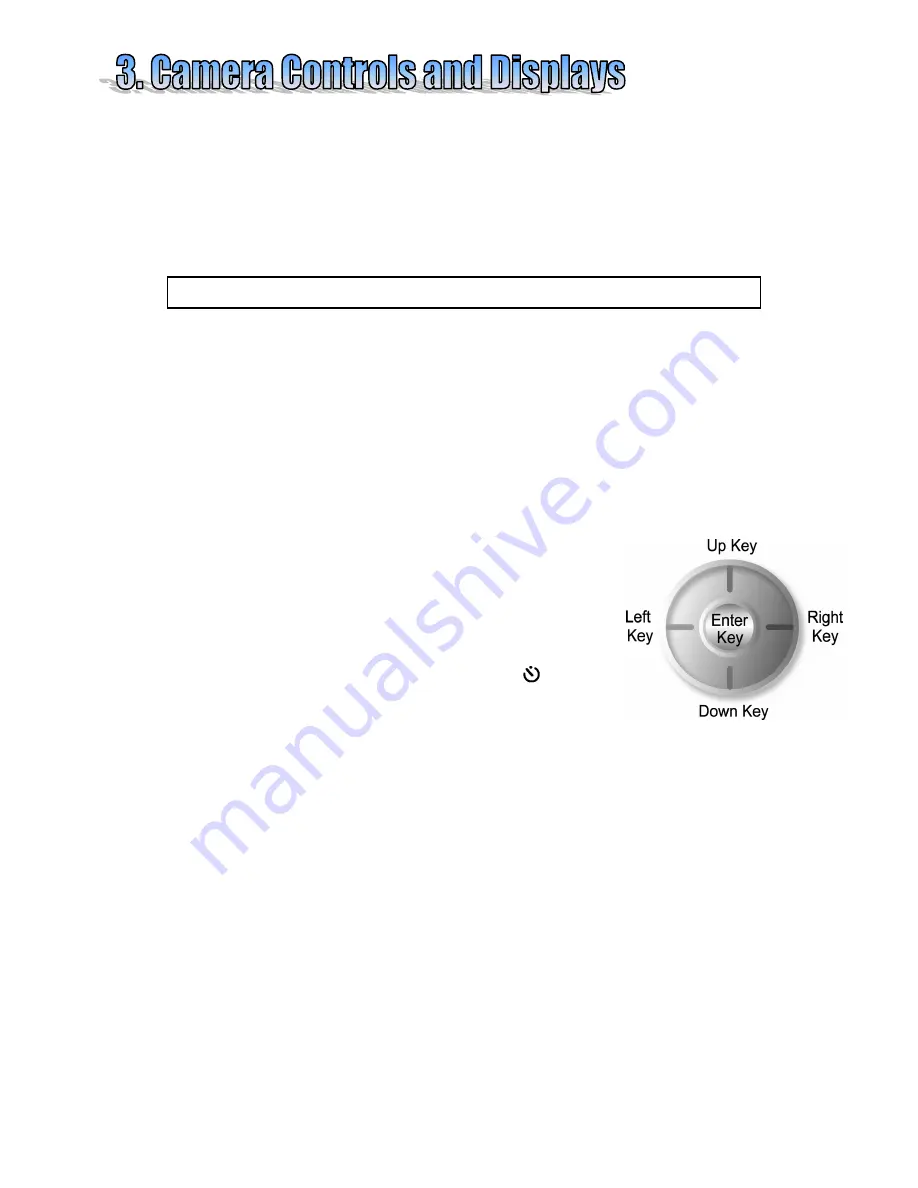
The Multi Selector Button is a thumb-activated switch that works like a game
controller switch. There are five active areas underneath the Multi Selector, known as
Keys.
Activate the OSD Menus:
•
On the Multi Selector Button press the Enter Key
(press the center of the MS Button straight down) to
activate the OSD (On-Screen Display) Menu.
•
A menu bar will appear on the image LCD Monitor
•
The menu will close automatically if no operation is
performed in 10 seconds.
Self-Timer ON/OFF:
•
Press the Left Key to activate, or disable, the
Self-Timer function. Note that a timer icon appears
in the lower left-hand corner of the image LCD.
•
When the Self-Timer is activated, the camera will
capture an image 10 seconds after the shutter button
is pressed.
Info ON/Info OFF/LCD OFF:
•
Press the Right Key once to suppress camera-setting information on the LCD.
Press the Right Key a second time to turn the LCD monitor off entirely. Press the
Right key a third time to turn on the LCD with complete setting info.
Digital Zoom-In:
•
Press the Up Key to (digitally) zoom-in on your subject. Note that the image
LCD must be ON to use digital zoom.
•
The zoom magnification value will be displayed on the LCD monitor and can be
up to 4 times the original size. Digital zoom can be set from 1.0 X (no zoom) to
4.0 X in steps of 0.2.
Digital Zoom-Out:
•
Press the Down Key to decrease the zoom magnification factor.
Multi Selector
Button
Note:
Camera Mode is the default setting when the camera is powered on.


