background image

4. Operations 


4.1 Power on/off 

Make sure that you have loaded the batteries correctly.    Press and hold the power button for 
two seconds.    The camera will power up.    The LEDs will illuminate and the LCD display 
screen will turn on.    Please press and hold the power button again for two seconds to power 
off.    (Note: If you will not use the camera for a long time remove the batteries to prevent 
damage by potential battery leakage.) 
 

4.2 Battery Level 


The battery level indicator icon will display in the lower left-hand corner of the display screen when 
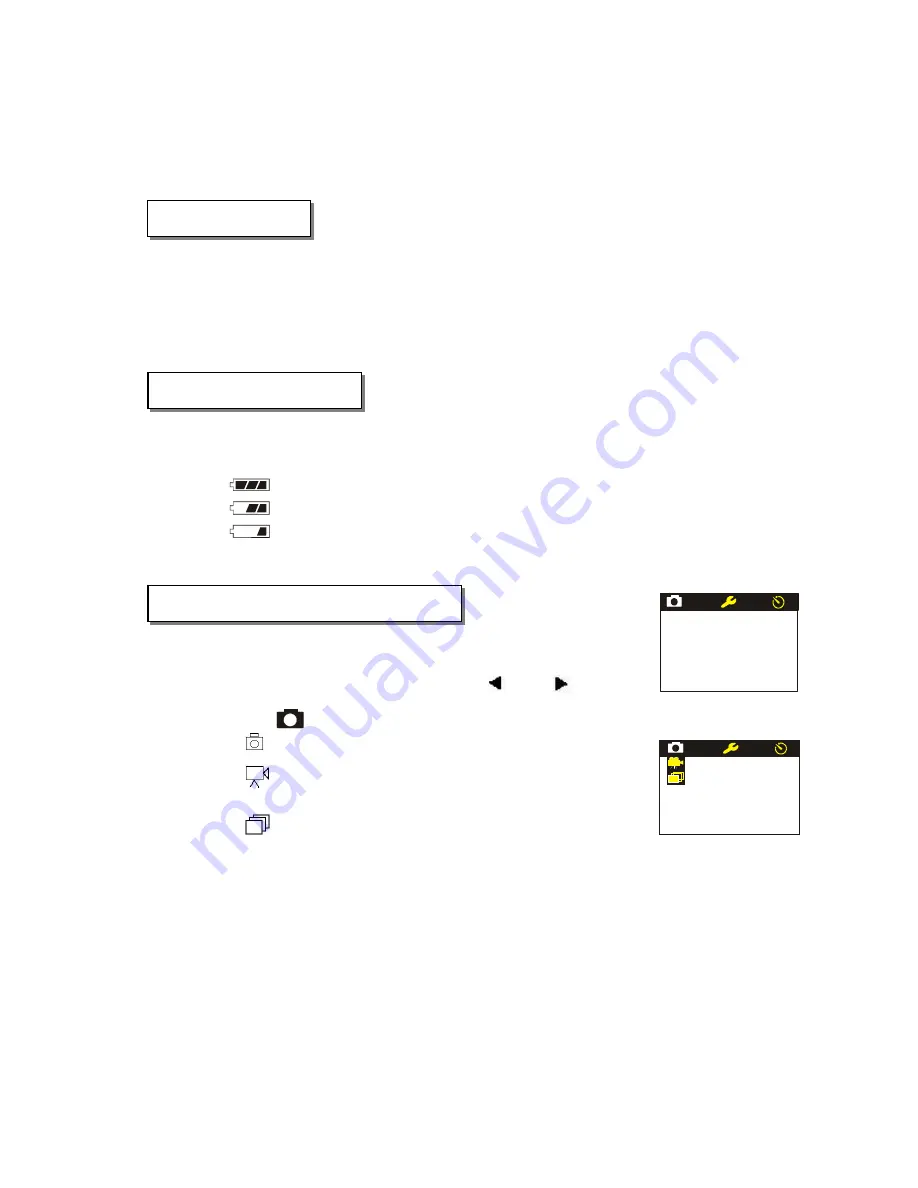
the camera is on.    The indicator is a three-segment gauge: 


: Full battery capacity 


: Low battery capacity 


: Virtually out of power, camera will power off automatically soon 

When the camera is out of power, it will power off automatically. 


4.3 Capturing Images and Video clips


Press the Menu button to select capture mode: 

Capture mode

.  Use left and right buttons (“

” and “

”) to select 

capture mode “

” (Figure 5).    Press OK to open the submenu as shown in Figure 6. 

Figure 5 –

Capture mode icon

OFF


  : Single image capture 

OFF

Figure 6 –

Capture modes


Video clip mode 


: Burst mode (4 images) 

Note: the default mode is single image capture 


Image resolution.


SF

,

F

and 

E

indicate image resolution (quality.)    You may 

select image resolution from the setup menu. 


SF (Super-Fine), 1600 x 1200 (2 megapixel) 


F (Fine), 1280 x 960 


E (Economy), 640 x 480 

Note: The default setting is Super-Fine 


9

Содержание Vivicam 2005

Страница 1: ...Vivicam 2005 User Manual 041227TP 1...

Страница 2: ...of shielded cable is required to comply with Class B limits in Subpart B of Part 15 of the FCC rules Do not make any changes or modifications to the equipment unless otherwise specified in the manual...

Страница 3: ...ian to receive treatment A camera is a precision instrument Do not drop it strike it or use excessive force when handling the camera This might cause damage to the camera Do not use the camera in humi...

Страница 4: ...ect alkaline battery performance Using new rechargeable batteries or rechargeable batteries that have not been used for an extended period of time will affect the number of images that can be captured...

Страница 5: ...apture mode still movie burst 2 Battery level Indicator 3 Image resolution Super Fine Fine Economy 4 Flash mode Off Auto Auto Red eye On 5 Self timer mode 6 Focus Frame 7 White balance selection auto...

Страница 6: ...mode zoom out digital zoom In playback mode no function In menu mode used for navigating selecting menu icons and functions 1 4 Memory Cards The Vivicam 2005 includes approximately 14 MB of built in...

Страница 7: ...oth cost effective and reusable To maximize performance and lifetime it is recommended that you fully charge the batteries and discharge them for at least one complete cycle before use Figure 3 Batter...

Страница 8: ...lso known as fill flash Hint for faster camera operation and increased battery life set the flash to OFF if you will not be using it 3 2 Setup Menu Also see section 4 4 for additional detail 1 White b...

Страница 9: ...gment gauge Full battery capacity Low battery capacity Virtually out of power camera will power off automatically soon When the camera is out of power it will power off automatically 4 3 Capturing Ima...

Страница 10: ...tup selections Press OK button to open any advanced setting sub menu SETUP QUALITY EXPOSURE EXIT SOUND AUTO OFF LANGUAGE DRIVER Figure 7 4 4 Main Setup Menu Image resolution SF F and E indicate image...

Страница 11: ...wer off in 3 minutes OFF Camera will not auto power off EXIT Exit sub menu Use the up and down buttons to select the desired setting and then press the OK button The sub menu is closed and the setting...

Страница 12: ...Figure 14 DELETE THIS Delete the current image from memory or SD card DELETE ALL Delete all images from memory or SD card FORMAT Format memory or memory card Figure 14 Delete and Format EXIT Exit men...

Страница 13: ...on your computer 2 Connect the other end of the USB cable to the USB connector on the camera 3 Turn the camera on and allow the computer to recognize the camera 4 From the Windows desktop double clic...

Страница 14: ...se Paste from the Edit menu You may also drag and drop image files from the camera to a desired location Macintosh and Desktop LX Open the unlabeled disk icon and the destination location on your hard...

Страница 15: ...13 Range of focus four feet to infinity 14 LCD field range over 95 of the field 15 Still Image file format JPG 16 Move clip file format AVI 17 Internal Memory 16 MB approximately 14 MB available for...

Отзывы: