50
1.
Touch the
New Contact
icon from the Contacts Main Screen to
add a new contact.
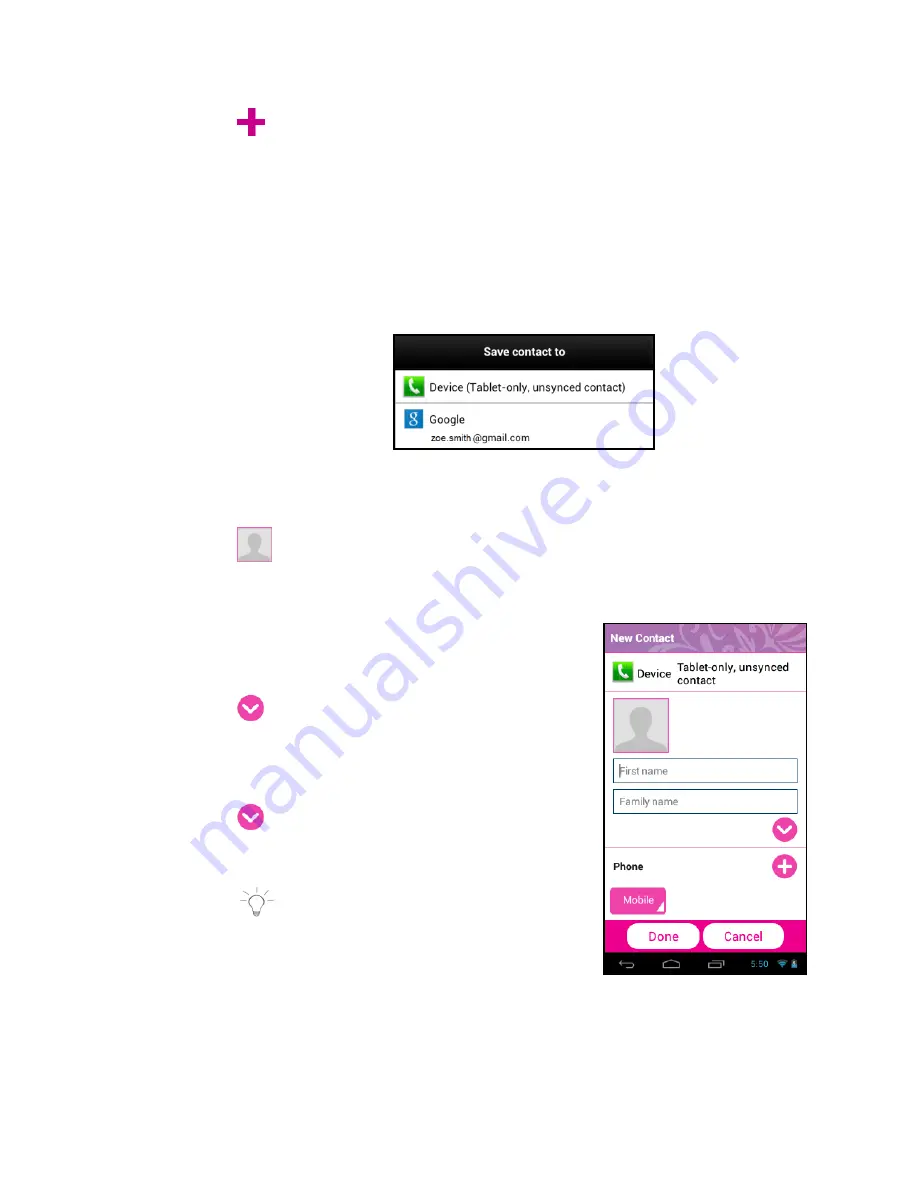
This opens the ‘Save contact to’ screen.
2.
From the ‘Save contact to’ screen, touch
Device
to save the
account to your tablet Contacts only, or touch an account for
synchronizing the contact (available options depend on the
accounts you have set up for synchronization). After selecting
where to save the contact, the ‘New Contact’ window appears.
3.
New Contact
window
:
Touch the
Photo
Thumbnail
icon to select an existing photo
from the Gallery or to take a new photo that will identify the
contact.
Enter the contact’s First and Last name
in the Name fields using the onscreen
keyboard.
Touch the
More
Information
icon to
enter additional name related fields such
as the contact’s Middle name, Name
Suffix, and more.
Touch the
Information
icon to
minimize the details to view the first and
last name.
NOTE
: You can touch the return
button on the keyboard after each field
is complete to move to the next field.
4.
Continue entering the contact’s information as specified - including
Phone, Email, IM, Groups, Postal Address and Organization.


