background image

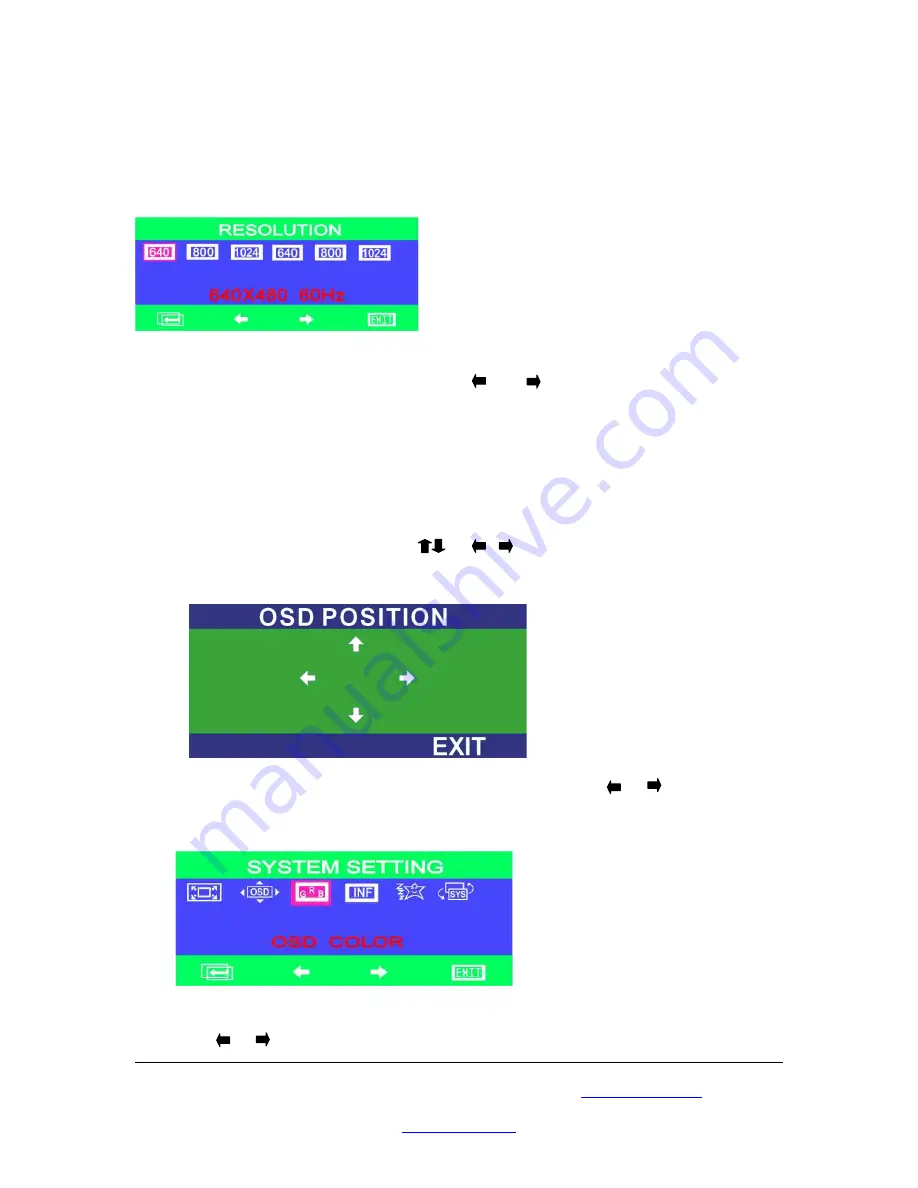
RESOLUTION Setting

The


RESOLUTION


Sub-Menu provides 

640 X 480@60Hz, 800 X 600@60Hz, 1024 X 

768@60Hz, 640x480@75Hz, 800x600@75Hz, 1024x768@75Hz

 modes

    1. To enter your demand resolutions, press       or          button to select one of them, 

then press 

Enter

 to confirm the setting and 

Exit

 to main menu

OSD FUNCTION Setting


The

 OSD FUNCTION 

Sub-Menu provides 

OSD POSITION

OSD COLOR 

settings.

    1


Press the “Enter” button to choose the “OSD POSITION”, another “OSD 

POSITION” sub-menu appears, Use         or                buttons to move the position of 
menu position on the display.  After setting, press the “Exit” button to return to the 
OSD function Sub-Menu.

3. Press “Enter” button to choose the “OSD COLOR”, using the       or      button to 

choose your favorite OSD color. After setting, press “Exit” to return to the OSD function 
sub-Menu.

Press the        or        button to switch the color selection, and choose the colour you like.


Please browse our online catalogue to view our full product range.

44-48 Maitland Road, Mayfield East, NSW, 2304 Australia, 

[email protected]

Phone +61 249689313   Fax +61 249689314

www.converters.tv

Содержание VTB-101

Страница 1: ...B 101 Operation Manual Please browse our online catalogue to view our full product range 44 48 Maitland Road Mayfield East NSW 2304 Australia sales converters tv Phone 61 249689313 Fax 61 249689314 ww...

Страница 2: ...e and channel from the remote control and on screen menu The TVBOX with its built in V chip allows controlled programming based on a selected rating system Closed caption technology displays text over...

Страница 3: ...utput Freq Display function Compatible for multi signal inputs TV tuner Video S Video VGA Support Sleep Timer Setting Available in NTSC PAL SECAM model Localized TV system menu selection Re mapping fu...

Страница 4: ...e 6 Adjust channel decrease 7 Adjust channel increase Rear Panel 1 DC In Connect to a 12V power supply 2 VGA Out Connect your 15 Pin Monitor to the VGA output 3 VGA In Using the 15 pin VGA cable provi...

Страница 5: ...e to your equipment due to ground potential influence make sure that all devices on the installation are properly grounded Consult your dealer for technical details if necessary 2 Please turn off the...

Страница 6: ...to select channels 6 Press the Menu button and the OSD Main Menu window appears 7 Press or to select the OSD Sub Menu 8 Press ENTER for the he selected Sub Menu 9 If you don t want to select the Sub...

Страница 7: ...adjustments and return to factory settings 5 When finished making all picture adjustments press the Exit button to return the main menu SOUND Setting The SOUND Sub Menu provides BASS TREBLE BALANCE a...

Страница 8: ...g The TV FUNCTION Sub Menu provides AIRCATV CHANNEL SWAP CHANNEL RENAME CHANNEL EDIT CHANNEL MEMORY FINETUNE and AUTO SCAN functionality AIRCATV function is only available on the model which is built...

Страница 9: ...annel number Key in the channel number you like to swap at the TARGET column For example if you want to change the channel 11 to channel 22 Press the number key on the remote control unit After key in...

Страница 10: ...press Enter to enter the channel rename dialog No TV Frequency table built in With TV Frequency table built in Note SYSTEM SELECT selection is only available on the model which is built in TV frequen...

Страница 11: ...reen shows 10 channels You can press to move to the next page No TV Frequency table With TV Frequency table 1 Channel Editing Select the CHANNEL EDIT function on the TV Function Screen by pressing the...

Страница 12: ...function sub menu press or button to enter CH Edit and then press or button to access ERASE and confirm Erase by passing the Enter button on your Remote Controller After Adding Erasing a channel press...

Страница 13: ...he Enter button to DISABLE or ENABLE the favorite channel function When the FAVORTIE column is selected on ENABLE you can only select the channels on the list by press channel up or channel down on yo...

Страница 14: ...another OSD POSITION sub menu appears Use or buttons to move the position of menu position on the display After setting press the Exit button to return to the OSD function Sub Menu 3 Press Enter butt...

Страница 15: ...You can see the details information of the TV box from the system info sub menu Please browse our online catalogue to view our full product range 44 48 Maitland Road Mayfield East NSW 2304 Australia s...

Страница 16: ...all the settings of the TV box are restored to the default setting factory setting PIP Picture In Picture Function The Picture In Picture function provides the user the ability to see the TV and work...

Страница 17: ...optional Press or button and then pressing ENTER to enter the FM function After you have entered the FM function the FM radio mode a black blank screen will show up The number shows on the right top...

Страница 18: ...prefer e g 100 7 press the Menu button on the remote control and press or and the Enter button to enter the FM FAVORITE function Press to select which station you prefer After you have decided the st...

Страница 19: ...ion on your screen 6 PIP Activate to the PIP mode adjust the PIP screen by clicking the button 7 AUTOSCAN Scan program channels automatically and save scanned channels 8 SLEEP Automatically switches o...

Страница 20: ...u item or to confirm the setting 17 C C This function is only supported by USA NTSC area Enables disables the closed caption function 18 V CHIP This function is only supported by USA NTSC area Locks t...

Страница 21: ...e Favorite button to select the position to put the channel The favorite channel selection will follow position sequence 3 After deciding the position press the FAVSET button the channel will be set T...

Страница 22: ...ensions L W H 225 x 160 x 31mm Weight 1 8 kg Please browse our online catalogue to view our full product range 44 48 Maitland Road Mayfield East NSW 2304 Australia sales converters tv Phone 61 2496893...

Отзывы: