After Sales Support TEL: 1300 886 649
9
System set-up
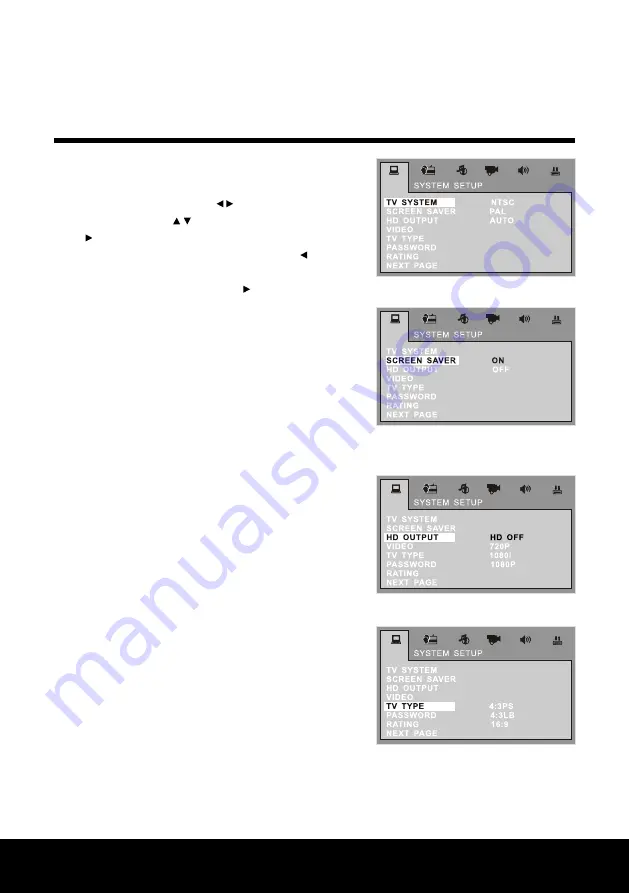
1. TV system
Press the "SETUP" key on the remote control to get to
the setup menu screen. Press to switch to the desired
setup page. Press the keys to select the item, then
press to go into the sub-menu. Change the setting and
press the "ENTER" key to confirm. Then press key to
return to the upper level. Finally press the "SETUP" key to
exit. Choose TV SYSTEM and press to open it. And then
change the TV mode to NTSC, PAL or AUTO (see Fig. 1).
2. Screen saver
Choose to have the screen saver "ON" or "OFF" (see Fig. 2).
3. HD output
This function allows you to choose from four high
definition settings: HD OFF, 720P, 1080i, 1080P. The
connection point at the back of the appliance is "HDMI"
(see Fig. 3).
4. Video output
4.1. Select "INTERLACE-YUV" when Y,Cb, Cr are connected
to the TV.
4.2 Select "P-SCAN" when Y, Cb, Cr is connected to
the TV. Press it to cut over to successive scans.
4.3 Select "S-VIDEO" when S-VIDEO is connected to
the TV.
5. TV type
5.1 Normal/PS (Pan Scan, 4:3PS): Display picture is
cropped to fit into your TV screen. Either or both
sides of the picture are cut off.
5.2 Normal/LB (Letter Box, 4.3LB): Displays the image
with the masking bars above and below the
picture.
5.3 Wide (16:9): Image will fit the whole screen
(see Fig. 4).
Fig. 1
Fig. 2
Fig. 3
Fig. 4


