6
7
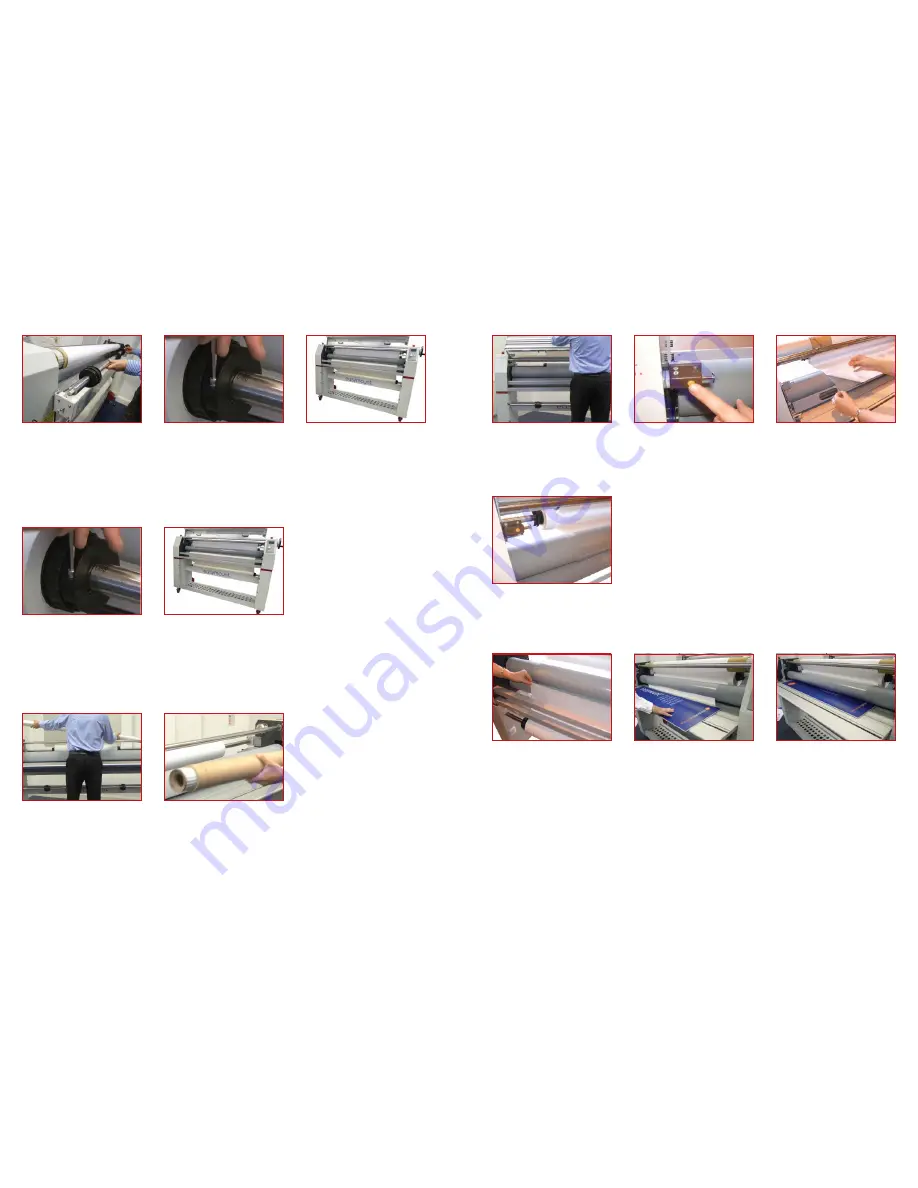
Take up mandrel (Release Liner)
1. Remove the top mandrel from the
mandrel support brackets
5. Re-load the mandrel on to the brackets
with the fi lm feeding from the bottom of
the mandrel, if the fi lm is wound with the
fi lm on the outside, or off the top of the
roll if the fi lm is wound on the inside.
2. Loosen the two fastening screws on
one of the mandrel core grips, slide off
one side.
3. Slide on the fi lm positioning it centrally
on the mandrel and re-fi x the core grips.
4. Release the tension on the fi lm by
turning the ‘friction adjustment sleeve’
Pressure sensitive fi lm (loaded on the top mandrel)
Installation of Laminating Films
1. Remove the mandrel from the mandrel
support brackets
2. Loosen the two fastening screws on
the mandrel core grips, slide off one side
3. Slide on the liner paper/mount fi lm
and position centrally to match the top
4. Re-load the mandrel into the brackets
1. The take up mandrel is held in place
with a sprung loaded bracket: to remove
push towards the spring and lift upwards
2. Slide an empty cardboard core onto
the take up mandrel and replace
Vinyl/Liner paper/Mount fi lm (loaded on the bottom mandrel)
1. Lift the feed tray to the upright
position and lock securely. Following the
loading diagram on the left cabinet of
the machine, pull the fi lm off the bottom
of the mandrel and towards the front of
the machine, going over the top of the
upper roller
2. Peel back the liner paper from the
fi lm, exposing the adhesive side of the
laminate and stick release liner to take up
mandrel using double sided tape
Pressure sensitive fi lm (loaded on the top mandrel)
Film Loading
3. Drape the fi lm over the upper roller
and stick the liner paper to the take up
mandrel using double sided tape
1. Following the loading diagram feed
the paper up over the lower roller
and stick it to the adhesive side of the
pressure sensitive fi lm
5. Press the drive button and feed
through. PLEASE NOTE When the board
is through the rollers the pressure handle
will need to be adjusted to compensate
for thickness
2. Using the pressure handle raise the
upper roller
3. Using a piece of stiff card or mount
board push the overlapped fi lms into the
nip of the roller
4. Using the roller pressure handle lower
the upper roller so it clamps the material
Liner Paper (Load on the Bottom Mandrel)
(Safety guard lock)


