background image

 1  IMPORTANT SAFETY INSTRUCTIONS

This device is designed and manufactured to assure personal safety. Improper use can result in 
electric shock or fire hazard. The safeguards incorporated into this unit will protect you if you 
observe the following procedures for installation, use, and servicing.

Follow all warnings and instructions marked on the product.

Unplug this product from the wall outlet before cleaning. Do not use liquid cleaners or 
aerosol cleaners. Use a damp cloth for cleaning.

Do not use this product near any liquids.

Do not place this product on an unstable surface. The product may fall, causing serious 
damage to the product.

Do not drop the product.

Do not block the slots and openings on the top and bottom of the chassis; to ensure proper 
ventilation and reliable operation of the product and to protect it from overheating, these 
openings must not be blocked or covered.

Operate this product only from the type of power indicated on the marking label.

Do not allow anything to rest on the power cord. Do not locate this product where persons 
will walk on the cord.

Never push objects of any kind into this product through the chassis slots as they may touch 
dangerous voltage points or short out parts that could result in a fire or electric shock.

Unplug this product from the wall outlet and refer servicing to qualified service personnel 
under the following conditions:

When the power cord or plug is damaged or frayed.

If liquid has been spilled on the product.

If the product has been exposed to rain or water.

If the product does not operate normally when the operating instructions are followed. 
Adjust only those controls that are covered by the operating instructions since improper 
adjustment may result in damage and require extensive work by a qualified technician to
the product to normal condition.

If the product has been dropped or the chassis has been damaged.

If the product exhibits a distinct change in performance, contact Vivaldi Customer 
Support.

Vivaldi S.R.L. it reserves the right to update this document at any time without notice.

GIOVE AC5

2

Содержание Giove AC5

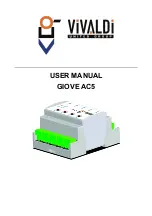
Страница 1: ...USER MANUAL GIOVE AC5...

Страница 2: ......

Страница 3: ...acts 7 4 2 3 Changing View Contacts 7 4 2 4 Change Communication Mode 8 4 3 Web Server 9 4 3 1 State 9 4 3 2 Configuration Local IP 10 4 3 3 Connection Configuration 11 4 3 4 Control Contacts 12 4 3 5...

Страница 4: ...cated on the marking label Do not allow anything to rest on the power cord Do not locate this product where persons will walk on the cord Never push objects of any kind into this product through the c...

Страница 5: ...possible to connect the Giove AC5 to the local network and manage it with Vivaldi iControl or a home automation supervisor It includes an integrated web server where you can manually control the conta...

Страница 6: ...g connector B A for power supply and RS485 connection with other devices Giove AC5 D Five multicolour LED matching to the relay used to display relay status E Power ON LED indicates that the device is...

Страница 7: ...n single module For proper operation of the device you need to feed it through the connector Figure 1 C from 12 to 24 Vdc Attention to the polarity For communication connecting the LAN to the RJ45 con...

Страница 8: ...nnector 4 way in parallel Figure 1 C and connect the LAN network cable only to the first device It will be necessary then to set a unique ID in the devices from 1 to 5 See Section 4 2 The power supply...

Страница 9: ...ID 11 15 To confirm the selection there will be a quick flashing of the five LEDs in red To quit the menu either wait or press the button P4 4 2 2 Changing the Status of Contacts To perform a manual...

Страница 10: ...D 4 Confirming with the P1 button you enter the menu of choice between LED 1 Protocol Mod Bus LED 2 Protocol Standard AC5 Press P1 to confirm your choice it will be a quick flashing of the LED for con...

Страница 11: ...rnet browser Firefox Chrome Safari etc and enter the Default IP address on the address bar The authentication window will open then you can enter the default username and password User admin default P...

Страница 12: ...4 3 2 Configuration Local IP Figure 4 On this page you can change the network parameters of the Giove AC5 To save the changes made click on the button Save GIOVE AC5 10...

Страница 13: ...Connection Configuration Figure 5 On this page you can configure the port and the communication protocol with the home automation controller To save the changes made click on the button Save 11 GIOVE...

Страница 14: ...ntacts and request information about the firmware version and hardware of the Giove AC5 In the drop down list you can select the destination device ID connected to the first Giove AC5 for each is poss...

Страница 15: ...ystem Configuration Figure 7 On this page you can change the name of Giove AC5 the ports number of the web server user name and password To save the changes made please click on the button Save 13 GIO...

Страница 16: ...4 3 6 Restart Figure 8 On this page you can restart the device remotely GIOVE AC5 14...

Страница 17: ...Relay 3 0 Off 1 On Byte 5 Relay 4 0 Off 1 On Byte 6 Relay 5 0 Off 1 On Byte 7 Byte not used Byte 8 CR String end equivalent to 13 in decimal or 0x0D in hexadecimal 5 1 3 Command Example ASCII String...

Страница 18: ...through the ModBus protocol you must write in the registers as in the table Relay 1 registry 5 0 OFF 1 ON Relay 2 registry 6 0 OFF 1 ON Relay 3 registry 7 0 OFF 1 ON Relay 4 registry 8 0 OFF 1 ON Rela...

Страница 19: ...6 TECHNICAL SPECIFICATIONS Supply Voltage 12 24Vdc Maximum Current 200mA Maximum Current of contacts in deviation NO 5A NC 3A Network Connection 10 100Mbps 17 GIOVE AC5...

Страница 20: ...www vivaldigroup it info vivaldigroup it Vivaldi S R L Administrative Headquarters Via E Fermi 8 Z I Est 30020 Noventa di Piave VE Italy tel 39 0421 307825 fax 39 0421 307845 info vivaldigroup it www...

Отзывы: