41
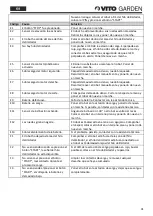
Rain sensor
In case of heavy rain, the robot will automatically return
to the docking station and restarts working when the
next working cycle begins.
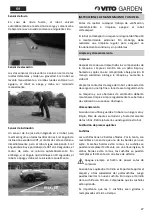
Lift sensor
The two lift sensors are positioned near the front
wheels and
measure their gravity. If the robot is lifted
manually or if both wheels run into hole, the robot
switches off and must be restarted manually.
Tilt sensor
A 6-axis sensor is integrated in the robot lawn mower to
measure the tilt angle in all directions. If the tilt angle
exceeds 30°, the cutting motor stops immediately, but
the robot continues driving. If the angle decreases to
less than 30°, the cutting motor restarts automatically.
However, if the angle does not decrease within 10
seconds, the mower will shut down and will need a
manual
restart.
MAINTENANCE AND CLEANING INSTRUCTIONS
Before carrying out any checking, maintenance or
cleaning work, switch off the robot lawn mower.
The lawn mower does not require any additional
lubrication or maintenance. However, regular cleaning
should be carried out to ensure continuous, trouble-
free operation.
Cleaning and storage
Cleaning
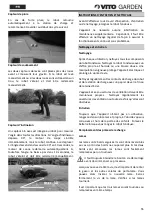
After each use, clean all components of the mower.
Clean the robot mower with a clean, damp cloth or soft
brush. Careful handling protects the power tool and
extends its service life.
Clean the charging contacts of the robot and the
docking station with a thin sandpaper or steel wool
regularly.
The tool and its ventilation openings must be kept clean.
Clean ventilation openings regularly or whenever they
become obstructed.
Storage
When not in use, store the robot in a dry, clean place,
free of corrosive smoke and out of the reach of children.
Remove the battery when storing the robot lawn
mower.
Spare parts replacement
Blades
The blades have 2 sharp-cut edges. Therefore, they are
reversible if they have become unsharp on one edge. If
both edges are unsharp, the blades can be easily
replaced using a screwdriver.
Always turn off the power switch before you start
working with the power tool.
When you have taken out the screw, it is important to
remove grass and other dirt from the blade holder. Then
you can insert the new blade
Screw the blade screw
firmly in. Check that the blades are rotating.
It is important that all 3 blades are reversed or replaced
at the same time.
Содержание VIRCR1000
Страница 1: ...PT EN ROBOT CORTA RELVA ROBOT LAWN MOWER ES FR ROBOT CORTACÉSPED ROBOT TONDEUSE VIRCR1000 ...
Страница 61: ...61 FIGURA 1 ...
Страница 63: ......
Страница 64: ...VIRCR1000_REV00_JAN20 ...

