background image


Instructions for Use


67 


7.7.3 

 Measurement Types 

The  next  group  of  Protocol  definition  fields  relate  to  how  the  sample  is 
measured by the Lu-mini Unit to produce a test result value. 
 
When  the  Lu-mini  unit  measures  a  test  sample,  it  performs  the  following 
steps, as defined by the selected 

Protocol


Acquire measurement data 


 Optional: Pre-zero phase 

 Below 


 Open internal shutter 


 Initial 10-second reading 


 Optional: Additional 1 to 600-second data collection 

 Below 


 Close internal shutter 


Translate reading data according to Assay curve 

 7.8 


Process reading data (as per Protocol definition) 

 Below 


Calculate final test result 

 7.7.4 

 
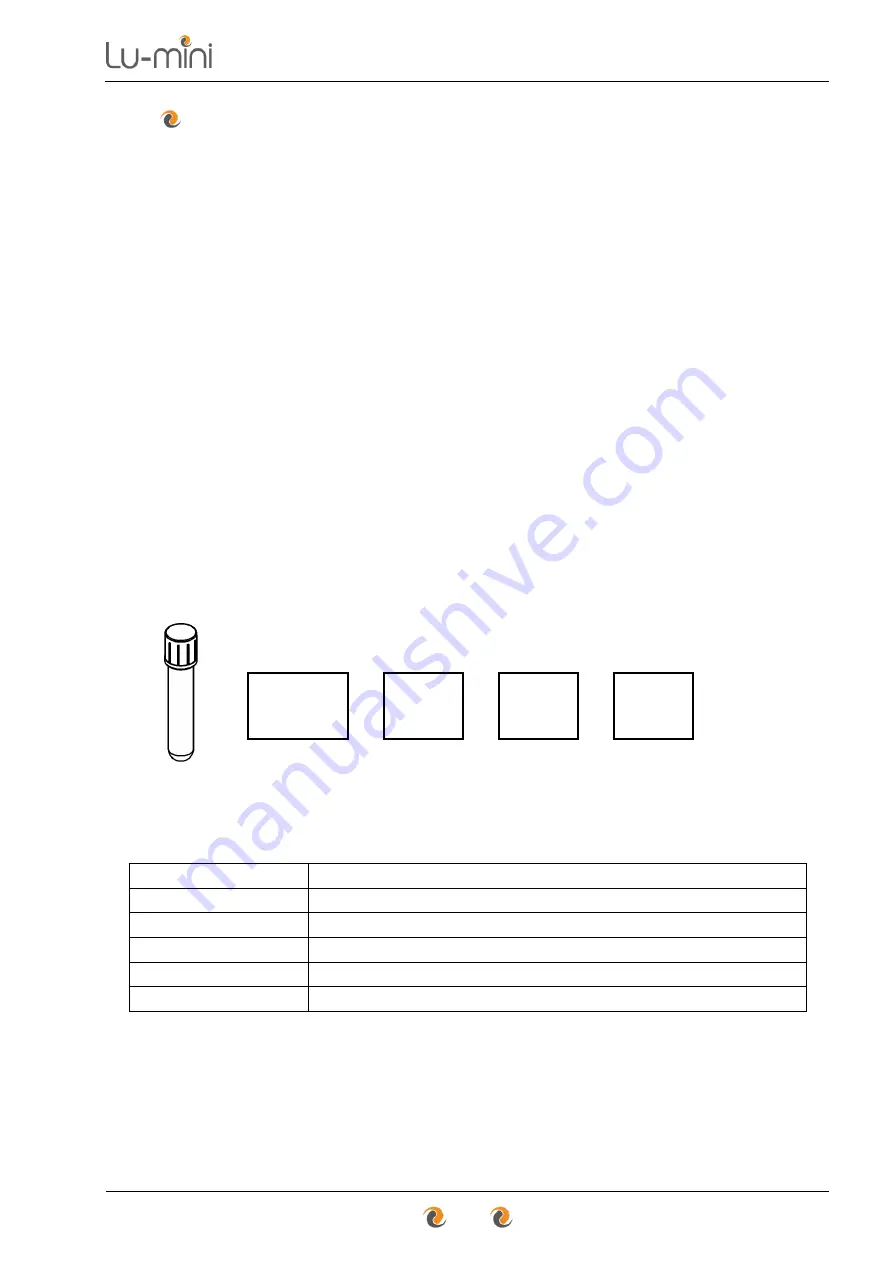
Hence the measurement sequence is: 


Luminescent 

Signal Data 

Acquisition 


Assay 

Standard 

Curve 


Process 

Reading 

Data 


Calculate 

Formatted 

Result 


Result 


Sample   

Read 

  Translate   

Process 

  Calculate   

Store 

 
The measurement parameters are: 
 

Measurement Type 

Sample measurement type


Show Graph 

Show data progress graph for long measurement times


T1 

Result analysis start time t1 in seconds


T2 

Result analysis end time t2 in seconds


Window 

Result analysis window size in seconds


Threshold 

Percentage change threshold limit


Содержание Lu-Mini

Страница 1: ...Instructions for Use...

Страница 2: ...1810 Vitl is the brand name for Integrated Technologies own range of laboratory products For further information please visit the Vitl web site www vitlproducts com All sales and technical enquiries s...

Страница 3: ...dent Timer 36 6 6 2 Using Linked Cascading Timers 38 6 6 2 1 Linking Timers into a Single Cascading Group 38 6 6 2 2 Linking Timers into Multiple Cascading Groups 40 6 6 3 Using the Timers whilst Samp...

Страница 4: ...Comparison Bands 72 7 8 Reagent Assays Page 73 8 Troubleshooting 75 9 Maintenance and Servicing 77 9 1 Routine Cleaning and Inspection 77 9 2 Decontamination Procedure 79 9 3 Transportation and Stora...

Страница 5: ...2 Table 11 Automatic Sample ID Buttons 44 Table 12 Lu mini App Page Select Buttons 51 Table 13 Lu mini App Toolbar Options 52 Table 14 Lu mini App Help Menu Options 52 Table 15 Data Cell Context Menu...

Страница 6: ...vere injury or death or severely damage the unit CAUTION Indicates a hazardous situation which could if not avoided result in minor or moderate injury or degrade or impair the functionality of the uni...

Страница 7: ...ven in these instructions before attempting to operate the unit Improper use of this unit or its accessories may impair their functionality and invalidate the manufacturer s warranty Unit Handling Pre...

Страница 8: ...ovided with the unit Care should be taken when powering the unit from a computer USB port or alternative USB power source WARNING Always ensure that the USB power cord is securely inserted into the re...

Страница 9: ...samples use sealed or capped tubes of the type specified in Section 4 1 Always follow prescribed laboratory procedures and use appropriate personal protective equipment PPE such as gloves clothing gog...

Страница 10: ...ect the USB power cord from the unit before performing any cleaning or decontamination procedure If liquid is spilt into or over the unit switch off and disconnect the USB from the source before attem...

Страница 11: ...C CFR 47 Parts 15 107 and 15 109 Class A RoHS and WEEE Directive Compliance This product complies with the requirements of the RoHS2 Directive 2011 65 EU for Electrical and Electronic Equipment and in...

Страница 12: ...Instructions for Use 12 4 Lu mini Unit Description The Lu mini unit is a benchtop Luminometer and has the following external features vj d vj vj d vj...

Страница 13: ...ssel Eject Button 6 4 3 Power Rating 11 USB Power Inlet 0 Unit Label and Serial Number 0 The unit label is located on the underside of the unit and provides the unit serial number voltage and power ra...

Страница 14: ...Instructions for Use 14 The unit is supplied with the following accessories Table 3 Unit Accessories AC DC USB Power Adaptor 6 2 USB Power Cable 6 2 11 Lu mini App Install Flash Drive 7...

Страница 15: ...Minimum 600uL Cuvette Square flat bottomed 12 5mm square 48mm tall 10mm path length 12 5mm Recommended 1000uL Minimum 500uL The recommended tube type is the 12mm x 75mm 5mL round bottomed polypropylen...

Страница 16: ...clearance around the unit to adjacent objects and walls Out of direct sunlight and away from sources of heat or draught WARNING Please also observe and abide by the Unit Installation and Operating En...

Страница 17: ...of a colour LCD touch screen display The menu structure is divided into two main sections as shown below Control and Status Function and Option buttons The above screen shows the Main Menu buttons wh...

Страница 18: ...ption 6 7 Return to Main Menu 6 1 Return to Previous menu 6 4 Edit Sample ID 6 4 Expand database result 6 5 Test result Status tag 6 4 5 Test result Comment 6 4 5 Jump to Top or Bottom of data list 6...

Страница 19: ...ied Tube Number 6 4 3 Status Sample Inserted correctly 6 4 3 Prompt Close Lid 6 4 3 Prompt Remove Sample vessel 6 4 3 When the lid is open the unit also periodically beeps to prompt the user to close...

Страница 20: ...USB battery pack or a 12V to USB Car Charger AC DC USB Adaptor Supplied Computer USB Port or Powered Hub USB Battery Pack 12V to USB Car Charger Plug the supplied USB Cable into the Lu mini Unit and...

Страница 21: ...t there are correctly set This is important as the time and date are required for the Reading and Timer options to function correctly Note If the unit clock is not set the time and date are displayed...

Страница 22: ...p Move Up Move Down Accept By default the User ID is set to Any User and there are no other User IDs available to choose from therefore the Up and Down arrow buttons are disabled To return to the main...

Страница 23: ...eyboard is displayed to allow the password to be entered Main Menu Screen Enter password The User ID and User Name are displayed on the Main Menu screen and the User ID button changes to a solid figur...

Страница 24: ...n Menu Protocol Selection Screen User ID Protocol Count Main Menu Screen Main Menu Worklist Move Up Move Down Accept By default the Protocol selection list consists of just the Standard RLU Measuremen...

Страница 25: ...t corner of the screen shows how full the results Database is In the middle of the screen the selected protocol is displayed along with the time and date and visual prompts to instruct the user on how...

Страница 26: ...he Accept button to continue or the Cancel button to undo and return to the Test screen Edit Sample ID Screen Edit Sample ID Sample Test Screen No edit required If the unit has been set up to have no...

Страница 27: ...e Open Lid Insert Sample Vessel Ensure that the sample vessel is fully pushed down into sample chamber until the bottom of the vessel is touching the bottom of the chamber Ensure Vessel Fully Inserted...

Страница 28: ...when instructed 2 If the vessel is easily accessible then it can be simply removed by hand If the vessel is difficult to access then the Eject button can be used 3 Use a finger to push down on the eje...

Страница 29: ...bove press the Accept button start the reading Open Lid Insert Sample Sample Inserted Close Lid Sample Ready Accept The measurement countdown begins At the end of the countdown period the reading resu...

Страница 30: ...d See Section 6 4 3 for sample vessel removal Open Lid Remove Sample The sample Test screen will then appear To perform another test follow the visual prompts in the middle of the screen as detailed i...

Страница 31: ...test result Uncertain Unclear protocol test result Bad Bad protocol test result Flagged Result flagged as interesting Invalid Invalid out of range test result The Status tag can be added to the result...

Страница 32: ...atus option is selected This text will appear in the Notes field of the Lu mini App Test Results Database table Enter comment To change the result status press the required Status button in the middle...

Страница 33: ...l the test results that have been completed Results are listed in date time order with the most recent result at the top of the list The Up and Down buttons can be used to scroll up and down the list...

Страница 34: ...t Results from the Lu mini Database Test results cannot be directly deleted from the Lu mini s Results Database When the database is full the oldest result is automatically overwritten However they ca...

Страница 35: ...each other or grouped together so that when one timer finishes the next one automatically starts Table 9 Timer Function Buttons and Status Symbols Select Timer 1 of 8 6 6 Start Timer 6 6 1 Stop Timer...

Страница 36: ...labelled 1 to 8 with each being assigned a default time between 0 30 seconds to 60 00 minutes 6 6 1 Using an Independent Timer To use a single independent timer select a Timer from the Timer Summary s...

Страница 37: ...rts sounding and the Stop button changes to a Silence alarm button Press the Silence button to stop the Alarm and reset the Timer 0 30 0 30 0 00 0 30 Press the Previous button to return to the Timer S...

Страница 38: ...r 2 to 3 and so on All the timers can be linked together into a single group or multiple groups 6 6 2 1 Linking Timers into a Single Cascading Group Instructions on how to link timers are as follows 1...

Страница 39: ...Timer Linked button and that Timer 1 is now linked to Timer 2 Previous Menu Timer Linked Increase Value Decrease Value Start Timer 6 Return to Previous menu There is now a small arrow between Timer 1...

Страница 40: ...art of a new group must not already be linked to the previous timer Multiple timer groups are started by pressing the Start button on the individual Timer Details screen for the first timer in each gr...

Страница 41: ...he settings Press the Set up button from the Main Menu screen to view the Set up Options menu Set up Options Screen Main Menu Screen Main Menu Reader Test To change a setting press the associated opti...

Страница 42: ...references and Options Set clock and Date Time formats Year Month Day Day Month Year Month Day Year 6 7 1 AM PM 24 Hour Beeper volume Muted Normal 6 7 2 Touchscreen button click volume Silent Click 6...

Страница 43: ...using the Lu mini Windows App the date and time can be automatically set and synchronised with the computer s clock This will also set the date and time formats See Section 7 6 for details 6 7 2 Beep...

Страница 44: ...ormat The Sample ID text format can be edited as required using the sample ID editor function From the Set up menu select the Sample ID Auto text button Sample ID Auto text Screen Previous Prefix Auto...

Страница 45: ...In this case when a sample Test is performed the unit automatically prompts to user to manually enter the Sample ID by displaying the QWERTY keyboard A sample ID must be given to the sample before a t...

Страница 46: ...ly background test readings they are not stored in the unit s results database 6 8 Standby Mode and Unit Shutdown Procedure After use and before switching off the power to the unit it is recommended t...

Страница 47: ...ode then the power can be safely removed When the power to the unit is switched off or disconnected the LCD may remain illuminated for several second before going blank To wake up the unit from standb...

Страница 48: ...orts and a powered USB hub 7 1 Installing the Lu mini Windows App and USB Driver DISCLAIMER THIS SOFTWARE IS PROVIDED AS IS WITHOUT WARRANTY OF ANY KIND EITHER EXPRESSED OR IMPLIED INCLUDING BUT NOT L...

Страница 49: ...ed This is done by running the appropriate driver install program from the CP210x_Driver sub folder on the Installation Drive and following the onscreen prompts For 64 bit Windows Run CP210xVCPInstall...

Страница 50: ...and from the Lu mini unit and a Windows computer making it easy to add User IDs and customise the unit with specific sample measurement Protocols The application display format consists of a spreadshe...

Страница 51: ...side of the application Window Table 12 Lu mini App Page Select Buttons Test Results Database 7 4 Future Feature Test Results Database Filters Future Feature Scheduled Test Sample Work List Future Fe...

Страница 52: ...ific Sections for more details 7 2 3 Help Menu Options The Help Menu is accessed by clicking on the Help button in the toolbar and provides the following options Table 14 Lu mini App Help Menu Options...

Страница 53: ...adsheet Table consisting of a matrix of data Cells organised in Lines running down the sheet in rows of related data Fields arranged across the sheet in columns Fields Lines Lines or Cells which are g...

Страница 54: ...o use the Refresh button see below for details When a data cell value has been changed the line text colour changes to Blue to signify that it has been modified but has not yet been saved to disk To s...

Страница 55: ...ing the Delete Line option from the Context Menu Select lines Delete Line Yes Lines deleted The full list of right click Context Menu options are as per Table 15 below Table 15 Data Cell Context Menu...

Страница 56: ...Optional 7 6 Update Unit s User IDs list 7 5 Update Unit s Protocols list 7 7 Click the Sync button on toolbar to initiate the data transfer The Lu mini Unit will display the Download screen until the...

Страница 57: ...ID 7 5 Date Time Date and Time when sample test performed Location Sample location name Patient ID Optional Patient ID from Worklist Sample ID Test Sample ID 6 4 2 Sample Type Sample Type S C 1 2 3 4...

Страница 58: ...the toolbar This can either be the all the data in the table or just the selected lines Save data to CSV file Open file in Excel Alternatively the data can be Copied and Pasted into an existing Excel...

Страница 59: ...new line to the User IDs table see Section 7 2 4 Edit new User ID fields The available User IDs table data field options are listed in Table 17 below Table 17 User IDs Data Fields Active Selects wheth...

Страница 60: ...number Unit Name Optional Name that appears at the top of unit s Main Menu screen 7 6 1 Last Synced Fixed The date and time with unit was last synchronised Notes Optional Additional notes 7 2 4 Time a...

Страница 61: ...RLU Measurement protocol This page allows custom protocols to be created and developed as required To create a new Protocol click the toolbar Add button and then enter all the appropriate data field v...

Страница 62: ...nd time t2 in seconds 7 7 3 Window Result analysis window size in seconds 7 7 3 Threshold Percentage change threshold limit 7 7 3 Result DPs Result display number of decimal places 7 7 4 Result Units...

Страница 63: ...Protocol Name and Description appear on the Lu mini Unit in the Protocol selection screen along with the Result Units of measurement The Assay is the name of the Reagent Assay see Section 7 8 being u...

Страница 64: ...ple tube readings and displays the result to the user 7 7 2 1 Single Tube Measurements For the Single Sample and Control Only options the Unit measures a single test tube and presents the result in th...

Страница 65: ...o return to the Protocol selection screen The Test screen then prompts for the specific tube number for be inserted or press the Tube Select button the select a different tube number Test Screen Tube...

Страница 66: ...for instance if the sample has been incubated This is achieved by pressing the Worklist button on the Protocol screen to display and select any unfinished tests Worklist Screen Protocol Screen Cancel...

Страница 67: ...internal shutter Translate reading data according to Assay curve 7 8 Process reading data as per Protocol definition Below Calculate final test result 7 7 4 Hence the measurement sequence is Luminesc...

Страница 68: ...e other measurement parameters Measurement Type T1 seconds T2 seconds Window seconds Threshold Standard Averaging Window Start Averaging Window End Dual Point T2 T1 Start Time Maximum Time Reaction Ra...

Страница 69: ...7 1 to convert a reading to specific Result Units of measurement The second set of options control how the result is qualified Lock Status Prevent user from changing pre assigned Status value Result...

Страница 70: ...NE BLACK GREY BLUE GREEN YELLOW ORANGE RED If NONE is selected the result band is not displayed on the Lu mini Unit but is still visual when the result is uploaded to the Lu mini App database The Stat...

Страница 71: ...00 RLU LOW 500 RLU Result 5000 RLU NEGATIVE 5000 RLU Result 10000 RLU UNCERTAIN 10000 RLU Result 1000000 RLU POSITIVE 1000000 RLU Result OVER RANGE Ticking the Limit Result check box would restrict th...

Страница 72: ...to four Comparison Bands For instance the previous example above translates as Percent Result Sample reading Relative Result Percent Result 100 Control reading 0 Percent Result 80 SUSCEPTIBLE 100 Rel...

Страница 73: ...ing the required data field values Line Duplicate Line New assay added Edit assay fields The available Reagent Assay data fields are listed in Table 23 below Table 23 Reagent Assay Data Fields Assay N...

Страница 74: ...of the Curve X Data Curve Y Data or Curve Fit fields opens the following definition window This provides a transfer function between Standard Lu mini RLUs input and the required Assay Reading output...

Страница 75: ...ply 11 Unit does not recognise sample tube insertion Tube too small Ensure minimum tube requirements met 4 1 Unit Protocol and Timer buttons are greyed out Clock not set Ensure the Date and Time are s...

Страница 76: ...eport code A copy of the unit screen image can be captured using the Capture Unit Screenshot option in the Lu mini App Help menu see Section 7 2 3 Table 25 Lu mini Unit Error Codes Code Meaning Sugges...

Страница 77: ...sing statically charged cleaning cloths For technical and service related enquiries please contact your distributor or Vitl at the address given on page 2 of this manual 9 1 Routine Cleaning and Inspe...

Страница 78: ...Instructions for Use 78 WARNING After cleaning ensure that the unit is thoroughly dry before reconnecting the power cord to the unit...

Страница 79: ...roughly clean all outside surfaces of the product including any accessories power cords manuals packaging etc with a damp cloth soaked with suitable disinfectant solution such as Virkon Allow to dry f...

Страница 80: ...equipment The unit and its accessories should be decontaminated using the procedure detailed in Section 9 2 before disposal or shipping Do not dispose of this product into unsorted municipal waste or...

Страница 81: ...r or peripheral not supplied specified or sanctioned by ITL will invalidate this warranty This warranty is provided to the original purchaser of the product for one year from the date of purchase Unde...

Страница 82: ...e Relative Humidity Range Maximum Operating Altitude 15 to 35 C 20 to 85 non condensing 2000 m above sea level Storage and Transportation Temperature Range Relative Humidity Range 10 to 50 C 20 to 95...

Страница 83: ...Units of Measurement Test Result Bands Band Name Result Bands Comparison Bands Comparison Range Test Assays Assay Name Assay Curve Points Unlimited 50 Active 1 to 4 characters 1 to 20 characters Opti...

Страница 84: ...ity Incubate Keeping an organism cell or cell culture at the optimum temperature for growth and development PCR Polymerase Chain Reaction Pellet A small densely packed mass Created for example via the...

Страница 85: ...Instructions for Use 85 Notes...

Отзывы: