

5
4
3
6
Installation
4. Tighten the lock screw to secure the viewing angle adjustments.
5. Carefully remove the protective film from the lens to complete the
installation.
Lock Screw
5
LAN Configuration
The camera can be accessed on the local network either using the
IP-Tool or directly in a web browser.
Accessing the Camera Using the IP-Tool
1. Make sure the camera and PC are connected to the LAN.
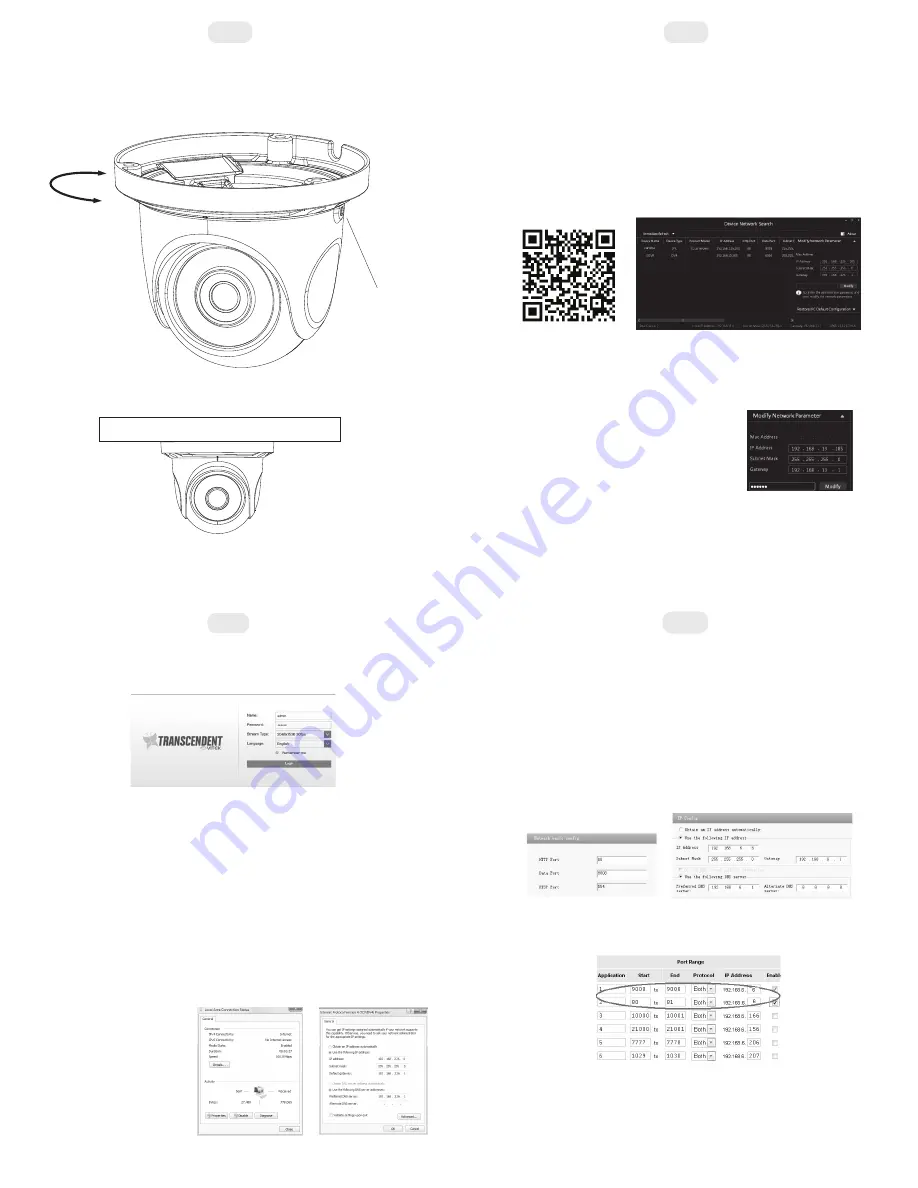
For example, the IP address of your computer
is 192.168.13.4. So the IP address of the
camera shall be changed to 192.168.13.X.
After modification, please input the password
of the administrator and click “Modify” button
to modify the setting.
** Default admin password: “123456".
4. Double-click the IP address and then the system will pop up the web
browser to connect IP-CAM . IE browser will download the Active X
control automatically. After downloading, a login window will pop up
as shown below:
Input the user name and password to log in.
Default user name: admin / Default password: 123456.
Directly Access Through a Web Browser
The default network settings are as shown below:
IP address: 192.168.226.201 HTTP: 80
Subnet Mask: 255.255.255.0 Data Port: 9008
Gateway: 192.168.226.1
You may use the above default settings when you log in the camera for
the first time.
1. Manually set the IP address of the PC and the network segment
should be as the same as the default settings of IP-CAM. Open the
network and share center. Click “Local Area Connection” to pop up
the following window.
Select “Properties” and then select Internet protocol according to the
actual situation (for example: IPV4). Next, click “Properties” button to
set the network of the PC.
2. Open the IE Browser and input the default address of IP-CAM and
confirm. The IE browser will download Active X control automatical-
ly.
3. After downloading Active X control, the login dialog box will pop up.
4. Input the default username and password and then enter to view.
WAN Configuration
Access the camera by the router or virtual server for example.
1. Make sure the camera is connected to the LAN; Then log into the
camera via LAN and go to System Congfig→Network Config→Port
menu to set up the port number.
2. Enter System Config→Network Config→IP Address menu to modify
the IP address.
4. Open the web browser and input its WAN IP and HTTP port to
access the IP-CAM.
3. Go to the router’s management interface through IE browser to
forward the IP address and port of IP-CAM in the “Virtual Server”.
7
2. Locate the IP-Tool installer on the Vitek Website:
vitekcctv.com/Downloads/Software/Transcendent-IPTool_v2.0.2.zip
(also available via the QR code below)
Then install on the PC. Open the installed application.
3. Modify the IP address. The default IP address is 192.168.226.201.
Click the information of the camera listed in the above table to show
the network information on the right side. Modify the IP address and
gateway of the camera and make sure its network address is in the
same local network segment as the computer’s. Please modify the
IP address of your device according to the practical situation.


