Chapter 2 - Installation 19
Connecting the Table
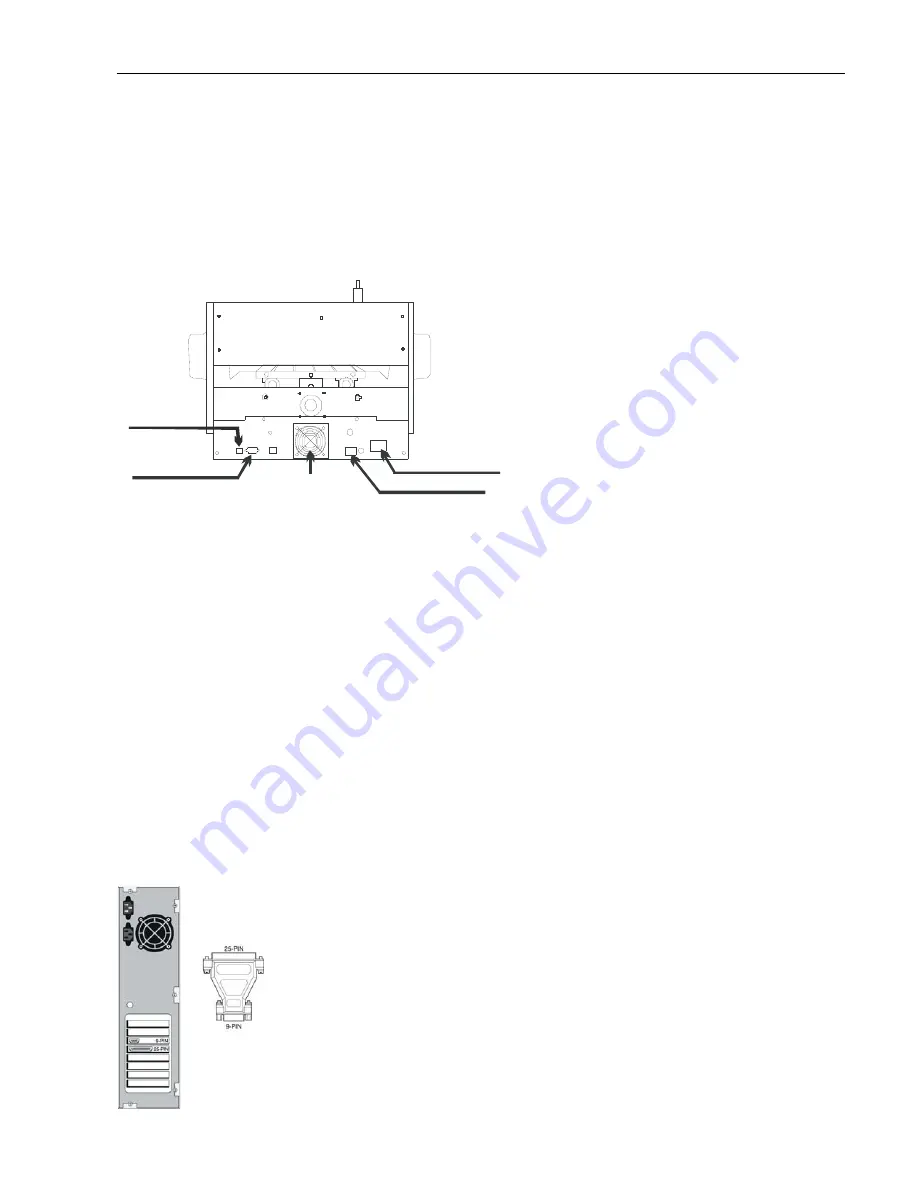
There are two connections that must be made to the VE-810 engraver. The power input
and the serial or USB connection (See Figure 2.1)
(Figure 2.1) The VE-810 rear view
USB Connection
Serial Connection
Fan
Power Input
Power Switch
The power input is where you plug the power cord into the VE-810. The VE-810 can
accept 110 volt or 220 volt power depending on which option you’ve chosen. If your
system is configured for 220 volts, a yellow 220 volt label will be affixed to the back of
your machine. If there is no 220 volt label DO NOT PUT 220 VOLT power to the machine
as serious damage will occur.
The serial connection is where you connect the computer to the VE-810. The VE-810
accessory box contains a white serial cable. Connect one end to the VE-810 and screw in
the thumbscrews. The other end connects to your computer.
Your computer will have one of two different types of serial port connectors on the back.
One will be a 9-pin connector and the other will be a 25-pin connector. If you have a 9-pin
connector, you can plug the white serial cable directly into the computer. If your computer
has a 25-pin connector, you can use the 9-pin to 25-pin adapter included with the VE-810
to connect the cable to your computer. (See Fig 2.2 below)
(Figure 2.2) The 9 pin and 25 pin plug
Содержание VE-810
Страница 4: ...iv VE810 Engraver Manual ...
Страница 8: ...8 VE810 Engraver Manual ...
Страница 12: ......
Страница 18: ...18 VE810 Engraver Manual Please give Vision a call if you have any questions at 602 439 0700 ...
Страница 44: ......
Страница 61: ...Chapter 5 Maintenance 61 Figure 5 15 External Fuse removal ...
Страница 62: ...62 VE810 Engraver Manual ...
Страница 68: ......


