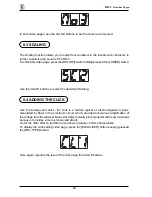
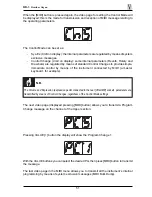
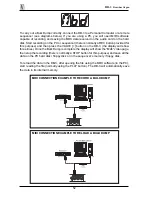
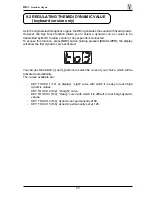
background image

DB-3

   Drawbar Organ


ABOUT MIDI

  WHAT IS MIDI?

The MIDI (Musical  Instrument  Digital  Interface) allows
instruments of different makes and types to communicate
with each other by means of this clearly specified protocol
of codes. This makes it possible to create systems of
MIDI instruments which offer much better versatility and
control than can be achieved with separate instruments.
To make this communication possible, all MIDI
instruments are equipped with two or three 5 pin DIN
connectors marked:

MIDI IN:

By means of this jack, the device
receives the MIDI data emitted by other
units.

MIDI OUT:

By means of this jack the device sends
the MIDI data it has generated to other
units.

MIDI THRU:

This jack, used to connect several units
in series, emits the MIDI data exactly
as they are received by the respective
MIDI IN port.

For example, most instruments equipped with MIDI
interface transmit MIDI messages which specify which
note has been played and with what dynamics by means
of the MIDI OUT connector.
If this connector is connected to the MIDI IN of another
MIDI instrument, such as a synthesiser or an expander,
the connected instrument will give a precise response
to the notes played on the transmitter instrument.
This allows you actually to play two instruments at the
same time, and obtain special multi-instrument sounds.

CAUTIONS

Always use top quality cables for the MIDI connections from and
to the DB-3. We also advise the use of cables no more than 5
metres long.
It is possible to use the MIDI THRU to connect two or more MIDI
devices, but in practice the limit is 5 units. This is because as the
signal path becomes longer, the signal deteriorates and the

messages can no longer be received correctly.

MIDI Channels

The MIDI is able to transmit a multitude of digital data by
means of a single cable and thus a single connector,
thanks to the MIDI channels.
There are 16 MIDI channels, so MIDI messages are
processed when the channels of the receiver and
transmitter instruments are the same.
The DB-3 is able to receive and transmit information on
a maximun of 3 MIDI channels simultaneously: one for
the upper manual, one for the lower manual and one for
the BASS section (see also MIDI Mode function). The
data relating to the instrument’s general information (the
Reverb parameter, for example) are sent on the channel
associated to the upper manual.

  MAIN MIDI MESSAGES TRANSMITTED AND RECEIVED BY

THE DB-3

The same type of transfer of information is used to
record MIDI sequences. A sequencer can be used to
record the MIDI data transmitted by the DB-3 or any other
instrument. When these recorded data are sent to the
DB-3, it will automatically play back the recorded
performance.

The MIDI includes various types of messages used to
communicate various types of data. The MIDI messages
can be subdivided into messages handled separately
on each channel, and messages dedicated to the entire
system.

The channel messages include:

Note On: this message is transmitted when a note
is played, i.e. when a keyboard key is pressed. Each
Note On message includes the following codes:
Note On: when a key has been pressed;
Note Number: the key and thus the relative note
which has been played;
Velocity: dynamic of the note (the force with which
the key had been pressed).

Note messages are expressed as a number from 0
to 127, with Middle C represented by the number
60. Since its dynamic value is fixed, the OB5 always
sets the Velocity value as 64.

Note Off: this message is transmitted when the key
pressed previously is released. When it is received,
the sound of the note of that key is deactivated. Each
Note Off message includes the following codes:
Note Off: a key has been released;
Note Number: which key has been released;
Velocity: dynamic (amount of force) with which it has
been released.
N.B.: 

A Note On message with Velocity=0 is considered as a

Note Off message.

54

Содержание DB-3

Страница 1: ...DB 3 User Manual ...

Страница 2: ...ith one wider than the other A grounding type plug has two blades and a third grounding prong The wider blade or the third prong are provided for your safety If the provided plug does not fit in to your outlet consult an electrician for replacement of the obsolete outlet 11 Protect the power cord from being walked on on pinhead particularly at plugs convenience receptacles and the point where they...

Страница 3: ... 4 5 Factory Settings 39 5 Setting the Lower and Bass sections 40 6 Percussion 43 7 The effects 44 7 1 Vibrato Chorus 44 7 2 Reverb 44 7 3 Overdrive 45 7 4 Rotary 45 8 Additional functions 47 8 1 The equalizer 47 8 2 Adding the internal noises 47 8 3 Scaling 48 8 4 Adding the click 48 9 MIDI 49 9 1 Setting the MIDI functions 49 9 2 Regulating the MIDI dynamic value keyboard version only 53 About M...

Страница 4: ......

Страница 5: ... the programming settings onto a MIDI unit able to memorise System Exclusive messages CONNECTION TO THE ELECTRICAL MAINS Use the external power supply adapter supplied with the instrument only To avoid the risk of electric shock never make connections with wet hands Make sure that the mains voltage is the same as that marked on the power supply adapter CONNECTING TO OTHER INSTRUMENTS Always use go...

Страница 6: ...only factors behind these organs special sound there are also many other ingredients such as the click of the manual contacts the background noise due to the motor inside needed to turn the tonewheels and last but not last the external rotary speaker which gives another special quality to the timbre These are just some of the characteristics of the electromagnetic organ which has played an importa...

Страница 7: ...section LOWER the parameters relating to the Lower section ROTARY the setting of the Rotary effect REV TYPE selection of the type of reverb EQUALIZER equalizer setting MIDI settings concerning the MIDI functions GLOBAL MEMORY selection of the Global Memories VALUE increases button or decreases button the value of the parameter shown on the display BASS LOWER Noise adjustment of the levels of the M...

Страница 8: ...ble the Vibrato or Chorus effect selected with the VIBRATO CHORUS switch in the VOLUME CONTROL section on the Lower LOWER button and or Upper UPPER button sections of the keyboard 5 BASS LOWER PRESET Section these buttons allow you to activate the presets of the Bass section BASS x buttons and or of the Lower section ORG x buttons 6 ROTARY Section this section contains the buttons for controlling ...

Страница 9: ...edal 4 PITCH Trimmer this control allows you to regulate the instrument s fine tuning In the central position A is 440 Hz 5 MIDI Connectors five pin DIN sockets for connecting remote MIDI units as follows MIDI IN connector for receiving MIDI messages from a remote unit MIDI OUT connector for transmitting the MIDI messages generated by the DB 3 MIDI THRU connector for transmitting the MIDI messages...

Страница 10: ...DB 3 Drawbar Organ 3 3 CONNECTION EXAMPLES 36 ...

Страница 11: ... MEMORY to activate it To recall a Global Memory while the display is showing another function such as the Equalizer simply press the GLOBAL MEMORY button the VALUE keys to make the selection and GLOBAL MEMORY another time To save a memory keep pressed the GLOBAL MEMORY key the number of the memory shown on the display will start to flash informing you that you can use the VALUE buttons to select ...

Страница 12: ...mory simply press the Store button and keep it pressed the LED starts flashing while you press the key of the memory of your choice WARNING Bear in mind that when you overwrite a memory the data it contains will be lost To restore the memories present when the instrument was purchased use the Factory Settings function described in point 4 5 4 3 THE BASS AND LOWER PRESETS The Bass and Lower Presets...

Страница 13: ...the length in feet of the church organ pipes used to create the notes The pipe which produced the fundamental was 8 feet long when it was shortened by one half 4 feet a note one octave higher was obtained while if its length was doubled 16 feet the octave below was obtained To play with the real settings of the drawbars i e not with the Upper Memory settings press the DRAWBARS button The LED of th...

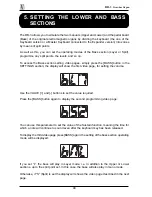
Страница 14: ...INGS section the display will show the first video page for setting the volume Use the VALUE and buttons to set the value required Press the BASS button again to display the second programming video page You can use this parameter to set the value of the Sustain function meaning the time for which a note will continue to sound even after the keyboard key has been released To display the third vide...

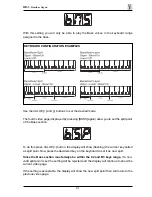
Страница 15: ...on the display will show flashing the current key setted as split point Now press the desidered key on the keyboard to set it as new split Since the Bass section must always be within the C2 and B3 keys range if a non valid split point is set the setting will be rejected and the display will continue to show the current video page If the setting is acceptable the display will show the new split po...

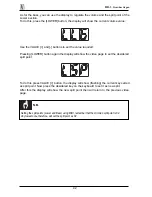
Страница 16: ...the display will show the video page to set the desidered split point To do this press VALUE button the display will show flashing the current key setted as split point Now press the desidered key on the keyboard to set it as new split After this the display will show the new split point then will return to the previous video page N B Setting the split points Lower and Bass using MIDI remember tha...

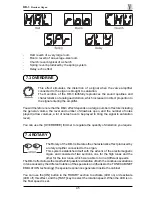
Страница 17: ...damental note you are playing while the 3rd button adds the percussion one thirteenth above the fundamental N B The 2nd and 3rd buttons are self disabling It is therefore not possible to use the two percussion options simultaneously The volume of the percussion can also be regulated using the NORM SOFT switch When the LED of the key is off the volume of the percussion will be normal when NORMAL SO...

Страница 18: ... on the key will illuminate to show that the effect has been assigned 7 2 REVERB The reverb derives from the sum of the various acoustic reflections generated by a sound in a natural environment When you clap your hands in a large reflective building such as a church you will hear a loud resonance which gradually fades away In the original electromagnetic organs the reverb was simulated by means o...

Страница 19: ...ave to be played to bring the signal to saturation level You can use the OVERDRIVE trimmer to regulate the quantity of distortion you require 7 4 ROTARY The Rotary of the DB 3 simulates the characteristic effect produced by a rotary amplifier connected to the organ This system established itself with the advent of the electromagnetic organ and consisted of two sections one for the high tones and t...

Страница 20: ...ALUE buttons The value b stands for Brake meaning rotary speaker stationary although the cabinet tone simulation is still present while the numbers from 2 to 9 indicate the speeds When ROTARY is pressed again the parameter for regulating the Fast speed will be displayed and when ROTARY is pressed again the time for switching from the Slow to the Fast speed also known as Rise Time and the time for ...

Страница 21: ...igh frequencies 8 2 ADDING THE INTERNAL NOISES To make the sound of the DB 3 as faithful a reproduction as possible of that of the original electromagnetic organs you can use the Noise function to add the organ s internal noise In actual fact the noises reproduced are of two types Motor Noise or the noise generated by the internal motor used to rotate the 91 tonewheels and the Leakage Noise genera...

Страница 22: ...4 ADDING THE CLICK Here again regulate the level of the click using the VALUE buttons Like the background noise the click is a feature typical of electromagnetic organs Generated by flaws in the electronic circuit which provided anomalous amplification of the voltage from the drawbar buses this defect actually proved popular with most musicians because it provides a more pronounced attack As for t...

Страница 23: ...e from the following options MIDI Mode 1 Md1 on display the instrument receives and transmits on just one MIDI channel the one of the Upper section which can be set using the video page displayed by pressing MIDI again The notes received are played on the Upper Lower and Bass sections in accordance with the split settings in the instrument MIDI Mode 2 Md2 the instrument receives and transmits on t...

Страница 24: ...e diagrams shown in the previous page the Bass section is in Split mode ü Any note received by the MIDI IN port not included in the OB 3 s keyboard range C2 C7 will be shifted up if below of C2 or down if above of C7 of one octave Pressing the MIDI button again allows you to display the video pages for setting the channels for receiving and transmitting the MIDI data for the Upper sections Lower c...

Страница 25: ...trol by means of the instrument connected by MIDI a master keyboard for example N B The Volume and Expression expression pedal connected to the rear VOLUME socket parameters are transmitted by means of Control Changes regardless of the Control Mode settings The next video page displayed pressing MIDI button allows you to transmit a Program Change message on the channel of the Upper section With th...

Страница 26: ...E button on the DB 3 the display will show three lines Once the Bulk Dump is complete the display will show the Mdb video page then stop the recording there is normally a STOP button for this purpose and save all the data on the PC hard disk floppy disk or in the sequencer s memory floppy disk To reload the data in the DB 3 after opening the file using the MIDI software in the PC start reading the...

Страница 27: ...tion press MIDI button holding pressed EQUALIZER the display will show the first dynamic curve activated You can use the VALUE and buttons to select the curve of your choice which will be activated automatically The curves available are KEY TOUCH 1 To1 on display Light curve with which it is easy to reach high dynamic values KEY TOUCH 2 To2 straight curve KEY TOUCH 3 To3 Heavy curve with which it ...

Страница 28: ...le connector thanks to the MIDI channels There are 16 MIDI channels so MIDI messages are processed when the channels of the receiver and transmitter instruments are the same The DB 3 is able to receive and transmit information on a maximun of 3 MIDI channels simultaneously one for the upper manual one for the lower manual and one for the BASS section see also MIDI Mode function The data relating t...

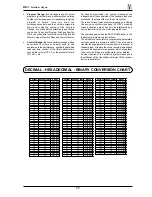
Страница 29: ...2 0000 0010 45 2D 0010 1101 88 58 0101 1000 3 03 0000 0011 46 2E 0010 1110 89 59 0101 1001 4 04 0000 0100 47 2F 0010 1111 90 5A 0101 1010 5 05 0000 0101 48 30 0011 0000 91 5B 0101 1011 6 06 0000 0110 49 31 0011 0001 92 5C 0101 1100 7 07 0000 0111 50 32 0011 0010 93 5D 0101 1101 8 08 0000 1000 51 33 0011 0011 94 5E 0101 1110 9 09 0000 1001 52 34 0011 0100 95 5F 0101 1111 10 0A 0000 1010 53 35 0011 ...

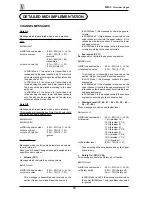
Страница 30: ...s transmitted and received on the section Upper Lower and Bass channel only Expression CC 11 Message which controls the sections expression BnH 0BH vvH n MIDI channel number 00H 0FH ch 1 ch 16 vv expression value 00H 7FH 0 127 This message is transmitted and received on the section Upper Lower and Bass channel only In MIDI Mode 1 this message controls the upper expression In MIDI Mode 2 if this me...

Страница 31: ... 00H 05H Global Memory 1 6 SYSTEM EXCLUSIVE MESSAGES System Exclusive messages control various parameters of the DB 3 Some parameters are controlled by sys ex messages only i e Vibrato Chorus Percussion etc Drawbars level Reverb and Rotary parameters are controlled by the Control Changes with MIDI Mode Control Change see the previous paragraph to know the messages or Sys Ex with MIDI Mode Sys Ex M...

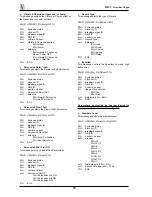
Страница 32: ...his message turns on and off the Percussions F0H 31H 30H 02H 01H xxH F7H F0H Exclusive status 31H Viscount ID 30H drawbars organ ID 02H DB 3 ID 01H control on panel xxH Percussion On Off 14H Percussion 2nd ON 15H Percussion 3rd ON 16H Percussion OFF F7H EOX Reverb Type This message selects the type of Reverb F0H 31H 30H 02H 01H 04H xxH F7H F0H Exclusive status 31H Viscount ID 30H drawbars organ ID...

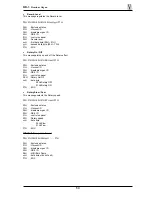
Страница 33: ...atus 31H Viscount ID 30H drawbars organ ID 02H DB 3 ID 01H control on panel 0FH Rotary speed xxH data byte 00H Slow 01H Fast F7H EOX MIDI Bulk Dump data format F0H 31H 30H 02H 09H xxH F7H F0H Exclusive status 31H Viscount ID 30H drawbars organ ID 02H DB 3 ID 09H MIDI Bulk Dump xxH data bytes do not edit F7H EOX Reverb Level This message regulates the Reverb level F0H 31H 30H 02H 01H 02H xxH yyH F7...

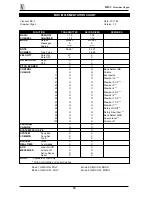
Страница 34: ...off Active Sense Reset NOTE Keyboard version only With Control Mode Control Change Mode 1 OMNI ON POLY Mode 2 OMNI ON MONO Mode 3 OMNI OFF POLY Mode 4 OMNI OFF MONO MIDI IMPLEMENTATION CHART FUNCTION TRANSMITTED RECOGNIZED REMARKS 1 16 1 16 1 16 1 16 Mode 3 Mode 3 X X 36 96 0 127 36 96 O X X X X X O O X X X X O O O O O O O O O O O O O O O O X X X X O X X X X O X O O X X X O X X Drawbar 2 Expressio...

Страница 35: ...tem since this version of the manual was completed The information contained in this version of the owner s manual supercedes all previous version NOTE This equipment has been tested and found to comply with the limits for a Class B digital Device persuant to Part 15 if the FCC Rules These limits are designed to provide reasonable protection against harmful interference in a residential installati...

Страница 36: ...1 869605 e mail viscount omniway sm Internet www viscount organs com www viscount it Distribution for Italy TITAN MUSIC S A Strada Genghe di Atto 80 47031 Acquaviva Repubblica di San Marino tel 0549 999164 fax 0549 999490 e mail viscount omniway sm Internet www viscount organs com www viscount it ...

Отзывы: