


3
Connection Guide
1.
Mount the 8 Cameras as required and connect them to the in-built POE Network Switch using
the supplied Network Cables.
2.
Connect the
48V Power Supply
to the in-built POE Network Switch portion.
3.
Connect the
12V Power Supply
to the NVR portion.
4.
Plug both power adaptors into a Power-point.
5.
Switch NVR on from back of device. Hold Power button for 3 seconds.
6.
The power LED at the front of the NVR should now be illuminated and the unit will make a loud
beep sound to indicate it is powered.
7.
Connect the included mouse to the USB port on the front or back.
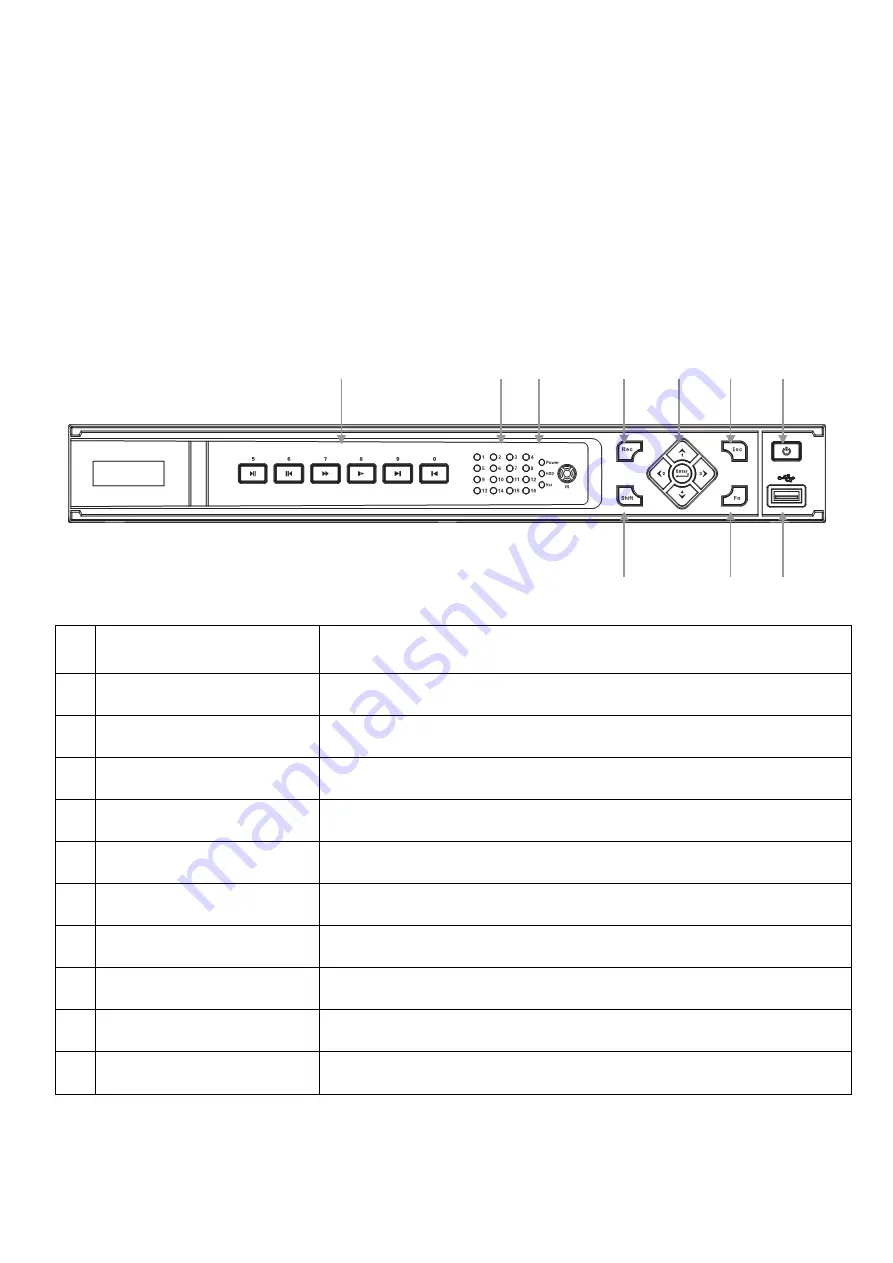
Front Panel
1,5
“NUMERALS”
Buttons marked with numbers can be used to enter numeric data
when in numeric text entry mode (See
“SHIFT”
)
1
“
PLAYBACK
”
Playback controls used when viewing recorded footage.
2
“
CAMERA LIGHTS
”
Displays recording cameras. (Unit limited to four maximum)
3
“
STATUS LIGHTS
”
Shows device is powered/reading HDD/connected to network.
4
“REC”
Manually start/stop recording.
5
“DIRECTION CONTROLS”
Used to select and enter options in menus.
6
“ESC”
Go to previous menu/cancel current operation.
7
“POWER”
Hold for three seconds to power on/off device.
8
“
SHIFT
”
Switch between text entry modes. (Numerals, English, Capitals, etc.)
9
“FN”
Various auxiliary functions.
10
“USB PORT”
Connect USB storage device or USB Mouse.
1
2
3
10
4
6
8
9
5
7


