background image


code: 

VIM 201301/S/01


20


V40 AL models (30mm recess plinth) 


1 Lock screws 

2 Lower hinge (Right)         3 Door axis 

4 Top hinge (Right) 

5 Door 

                            6 Cabinet body 

7 Top hinge (Left)         8 Lower hinge (Left) 


- Unscrew the lock screws (1) (Fig. 1) to remove the door axis located at the bottom. 

While holding the door firmly,

 pull the door (5) outward and take it out; (Fig. 2) 

- Remove the 3 bolts and take out the right top hinge (2); (Fig. 3) 
- Fix the left top hinge and the bottom left hinge with the bolts as per Fig. 4, 
- Re-install the door the same way it was removed and fix back the door axis. 


Содержание V26SG e SS/S3

Страница 1: ...1 Armoire vin Wine Preservation Technology USER MANUAL V26SG e SS S3 models V30SGme AL S3 BK models V30SGe AL S3 BK models V40SGe AL S3 BK models V30SG2e AL S3 BK models V40SG2e AL S3 BK models V40DG...
Страница 2: ...son responsible for their safety Children should be supervised to ensure that they do not play with the appliance R600A WARNINGS The following models use small quantity of R600A Iso butane flammable r...

Страница 3: ...when disposing of this appliance Please ensure the appliance is taken to a recycle centre for safe recycling DO NOT dispose of the appliance in land fill as the insulation and refrigerant gas contain...

Страница 4: ...e there is frequent lightning it is advisable to use surge protectors Improper use of the grounding plug can result in the risk of electric shock Consult a qualified electrician or service person if t...

Страница 5: ...he back spacer at the back of the cellar for air circulation and heat evacuation IMPORTANT THIS SPACER MUST BE ATTACHED TO THE UNIT BEFORE THE INSTALLATION FOR VENTILATION PURPOSE FAILURE TO DO SO VOI...

Страница 6: ...countries specifications 6 The power cord is 1 9m in length and is fixed on the right side at the back when looking from front of cabinet 7 As with most appliances of today the wine cellar has sensiti...

Страница 7: ...e VIM 201301 S 01 6 INSTALLATION DRAWINGS FOR BUILT IN WINE CELLARS UNDERBENCH OR IN COLUMN FRONT VENTING WINE CELLARS ONLY only 10mm requires for V26 etc 30 mm This applies to all V40SG DG BK S3 mode...

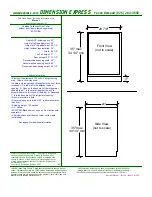
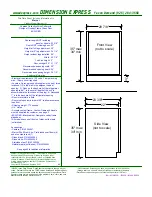
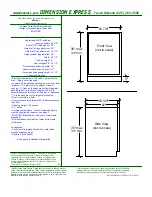
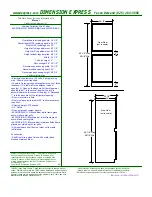
Страница 8: ...code VIM 201301 S 01 7 Dimensional drawings V26 s V40 s 30mm recess plinth...

Страница 9: ...off for a long time there will be a few degrees variance between the temperature you have selected and the one indicated on the LED readout This is normal and it is due to the length of the activatio...

Страница 10: ...ugh bottles to fill your wine cellar it is better to distribute the load throughout the wine cellar so as to avoid all on top or all below type loads Do remove or relocate adjustable wooden shelves to...

Страница 11: ...he bottle VINTEC recommends 7 C for your champagne 12 C for whites and 18 C for reds Refer to Wine Service Temperature recommendation chart Two Compartment single temperature wine cellars 2 in 1 Wine...

Страница 12: ...ment 7 7 C 2 5 C Right compartment 12 12 C 2 5 C It is important to understand that there is a difference between the air temperature inside the wine cellar and the actual temperature of the wine You...

Страница 13: ...WN buttons Each depression of the buttons will scroll through the available temperature settings in increments or decrease of 1 degree Celsius The temperature setting can be adjusted from 6 C to 18 C...

Страница 14: ...in increments or decrease of 1 degree Celsius The temperature selected will flash in the LED display for approximately 5 seconds and then revert to displaying the temperature of the internal cabinet T...

Страница 15: ...EMPERATURE Your VINTEC wine cellar has been designed to guarantee optimum conditions for storing and or serving your wines Fine wines require long and gentle developments and need specific conditions...

Страница 16: ...y have to add some water into the water container provided with your wine cellar All units are equipped with a double glazed glass door that has a third internal acrylic layer to minimise condensation...

Страница 17: ...is heavy and may cause injury if dropped Depending on the model and the type of handle your wine cabinet is equipped with you may have to rotate the door through 180 degrees Depending on the type of h...

Страница 18: ...ft Unscrew the lock screws to remove the door axis at the bottom of the door Fig 1 While holding the door firmly pull the door 5 outward take it out Fig 2 4 Remove the Right Top hinge Fig 3 Install th...

Страница 19: ...ng the door firmly loosen and remove the top hinge lift up and remove the door See Fig 2 Unscrew the lower hinge 8 Remove the long cabinet leg 9 on the left side and shift it to the right side Fig 3 I...

Страница 20: ...t device 3 and re locate it at left side of the door frame Fig 2 Take out the 3 hinge screws from the top hinge right 7 and remove it Fig 3 Remove decorative nail 8 from left top of cabinet and instal...

Страница 21: ...e Left Unscrew the lock screws 1 Fig 1 to remove the door axis located at the bottom While holding the door firmly pull the door 5 outward and take it out Fig 2 Remove the 3 bolts and take out the rig...

Страница 22: ...inge module and remove it Fig 1 Remove the three lock screws 4 from the top right hinge and remove the hinge 3 Fig 3 Fix the top left hinge 5 at the top left corner with the three lock screws 4 Fig 4...

Страница 23: ...late 3 from the door Fig A Unscrew the screw 11 located underneath the doorframe and the limit device 10 and relocate it at left side of the door frame Fig A B Take out the 3 hinge screws 6 from the t...

Страница 24: ...thorised technician by Vintec will lead to the warranty being considered as null and void POWER FAILURES In the event of a power interruption all previous temperature settings are automatically erased...

Страница 25: ...dded to the Wine cellar The door is opened too often The door is not closed completely The temperature control is not set correctly The door gasket does not seal properly The light does not work Not p...

Страница 26: ...AL 595x572x820 S3 BK 595x561x820 Gross dim in mm WXDXH 2 415x625x845 550x650x880 655x665x875 550x650x880 655x665x875 655x665x875 Net weight 34kg 38 kg 44 kg 43 kg 50kg 50 kg Gross weight 38kg 42 kg 48...

Страница 27: ...5x572x820 S3 BK 595x561x820 AL 595x572x820 S3 BK 595x561x820 AL 595x572x820 S3 BK 595x561x820 Gross dim in mm WXDXH 2 655x665x875 655x665x875 655x665x875 655x665x875 Net weight 50kg 44 kg 50 kg 50kg G...

Страница 28: ...de VIM 201301 S 01 Copyright All rights are reserved All photocopying reproduction translation whether partial or total are strictly prohibited without prior written consent from VINTEC www vintec co...

Отзывы: