background image

ASSEMBLY PROCEDURE


1. Prepare location and place all unit boxes near location sight. Perform an inventory check before 

beginning, to be certain all components are available for installation. 

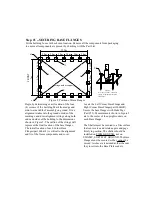
2. Secure base plates flanges to vase surface. 

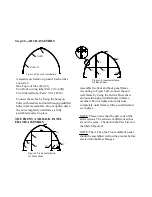
3. Assemble every group of arch. 

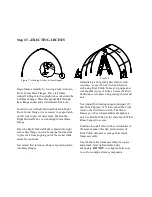
4. Begin frame assembly with front end arch,first interior arch,purlins,etc. 

5. Add to assemble other groups of arches. 

6. Install main cover over frame. 

7. Install end covers over end panels. 

      Read all the detailed instructions and notices in the following assembly instructions! 


MAINTENANCE AND CARE 

1. If some parts or the cover were accidently damaged during the use, contact the local supplier for 

advises in the repairing method or replacements, so the to prevent from further damage and keep 

the building in a good condition. 

2. When replacing the parts, male certain the whole frame and the parts connected to the replaced 

parts be well fixed or supported. 

3.  Same  with  when  attaching  the  cover,  choose  a  windless  day  to  replace  the  cover.  Begin  with 

making  certain  all  the  bolts  of  the  frame  and  the  tensioning  equipments  be  well  fixed.  When 

taking  off  the  cover,  make  sure  the  related  ropes,  etc.  Be  taken  off,  and  the  cover  will  not  be 

blocked during the way. Avoid taking off the cover with heavy big power equipments. 

4. For the building with mechanical door. Keep the door closed if it is not used for long time. This 

helps the mechanical door to have a longer life. 

5. To enlongate the life of the cover, put small duct tape or foam rubber(provide it by yourself)on 

the frame that comes to in contact with cover. The tape and foam rubber acts as a cushion to avoid 

rubbing damage to the cover over years. 

6. Periodically(once in half a year or more often),the building should be completely inspected and 

maintained internally and  externally to  make  certain the building remains properly installed and 

secured.  Including:  check  all  bolts  and  hardware  connectors  to  be  certain  they  are  in  place  and 

tightened,  he  base  plates  are  still  fixed  firmly,  check  and  adjust  the  ropes  if  in  need,  clean  the 

cover with suitable washing. Allowing dirt and debris to sit on cover over an extended time will 

damage cover irreparably. 


Thanks  again  for  choosing  this  quality  product.  The  following  is  the 

detailed assembly instructions for you starting the assembly. 


Содержание JIT-2340J

Страница 1: ...SHELTER MODEL JIT 2340J L12 0xW7 0xH4 8m Assembly Manual www vikre no...

Страница 2: ...snow drifts n slippery places or in wet location The cover of the building will protect against normal falling leaves and light debris however large fast or sharp falling items etc may cause a punctur...

Страница 3: ...me and the tensioning equipments be well fixed When taking off the cover make sure the related ropes etc Be taken off and the cover will not be blocked during the way Avoid taking off the cover with h...

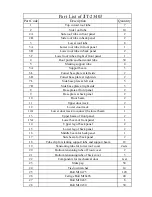
Страница 4: ...late at front panel 2 9 Base plate at back panel 2 10 Door beam 2 11 Upper door track 2 12 Lower door track 1 12A Lower door track to connect the lower beam 1 13 Upper beam of front panel 2 13A Lower...

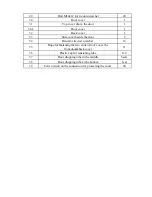
Страница 5: ...de cover beside the door 2 34 Band for tie down ratchet 14 35 Rope for fastening the two ends of roof cover the front door back cover 11 36 Plastic cap for tensioning tube 6 4 37 Door dropping tube in...

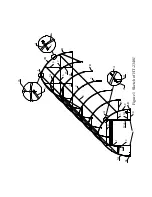
Страница 6: ...1 2B 3B 2 3 4 5 6L 6R 7R 7L 8 9 10 11 12 12A 13 13A 14 15 16 17 20 21 3B 25 2B 4 26 Figure 1 Sketch of JIT 2340J 2A 28 11 2A 3A 3C 5A...

Страница 7: ...l the components from packaging to ensure all components are present by checking with the Part List 6L 6R 2 0m 2 0m 2 0m 2 0m 2 0m 2 29m 7R 8 3 7m Diagonals are equal 12 0m 2 0m FRONT 7m 7L 9 1 65m 1...

Страница 8: ...nel frame According to Figure 5 6 connect the end wall frame by Using the bolts with washers and nuts through predrilled holes in frame members Do not tighten down the nuts completely until frame is f...

Страница 9: ...ly continues Next stand first interior arch up to repeat insertion into Base flanges Immediately after putting first interior arch into place connect Front Arch and Interior arch using Roof Purlin Tub...

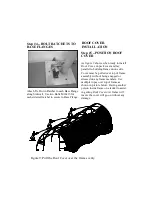
Страница 10: ...ady to install Roof Cover unpack cover and lay parallel to building frame on one side Cover must be pulled over top of frame assembly without being snagged or stressed on any frame members Use multipl...

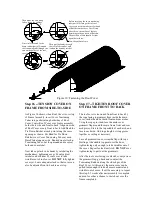
Страница 11: ...the unit at both front and rear arches Using the rope provided lace the main cover grommet flap around the main frame front and rear arch pieces Start in the top middle of each arch and lace to each...

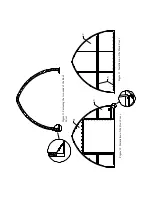
Страница 12: ...Figure 11 Fastening the two ends of the Roof Cover Figure 12 Installation of the Front Cover Figure 13 Installation of the Back Cover 33 32 31 35...

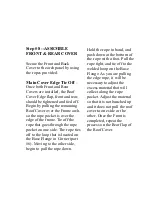
Страница 13: ...cket on one side The rope ties off to the loop that is located on the Base Flange in Corner part 6 Moving to the other side begin to pull the rope down Hold the rope in hand and push down at the botto...

Страница 14: ...t install the steel wire that leads from the bottom of the door dropping tubes to the door winching assembly Take one of the Steel Wires in the Door kit and feed down from the top of the Door track to...

Отзывы: