


17
16
7
1
2
3
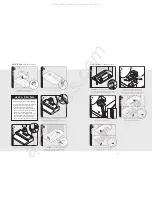
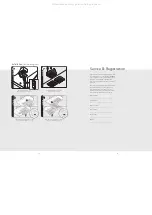
Slide filter front over front lip. Push filter
rear up, then slide back over rear lip.
Installation
(Recirculating cont.)
6
Assemble brackets to mesh filters
and insert charcoal filters.
11
2
3
8
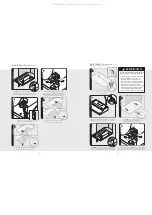
Slide filter front over front lip. Push filter
rear up, then slide back over rear lip.
Service & Registration
Only authorized replacement parts may be used
in performing service on the appliance.
DO NOT
repair or replace any part of the appliance unless
specifically recommended in this guide. All
other servicing should be referred to a qualified
technician.
Record the following information indicated below.
You will need it if service is ever required. The
serial number and model number for your
appliance are located on the identification plate
mounted on the inside of the hood canopy.
Model number
_________________________________________
Serial number
_________________________________________
Date of purchase
_________________________________________
Date installed
_________________________________________
Dealer's name
_________________________________________
Address
_________________________________________
1
1
2
5
Replace electrical box cover.
Make connection to breaker box.
All manuals and user guides at all-guides.com