Page 41
Camera
The Pb200i’s built-in camera is located in the foot of the instrument (see Fig. 1). The camera is operated
using the Pb200i application on the instrument.
Caution: Do not use the android camera application that is on the analyzer
.
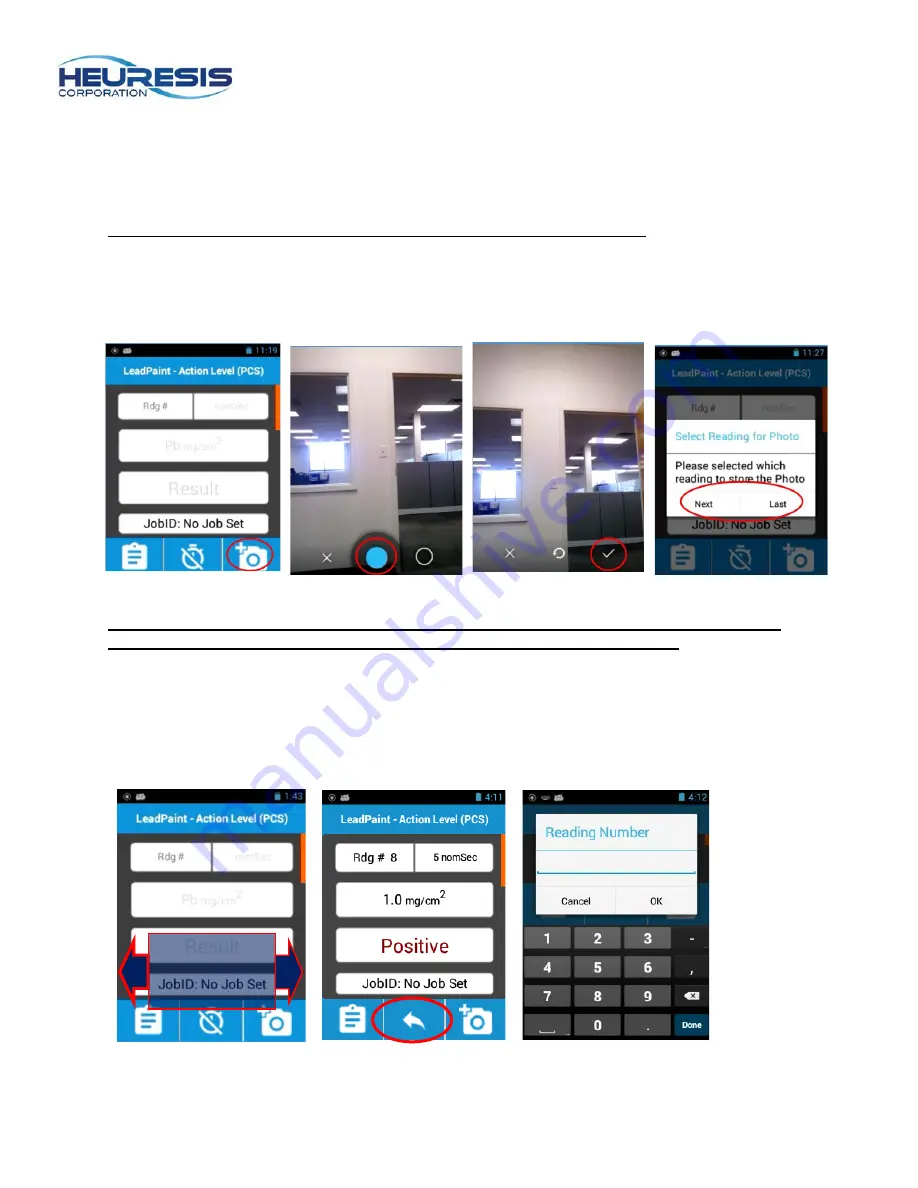
To use the camera, select the camera icon (Fig. 155). Select the blue dot (Fig. 156) to take the picture,
the “X” to exit the camera, or the white circle to adjust camera settings. Select the checkmark to store the
photo (Fig. 157), the circle with arrow to retake the photo, or the “X” to exit the camera. Once you have
stored the photo, select whether you want it associated with the next or the last XRF reading (Fig. 158).
Note: Please refer to the section on Exporting Readings and the HDMS User Guide for
more information on retrieving photos captured during your inspections.
Swipe to View Readings from Test Screen
You may swipe left or right from the "Ready to Test" screen to view readings (Fig. 159). You may also use
the search function to go to any desired reading (Fig. 160 and 161). Press the Back button on the
analyzer to return to the “Test” screen (Fig. 133).
Figure 159
Swipe left or
right from
test screen
Figure 155
Figure 156
Figure 157
Figure 158
Figure 160
Figure 141
Содержание Pb200i
Страница 48: ...Page 48 Figure 167 ...


