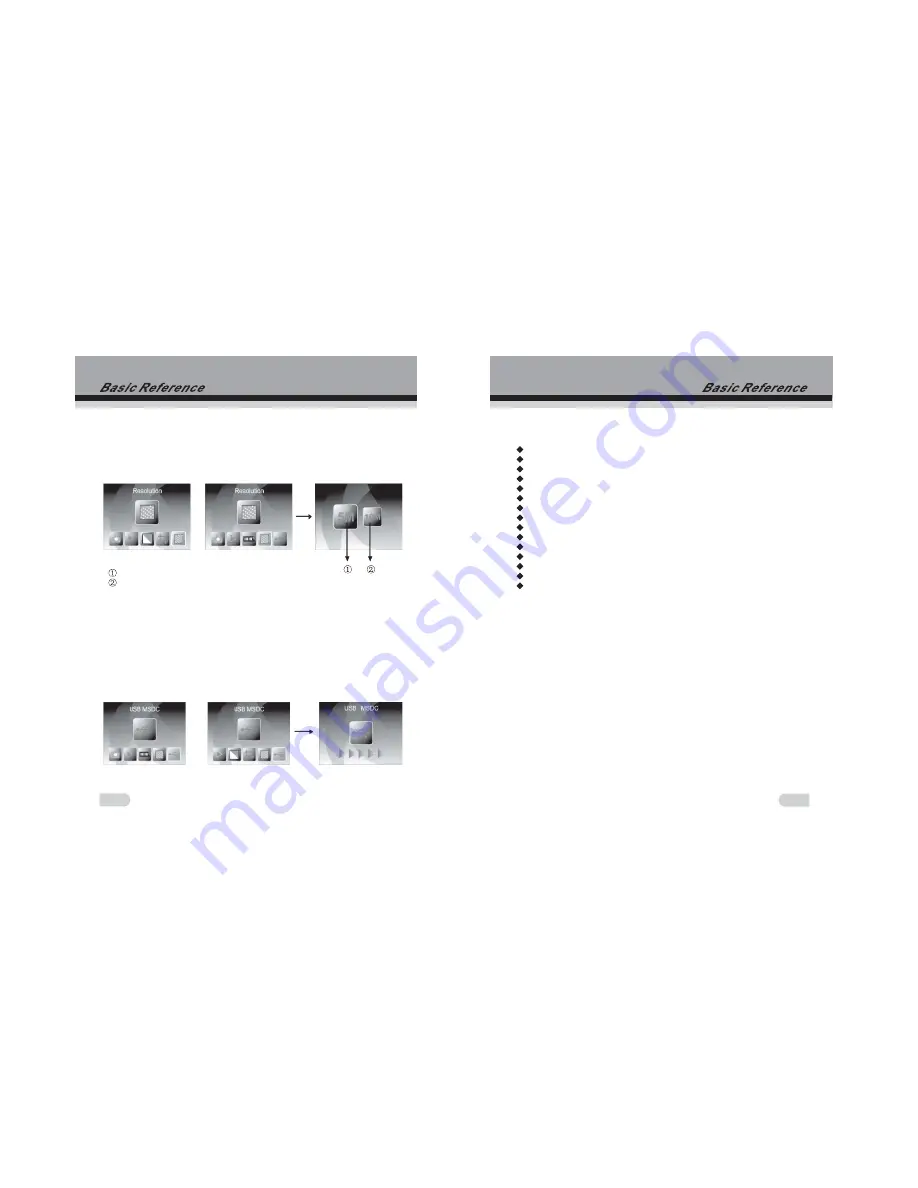
background image

25

26

6: Resolution

Change resolution by enter Resolution menu when power on the device or 
access the main menu by Home icon/MODE button anytime. Press 
LEFT/RIGHT button for Resolution and press ENTER button to confirm

User can press LEFT/RIGHT button to select resolution, then press ENTER
button to confirm


Or

5M resolution
10M resolution


7: USB mode

After finished capture, please take out the memory card from the film & photo 
scanner to download the stored images from the memory card.
When the device is connected with USB cable to PC, User can also press 
MODE button to main menu, then press LEFT/RIGHT button to select USB 
mode, then press ENTER button to confirm, the film & photo scanner will 
become a mass storage device and user can review or edit images on PC.

User can also press MODE button to back to main menu.


Or

8: Technical Specifications

Lens :                              F/3.6, f=4.83
Sensor :                          5.1 mega pixels CMOS sensor
LCD:                               2.4 inch LTPS LCD Display
External memory:           SD/MMC/MS/MS-PRO card
Exposure :                      Auto
Color balance :               Auto
Scan high resolution :    3,600 dpi interpolation resolution
Data conversion :           12 bits per color channel
Scan Method :                Single pass
Light source :                  7*2 white LED/Backlight (3 white LED)
Power :                           Powered from USB/5V adapter
Interface:                        USB 2.0
Dimension:                     220 x 208 x 147mm
Weight:                           1200G
Language:                      English, French, German, Italian, Spanish, 

                                          Traditional Chinese, Simplified Chinese, Japanese


Содержание PS970

Страница 1: ...Precautions 1 Package contents 2 Description of parts 3 Loading Slides 4 Loading Negatives 5 Loading Photo 6 General operations 7 Technical Specifications 26 For correct usage please read these instru...

Страница 2: ...periodically to produce a clear image Non use period The USB cord for the device should be unplugged from the computer when the unit is left unused for a long period of time USB overloading Do not ove...

Страница 3: ...into recessed area in the holder the slide should fit perfectly Note Handle slides with care Any dust scratches or fingerprints will show up on your saved images If possible use cotton gloves when ha...

Страница 4: ...hased from an office supply or electronics retailer Close the negative holder and press the edges so that it locks in place Hold it in the position as shown in the film photo scanner Insert the negati...

Страница 5: ...anner to PC with USB cable 2 5V adapter Connect the adapter to the device with USB cable 5 Press POWER button to turn on the film photo scanner Note 1 When the Film scanner mode is selected the Film s...

Страница 6: ...5X7 4X6 3X5 Resolution USB mode Home MODE No memory card If there is no memory card been inserted to device a warning icon will be shown on screen when enter main menu 1 Capture After welcome page abo...

Страница 7: ...e view mode Press LEFT button to change image left to right Press RIGHT button to upside down image Mirror Flip 1 2 Capture mode Once enter capture mode there will be an indicator on left top corner t...

Страница 8: ...ke between 1 2 second with 2 icons shown on the left side of the screen Save icon will be highlighted for user to confirm by ENTER button after the above step the display will go back to live view mod...

Страница 9: ...es to PC or replace another memory card for continue capture Memory full indicator 2 Playback Press LEFT RIGHT button to playback mode when power on the device or access the main menu by Home icon MOD...

Страница 10: ...playback mode single picture playback by press ENTER button Pause slide show Then user is able to scroll each picture by LEFT RIGHT button Once user select the picture stored in internal memory or me...

Страница 11: ...n edit menu the display will go back to slide show starting with the current picture without any change 20 Enter Enter 2 6 Playback Delete Select delete icon with LEFT RIGHT button then press ENTER bu...

Страница 12: ...when power on the device or access the main menu by Home icon MODE button anytime Press LEFT RIGHT button for Film Type and press ENTER button to confirm User can press LEFT RIGHT button to select fil...

Страница 13: ...color effect then press ENTER button to confirm Multicolor effect B W effect 5 Crop proportion When the Photo scanner mode is selected user can change crop proportion by enter Crop menu when power on...

Страница 14: ...then press LEFT RIGHT button to select USB mode then press ENTER button to confirm the film photo scanner will become a mass storage device and user can review or edit images on PC User can also pres...

Страница 15: ...ful interference in a residential installation This equipment generates uses and can radiate radio frequency energy and if not installed and used in accordance with the instructions may cause harmful...

Отзывы: