background image


- Sit up straight.   

- Position the monitor at a distance of 40-50cm below eye level, and make sure to look straight at the monitor. 

- Tilt the monitor back 1 to 20 degrees and adjust the height slightly below eye level. 

- Keep the arms perpendicular to the body and parallel to the back of the hand. 

- Make sure the elbows are positioned at a 90-degree angle. 

- Maintain a knee angle of over 90 degrees and adjust the monitor height to keep the heels on the floor and the 

  arms above the heart. 


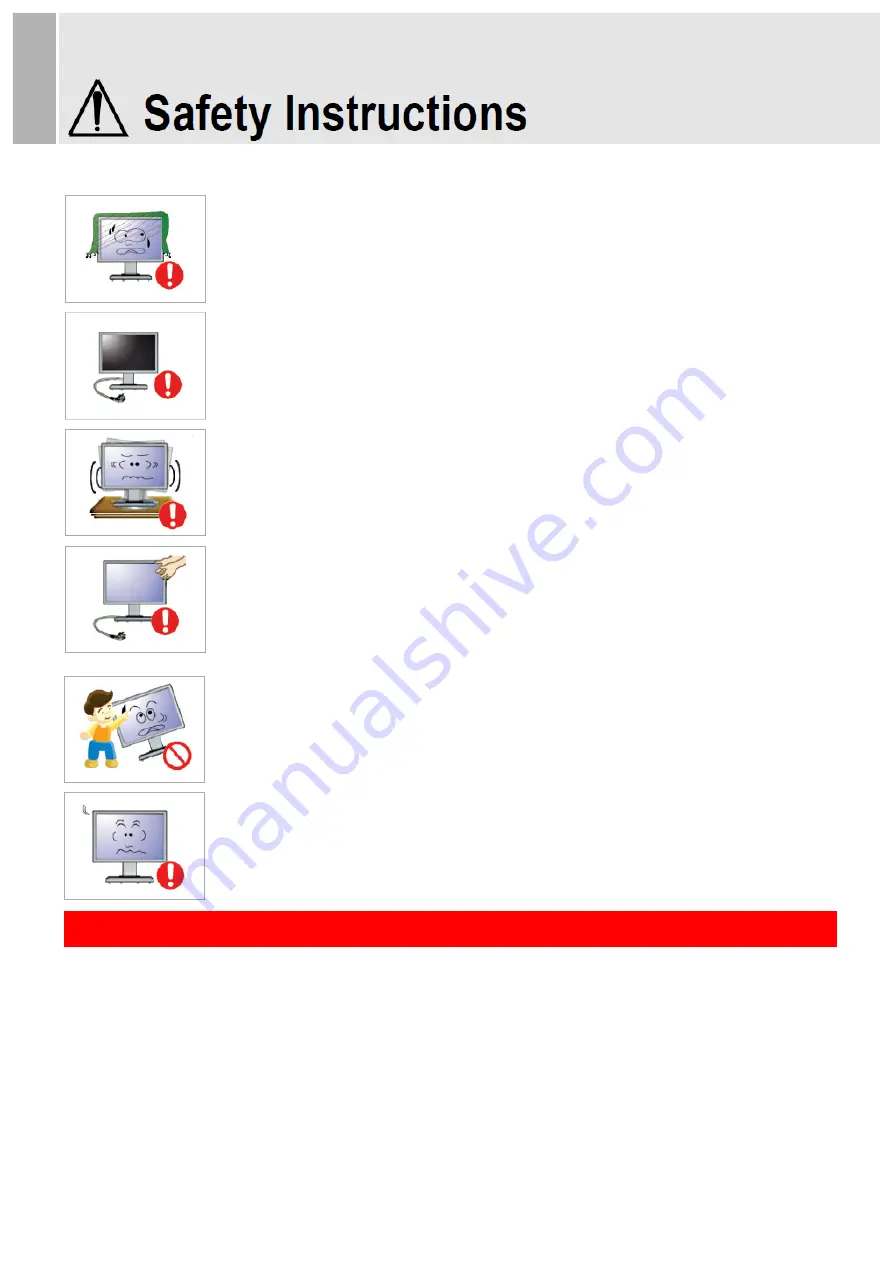
Do not cover the air vent. 

- Improper ventilation may cause monitor failure or a fire.


If the product is not used for a long time, disconnect the power cord. 

- Dust buildup may result in an electric shock or short circuit or fire due to heat output, 

ignition or deteriorating insulation. 

Do not place the monitor on unstable or vibrating locations, such as shaking shelves or 

inclined surfaces. 

- The fall of the product may result in failure or personal injury. Using the monitor on   

a vibrating location may shorten its service life or cause a fire.


When moving the monitor, make sure to turn it off and unplug from the outset. Also, make 

sure that other cords such as the antenna and other connecting cables have been 

disconnected.   

- Moving the monitor without disconnecting the cod will damage the cord, which may cause 

a fire or electric shock. 


Make sure that no child hangs on to or climb on the product. 

- If the product collapses, it may cause injury or death. 

Set the product resolution and frequency correctly. Otherwise, it may lead to eye problems. 

-  The  resolution  varies  depending  on  the  monitor  size.  Find  and  set  the  correct  resolution 

before use. 


Use the monitor in the correct posture. 


Содержание 215LEDSN

Страница 1: ... HD SDI 3G Broadcast Monitor 215LEDSN USER GUIDE v1 0 Driving Visual Innovation Please read this manual carefully to ensure proper use including connection and operation Also keep this manual for future use ...

Страница 2: ...or a long time please set it to DPMS Display Power Management Signaling mode If you turn on a screen saver set it to Moving Picture mode Do not use damaged power cords plugs or loose outlets Failure to do so may cause an electric shock or fire Power Supply Instructions Never remove the plug or power cord from the outlet with wet hands Failure to do so may cause an accident due to an electric shock...

Страница 3: ...o so may cause a fire or accident due to a short circuit or electric shock Make sure that the monitor stand does not stick out of a desk shelf or case when installing the product If the product falls to the ground it may be broken or damaged Maintain a distance of over 10cm from the wall when installing the monitor An increase in the temperature inside the monitor may affect the service life and p...

Страница 4: ...ord and wipe it with soft dry cloth when cleaning the product Do not use chemicals including wax benzene alcohol thinner mosquito repellent air freshener lubricant or cleaning solution Do not put items that can easily catch fire such as metal chopsticks wire awls paper or matches into the air vent headphone port or AV port Failure to do so may cause an electric shock or fire If water or any foreig...

Страница 5: ...ition or deteriorating insulation Do not place the monitor on unstable or vibrating locations such as shaking shelves or inclined surfaces The fall of the product may result in failure or personal injury Using the monitor on a vibrating location may shorten its service life or cause a fire When moving the monitor make sure to turn it off and unplug from the outset Also make sure that other cords s...

Страница 6: ...ns Names Functions of I O Port Menu Tree Control 3 Menu Tree Menu Control To Get Started 4 Menu Controls and Functions 5 Picture Settings Color Settings Audio Settings Marker Settings System Settings Specification 12 1 This Monitor was Manufactured by ISO 9001 Certified Factory ...

Страница 7: ...f I O Ports 1 Checking Control Buttons 2 Names and Functions of I O Ports 1 DC 12V In 6 YPbPr 2 SDI A SDI Out 3 HDMI In 4 DVI 5 VGA 7 Audio In 8 PGM 9 RS422 In 1 Power 2 Auto 3 Enter 4 Up 5 Down 6 Menu 7 Source 2 1 3 2 4 5 6 7 8 9 1 2 3 4 5 6 7 ...

Страница 8: ...ws Picture Settings menus in ViewZ monitor 2 Menu Control Menu control can be handled by front keys 1 Menu 2 Up 3 Down 4 Enter Press Menu button to enter menu Use Up Down keys on front to choose desired menu To enter desired menu press Enter key To exit to the previous step press Menu button Menu turns to blue when selected Grey menus are not yet activated 3 ...

Страница 9: ... the front 1 To choose the input signal after cable connection please use Source button on front Use either up and down keys to move to your input Then press enter to select Blue arrow shows your choice and when selected the menu turns to blue 2 If there s no input for your selected source the window will show No sync signal 4 ...

Страница 10: ...wn in grey as it can be controlled by front knobs without entering the menu Aperture used to control sharpness level from 0 to 24 0 for smooth and 24 for edge ViewZ recommend to use internal pattern edge for easier selection NTSC Setup used to control the difference black level when NTSCJ for Japan is used used for component signal only Advanced used for VGA input only 1 Auto Adjustment used to tu...

Страница 11: ...wn purpose Gain Red Green Blue changes only in user mode used to set R G B Gain level from 128 to 128 Bias Red Green Blue changes only in user mode used to set R G B Bias level from 50 to 50 Color Copy used to set standard for user mode select color copy and choose among 3200K 6500K or 9300K then preset values will be shown in RGB Gain and Bias Users can define their own values based on these pres...

Страница 12: ... input users can choose Off 16 Ch Horizontal and 16 Ch Vertical 16 Ch Horizontal shows 8 channels in each side horizontally 16 Ch Vertical shows 8 channels in each side vertically Level Meter Position used to select audio level meter position on screen depending on user s display users can choose Top Middle and Bottom for both horizontal and vertical Level Meter Reference used to select between 18...

Страница 13: ...speaker or Audio Out select from CH1 CH2 CH1 CH2 CH3 CH4 CH3 CH4 CH5 CH6 CH5 CH6 CH7 CH8 CH7 CH8 CH9 CH10 CH9 CH10 CH11 CH12 CH11 CH12 CH13 CH14 CH13 CH14 CH15 CH16 and CH15 CH16 when CH1 is chosen user can hear Ch1 from both speakers When CH1 CH2 is chosen user can hear Ch1 from left speaker and Ch2 from right speaker 8 ...

Страница 14: ... 1 1 85 1 and 4 3 Center Marker used to turn on and off center marker Safety Area used to select safety area among off 80 85 88 90 93 and 100 Marker Mat used to change darkness of areas out of line marker select level from OFF transparent to 7 black Marker Color used to change marker color on the screen select from blue green red gray black and white Corner On Off used to show safety area by ticks...

Страница 15: ...el marker features don t work Aspect used to change the display ratio among full screen 16 9 and 4 3 BlueMono used to change the display among off regular mono and blue H V Delay used to observe blank area for H sync and V sync when system setting is in H V delay marker features don t work Internal Pattern used to turn on internal pattern among off color bar and white Backlight to control backligh...

Страница 16: ...etween off and DPMS when DPMS is selected and there s no input signal for longer than 15sec monitor takes sleep mode LED light on front red power off green power on orange blink no input orange DPMS sleep mode Factory Reset used to reset the monitor to factory default setting 11 ...

Страница 17: ...x HDMI PGM Download Port Input Signal Format SDI SMPTE 425M A YCbCr 4 2 2 10bit 1080P 60 59 94 50 SMPTE 274M YCbCr 4 2 2 10bit 1080i 60 59 94 50 1080P 30 29 97 25 24 23 98 1080Psf 30 29 97 25 24 23 98 SMPTE 296M YCbCr 4 2 2 10bit 720P 60 59 94 50 30 29 97 25 24 23 98 SMPTE 125M YCbCr 4 2 2 10bit 525i NTSC 59 94 ITU R BT 601 YCbCr 4 2 2 10bit 625i PAL 50 2K Format YCbCr 4 2 2 10bit 2048 x 1080P 24 ...

Страница 18: ...Dimensions Outline Dimension 20 25 x 14 56 x 1 77 W x H x D 514 5mm x 370mm x 45mm Net Weight 8 4lbs 3800g General Power DC 12V Power Consumption 24W Operating Temperature 0 40 32 104 13 ...

Страница 19: ...Memo 14 ...

Страница 20: ...PERATION MANUAL Aug 2014 by Orion Technology Co Ltd All rights reserved Reproduction or duplication without permission of Orion Technology of edition or contents in whole in part any manner is prohibited Specifications and design are subject to change without notice ...

Отзывы: