background image

26

Selecting an Input Source

The projector can be connected to multiple devices at the same time. However, it 
can only display one full screen at a time.

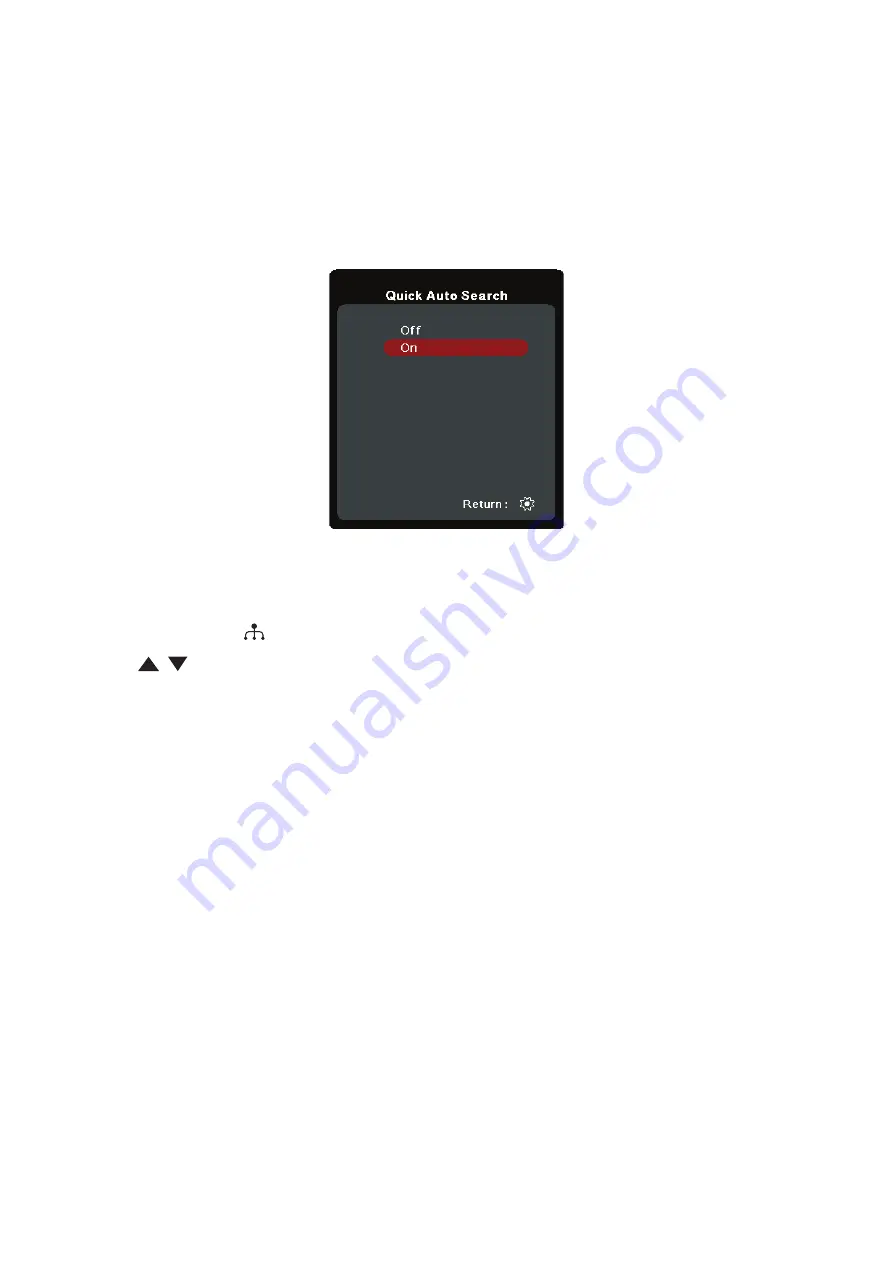
If you want the projector to automatically search for the input source, ensure the 

Quick Auto Search

 function in the 

SYSTEM

 menu is 

On

.

NOTE:  


If no input source is detected, the projector will go to 

SMART SYSTEM

.

To manually select the input source do the following:

1. 

Press 

SOURCE

 or 


, and a source selection menu will appear.

2. 

Press 

/

 until your desired signal is selected and press 

ENTER/OK

.

3. 

Once detected, the selected source information will be displayed on the screen 

for a few seconds. 

NOTE:  


If there are multiple devices connected to the projector, repeat steps 1-2 to 

search for another source.

Содержание VS18969

Страница 1: ...egistering your product for future service Warranty information contained in this User Guide will describe your limited coverage from ViewSonic Corporation which is also found on our web site at http www viewsonic com in English or in specific languages using the Regional selection box in the upper right corner of our website Antes de operar su equipo lea cu idadosamente las instrucciones en este ...

Страница 2: ... Image on a 16 9 Screen 12 X1 12 X2 13 16 9 Image on a 4 3 Screen 13 X1 13 X2 14 Mounting the Projector 15 Preventing Unauthorized Use 16 Using the Security Slot 16 Using the Password Function 17 Setting a Password 17 Changing the Password 18 Disabling the Password Function 18 Forgetting the Password 19 Password Recall Procedure 19 Locking the Control Keys 20 Making Connections 21 Connecting to Po...

Страница 3: ...e Image Size and Clarity 27 Correcting Keystone 28 Adjusting 4 corners 29 Hiding the Image 29 Menu Functions 30 General On Screen Display OSD Menu Operation 30 On Screen Display OSD Menu Tree 31 DISPLAY Menu 36 IMAGE Menu 39 POWER MANAGEMENT Menu 42 BASIC Menu 45 ADVANCED Menu 48 SYSTEM Menu 52 INFORMATION Menu 54 Smart System 55 Home Screen 55 Menu Operations 56 Media control bar buttons 61 Suppo...

Страница 4: ... Chart 71 Troubleshooting 74 Common Problems 74 LED Indicator 75 Maintenance 76 General Precautions 76 Cleaning the Lens 76 Cleaning the Case 76 Storing the Projector 76 Disclaimer 76 Light Source Information 77 Light Source Hour 77 Extending Light Source Life 77 ...

Страница 5: ...5 Package Contents NOTE The power cord and video cables included in your package may vary depending on your country Please contact your local reseller for more information Introduction ...

Страница 6: ...p Down When the input source is SMART SYSTEM Moves through the menu items or toggle through the available options When the input source is not SMART SYSTEM Manually corrects distorted images resulting from an angled projection Selects the desired menu items and makes adjustments when the On Screen Display OSD Menu is activated SOURCE Displays the input source selection bar Displays the HELP menu b...

Страница 7: ...urity Bar Adjuster Foot Remote IR sensor Kensington Anti theft Lock Slot Reset button for SMART SYSTEM Port Description 1 AUDIO IN Audio signal input socket 2 AUDIO OUT Audio signal output socket 3 RS 232 RS 232 control port 4 SERVICE For service personnel only 5 HDMI 1 HDMI 2 HDMI ports 6 USB C USB Type C port 7 USB A 5V 1A OUT USB Type A port for power supply ...

Страница 8: ...SMART SYSTEM Increases the projector volume Decreases the projector volume Mutes or unmutes the projector volume Plays or pauses the playback of a file Fast forwards the file or goes to the next one Rewinds the file or goes to the previous one When the input source is not SMART SYSTEM Button Description Power Toggles between standby mode and Power On Not available Displays the source selection bar...

Страница 9: ...ote Control Effective Range To ensure proper function of the remote control follow the steps below 1 The remote control must be held at an angle within 30 perpendicular to the projector s IR remote control sensor s 2 The distance between the remote control and the sensor s should not exceed 8 m 26 ft NOTE Refer to the illustration for the location of the infrared IR remote control sensor s USB C U...

Страница 10: ...it with the base and pushing it back into position NOTE Avoid leaving the remote control and batteries in excessive heat or a humid environment Replace only with the same or equivalent type recommended by the battery manufacturer Dispose of the used batteries according to the manufacturer s instructions and local environment regulations for your region If the batteries are drained or if you will n...

Страница 11: ...tor and other equipment The projector is designed to be installed in one of the following locations 1 Front The projector is placed near the floor in front of the screen 2 Front Ceiling The projector is suspeneded upside down from the ceiling in front of the screen 3 Rear Ceiling The projector is suspended upside down from the ceiling behind the screen NOTE A special rear projection screen is requ...

Страница 12: ... 30 767 39 998 15 374 1 37 4 4 112 60 1524 60 1535 79 1995 29 747 3 75 8 8 224 70 1778 70 1791 92 2328 34 872 3 87 10 3 262 80 2032 81 2046 105 2660 39 996 4 100 11 8 299 90 2286 91 2302 118 2993 44 1121 4 112 13 2 336 100 2540 101 2558 131 3325 49 1245 5 125 14 7 374 110 2794 111 2814 144 3658 54 1370 5 137 16 2 411 120 3048 121 3069 157 3990 59 1494 6 149 17 6 448 130 3302 131 3325 170 4323 64 1...

Страница 13: ...9 3789 179 4547 123 3113 6 156 6 1 156 300 7620 179 4547 215 5457 147 3736 7 187 7 4 187 16 9 Image on a 4 3 Screen X1 a Screen Size b Projection Distance c Image Height d Vertical Offset minimum maximum minimum maximum inch mm inch mm inch mm inch mm inch mm inch mm 30 762 28 704 36 916 14 343 1 34 1 34 60 1524 55 1409 72 1831 27 686 3 69 3 69 70 1778 65 1643 84 2137 32 800 3 80 3 80 80 2032 74 1...

Страница 14: ...0 45 1143 2 57 2 57 110 2794 60 1530 72 1837 50 1257 2 63 2 63 120 3048 66 1670 79 2003 54 1372 3 69 3 69 130 3302 71 1809 85 2170 59 1486 3 74 3 74 140 3556 77 1948 92 2337 63 1600 3 80 3 80 150 3810 82 2087 99 2504 68 1715 3 86 3 86 200 5080 110 2783 131 3339 90 2286 5 114 5 114 250 6350 137 3478 164 4174 113 2858 6 143 6 143 300 7620 164 4174 197 5009 135 3429 7 171 7 171 NOTE It is recommended...

Страница 15: ...sure the most secure installation please use a ViewSonic wall or ceiling mount 2 Ensure the screws used to attach a mount to the projector meet the following specifications Screw type M4 x 8 Maximum Screw length 8 mm 98 09 162 09 138 267 46 NOTE Avoid installing the projector near a heat source Keep at least a 10 cm gap between the ceiling and the bottom of the projector ...

Страница 16: ...ing changes Using the Security Slot To help prevent the projector from being stolen use a security slot locking device to secure the projector to a fixed object Below is an example of setting up a security slot locking device NOTE The security slot can also be used as a safety anchor if the projector is mounted to the ceiling ...

Страница 17: ...enu and go to SYSTEM Security Settings and press ENTER OK 2 Highlight Power On Lock and select On by pressing 3 As pictured to the right the four arrow keys represent 4 digits 1 2 3 4 Press the arrow keys to enter a six digit password 5 Confirm the new password by re entering the new password Once the password is set the OSD Menu will return to the Security Settings page 6 Press EXIT or to leave t...

Страница 18: ... entering the new password 6 To leave the OSD Menu press EXIT or NOTE The digits being input will display as asterisks Disabling the Password Function 1 Press MENU or to open the OSD Menu and go to SYSTEM Security Settings Power On Lock 2 Press to select Off 3 The message Input Password will appear Enter the current password If the password is correct the OSD Menu returns to the Password page with...

Страница 19: ...e Password Recall Procedure NOTE If you enter an incorrect password 5 times in succession the projector will automatically shut down for a short time Password Recall Procedure 1 When the message INPUT CURRENT PASSWORD appears press and hold ENTER OK for 3 seconds The projector will display a coded number on the screen 2 Write down the number and turn off your projector 3 Seek help from the local s...

Страница 20: ...el Key Lock is On no control keys on the projector will operate except Power 1 Press MENU or to open the OSD Menu and go to SYSTEM Panel Key Lock 2 Press to select On 3 Select Yes and press ENTER OK to confirm 4 To release panel key lock press and hold on the projector for 3 seconds NOTE You can also use the remote control to enter the SYSTEM Panel Key Lock menu and select Off ...

Страница 21: ... the projector 2 Plug the power cord into a power outlet NOTE When installing the projector incorporate a readily accessible disconnect device in the fixed wiring or connect the power plug to an easily accessible outlet near the unit If a fault should occur during operation of the projector use the disconnect device to switch off the power supply or disconnect the power plug ...

Страница 22: ... C cable to the USB C port of your video computer device Then connect the other end of the cable to the USB C port of your projector Connecting to Audio The projector is equipped with speakers however you can also connect external speakers to the AUDIO OUT port of the projector NOTE The audio output is controlled by the remote control and the projector s Volume and Mute settings The AUDIO IN port ...

Страница 23: ... connecting jacks available on the projector vary with each projector model Some cables may not be included with the projector They are commercially available from electronics stores RS232 HDMI 2 HDCP 2 2 USB C HDMI 1 HDCP 2 2 AUDIO IN AUDIO OUT SERVICE USB A 5V 1A ...

Страница 24: ...ing the light source To maintain light source life once you turn the projector On wait at least five 5 minutes before turning it off 4 Turn on all of the connected equipment i e notebook and the projector will start to search for an input source NOTE If the projector detects an input source the Source Selection Bar will appear If an input source is not detected the message No Signal will appear Fi...

Страница 25: ...t respond in a few seconds after the first press the message will disappear 2 Once the cooling process finishes a Power On Off Ring Tone will play 3 Disconnect the power cord from the power outlet if the projector will not be used for an extended period of time NOTE To protect the light source the projector will not respond to commands during the cooling process Do not unplug the power cord before...

Страница 26: ...STEM menu is On NOTE If no input source is detected the projector will go to SMART SYSTEM To manually select the input source do the following 1 Press SOURCE or and a source selection menu will appear 2 Press until your desired signal is selected and press ENTER OK 3 Once detected the selected source information will be displayed on the screen for a few seconds NOTE If there are multiple devices c...

Страница 27: ...oot Adjusting the foot will change the projector s height and the vertical projection angle Carefully adjust the foot to fine tune the projected image s position Fine Tuning the Image Size and Clarity To adjust the projected image to the size that you need rotate the Zoom Ring To improve the clarity of the image rotate the Focus Ring ...

Страница 28: ...emote control to display the keystone page when the input source is not SMART SYSTEM 2 After the keystone page is displayed press Down to correct keystoning at the top of the image Press Up to correct keystoning at the bottom of the image Press to correct keystoning at the bottom of the image Press Right to correct keystoning at the right side of the image Press Left to correct keystoning at the l...

Страница 29: ... degree angle adjustment press to adjust its shape and size You can press Exit or to go back to a previous step A long press for 2 seconds on ENTER OK will reset the settings on the corner that you chose NOTE Adjusting keystone will reset the Corner Adj settings After the Corner Adj settings have been modified some aspect ratios or timings are not available When that happens reset the settings on ...

Страница 30: ...SD of your projector The projector is equipped with an On Screen Display OSD Menu for making various adjustments It can be accessed by pressing MENU or on the projector or remote control 1 Press to select a main menu Then press ENTER OK or use to access the sub menu list 2 Press to select the menu option Then press ENTER OK to display its sub menu or press to adjust select the setting NOTE Some su...

Страница 31: ... Menu Option DISPLAY Aspect Ratio Auto 4 3 16 9 16 10 2 35 1 Native Keystone Auto V Keystone Off On Vertical 40 40 Horizontal 40 40 Corner Adj Top Right Top Left Bottom Right Bottom Left Zoom 0 8X 2 0X OverScan Off 1 2 3 4 5 3X Fast Input Inactive Active ...

Страница 32: ...00 Contrast 50 50 Color Temp 9300K 7500K 6500K Red Gain 0 100 Green Gain 0 100 Blue Gain 0 100 Red Offset 50 50 Green Offset 50 50 Blue Offset 50 50 Advanced Color 50 50 Sharpness 0 31 Gamma 1 8 2 0 2 2 2 35 2 5 Cubic sRGB Color Management Primary Color Hue Saturation Gain Reset Color Settings Reset Cancel ...

Страница 33: ...udio Pass Through Off On BASIC Audio Settings Audio Mode Music Speech Movie Mute Off On Audio Volume 0 20 Power On Off Ring Tone Off On Presentation Timer Timer Period 1 240 m Timer Display Always 1 min 2 min 3 min Never Timer Position Top Left Bottom Left Top Right Bottom Right Timer Counting Direction CountDown CountUp Sound Reminder Off On Start Counting Off Pattern Off Test Card Blank Timer Di...

Страница 34: ...D Settings Yes No HDMI Settings HDMI Format Auto RGB YUV HDMI Range Auto Enhanced Normal Light Source Settings Light Source Mode Normal Eco Dynamic Black 1 DynamicBlack2 Custom Light Source Power 20 100 Reset Light Source Hours Reset Cancel LightSourceHoursInformation LightSourceUsageTime Normal Eco Dynamic Black 1 Dynamic Black 2 Custom Restart Smart System Reset Cancel Reset Settings Reset Cance...

Страница 35: ...c 15 sec 20 sec 25 sec 30 sec Menu Position Center Top Left Top Right Bottom Left Bottom Right High Altitude Mode Off On Quick Auto Search Off On Security Settings Change Password Power On Lock Off On Panel Key Lock Off On Control Method RS 232 USB Baud Rate 2400 4800 9600 14400 19200 38400 57600 115200 INFORMATION Source Color Mode Resolution Color System Firmware Version 3X Fast Input S N ...

Страница 36: ...AY menu Then press ENTER OK or use to access the DISPLAY menu 3 Press to select the menu option Then press ENTER OK to display its sub menu or press to adjust select the setting NOTE Some sub menu options may have another sub menu To enter the respective sub menu press ENTER OK Use or to adjust select the setting ...

Страница 37: ...h definition TV as it displays them without aspect alteration 16 10 Scales an image so that it is displayed in the center of the screen with a 16 10 aspect ratio This is most suitable for images which are already in a 16 10 aspect as it displays them without aspect alteration 2 35 1 Scales an image so that it is displayed in the center of the screen with a 2 35 1 aspect ratio without aspect altera...

Страница 38: ...o frame rate reducing Quick response time in native timing can be achieved When enabled the following settings if applicable will return to factory preset values Aspect Ratio Zoom OverScan NOTE This function is only available when a native timing input signal is selected ...

Страница 39: ...E menu Then press ENTER OK or use to access the IMAGE menu 3 Press to select the menu option Then press ENTER OK to display its sub menu or press to adjust select the setting NOTE Some sub menu options may have another sub menu To enter the respective sub menu press ENTER OK Use or to adjust select the setting ...

Страница 40: ... of the sub menus under the IMAGE menu can be adjusted according to your selected input source Brightness The higher the value the brighter the image Adjust this option so the black areas of the image appear just as black and details in the dark area are more visible Contrast Use this to set the peak white level after you have previously adjusted the Brightness setting Color Temp There are several...

Страница 41: ...brightness level of the projector s grayscale levels Color Management Only in permanent installations with controlled lighting levels such as boardrooms lecture theaters or home theaters should color management be considered Color management provides fine color control adjustment to allow for more accurate color reproduction Select Primary Color first and adjust its range values in Hue Saturation ...

Страница 42: ...GEMENT menu Then press ENTER OK or use to access the POWER MANAGEMENT menu 3 Press to select the menu option Then press ENTER OK to display its sub menu or press to adjust select the setting NOTE Some sub menu options may have another sub menu To enter the respective sub menu press ENTER OK Use or to adjust select the setting ...

Страница 43: ...e that the device is correctly connected to the HDMI input of the projector via an HDMI cable and its CEC function is turned on Depending on the connected device the CEC function may not work Direct Power On Allows the projector to turn on automatically once power is fed through the power cord Smart Energy Auto Power Off Allows the projector to turn off automatically after a set period of time onc...

Страница 44: ...ings The functions below are available in standby mode plugged in but not turned on Audio Pass Through When selecting On the projector outputs an audio signal when the Audio In and Audio Out sockets are correctly connected to a proper device ...

Страница 45: ...C menu Then press ENTER OK or use to access the BASIC menu 3 Press to select the menu option Then press ENTER OK to display its sub menu or press to adjust select the setting NOTE Some sub menu options may have another sub menu To enter the respective sub menu press ENTER OK Use or to adjust select the setting ...

Страница 46: ...imer will restart whenever the Timer Period is reset Timer Display Allows you to decide if you want the timer to show up on the screen for one of the following time periods Always Displays the timer on screen throughout the presentation time 1 min 2 min 3 min Displays the timer on screen in the last 1 2 3 minute s Never Hides the timer throughout the presentation time Timer Position Sets the timer...

Страница 47: ...ter a period of time when there is no action taken on the blank screen To display the blank screen press Blank on the projector or remote control NOTE Do not block the projection lens as this could cause the blocking object to become heated and deformed or even cause a fire Message Sets reminder messages On or Off Splash Screen Selects which logo screen will appear during projector start up ...

Страница 48: ...ED menu Then press ENTER OK or use to access the ADVANCED menu 3 Press to select the menu option Then press ENTER OK to display its sub menu or press to adjust select the setting NOTE Some sub menu options may have another sub menu To enter the respective sub menu press ENTER OK Use or to adjust select the setting ...

Страница 49: ...n which enables you to enjoy 3D movies videos and sporting events in a more realistic way by presenting the depth of the images You need to wear a pair of 3D glasses to view 3D images 3D Format The default setting is Auto and the projector automatically chooses an appropriate 3D format when detecting 3D contents If the projector cannot recognize the 3D format choose a 3D mode 3D Sync Invert When y...

Страница 50: ... light source brightness Eco Reduces light source power consumption by 20 and lowers brightness to extend the light source life and decreases the fan noise Dynamic Black 1 Reduces light source power consumption by up to 70 depending on the content brightness level Dynamic Black 2 Reduces light source power consumption by up to 50 depending on the content brightness level Custom Allows you to adjus...

Страница 51: ... Settings Returns all settings to the factory preset values When using Reset Settings the following settings will still remain Zoom Keystone Language Projector Position High Altitude Mode Security Settings Control Method and Baud Rate ...

Страница 52: ...M menu Then press ENTER OK or use to access the SYSTEM menu 3 Press to select the menu option Then press ENTER OK to display its sub menu or press to adjust select the setting NOTE Some sub menu options may have another sub menu To enter the respective sub menu press ENTER OK Use or to adjust select the setting ...

Страница 53: ...ronment is between 0 to 1 499 m and the temperature is between 0 C to 35 C If used the projector will become over cooled Using High Altitude Mode may cause more operating noise as the fan speed will be increased to improve cooling and performance Quick Auto Search Allows the projector to automatically search for the signals Security Settings See Using the Password Function on page 17 Panel Key Loc...

Страница 54: ...on Description Source Shows the current input source Color Mode Shows the selected mode in the IMAGE menu Resolution Shows the native resolution of the input source Color System Shows input system format Firmware Version Shows the current firmware version 3X Fast Input Shows whether the function is activated or not S N Shows the serial number for this projector ...

Страница 55: ... SYSTEM To navigate the Home Screen simply use the directional buttons You can return to the main Home Screen at any time by pressing on the remote control regardless of what page you are on 1 Press to select a main menu Then press ENTER OK or use press to access the sub menu list 2 Press to select the menu option Then press ENTER OK to display its sub menu or press to adjust select the setting NO...

Страница 56: ...uetooth Speaker or Bluetooth Pairing Then press ENTER OK 3 A dialogue box appears select Connect and press ENTER OK to enter Bluetooth mode 4 A sound effect will be audible upon entering pairing mode 5 Upon successful connection another sound effect will be audible NOTE The projector s name will be labeled as ViewSonic Projector Once paired if both the projector and your device are powered on they...

Страница 57: ... Bluetooth Out Then press ENTER OK NOTE Once paired if both the projector and your device are powered on they will automatically connect via Bluetooth Screen Mirroring Screen Mirroring provides a 5GHz Wi Fi connection for users to mirror the screen on their personal device NOTE Ensure your device is connected to the same network as the projector ...

Страница 58: ...ing If your device does go to the Casting feature and choose ViewSonic PJ XXX from the list of available devices You can also scan the FAQ QR code and follow the steps to directly cast your Android device FileBrowser You can browse your files here Source Displays the input source selection bar You can switch the input source My Apps Displays your favorite Apps To remove an application from My Apps...

Страница 59: ...on Access and view all the applications you have installed To add an application to My Apps page or uninstall it 1 After entering the Application page all your applications are displayed 2 Long press on the selected APP to add to My Apps page or uninstalled it ...

Страница 60: ...When you find your preferred application press OK to enter the details and select the INSTALL button to install it 3 A progress bar will display while downloading 4 After the application is installed you can open upgrade or uninstall the application NOTE You can install third party applications by apk file in File Management However some third party applications may have compatibility issues Appli...

Страница 61: ...nd Play Play Pause Pause Next Fast forward Next Previous 3D More NOTE When using a USB storage device note the following Some USB storage devices may not be compatible If you are suing a USB extension cable the USB device may not be recongnized You may experience longer loading time when handling larger files Data on the USB storage device may be damaged or lost Back up important files beforehand ...

Страница 62: ...mment jpg jpeg Progressive JPEG Max resolution 1024 x 768 Baseline JPEG Max resolution 15360 x 8640 bmp Max resolution 9600 x 6400 png gif Max resolution 5120 x 2880 Supported external connected device formats Device NTFS format FAT32 format exFAT Read Write Read Write Read Write USB memory stick USB HDD NOTE Windows 10 built in format tool only supports FAT32 format up to 32GB Only FAT32 format i...

Страница 63: ... enabled by default for online upgrade When enabled if the system detects a newer version it will automatically download the software in the background 2 Select Online update and press ENTER OK 3 The system will check the ViewSonic website OTA and display below dialog message if there is a newer firmware 4 After selecting Download a progress bar will appear as the download process begins ...

Страница 64: ...ate Right Now 6 The Strat OTA update dialog message will appear 7 Select Update and the projector will restart the screen will turn black for a few minutes The update process takes about 5 to 10 minutes When finished it will take a few minutes to restart the projector ...

Страница 65: ...evice 2 Plug the USB device into the projector 3 Go to Application UPDATE UpdateLocale 4 Click Select and press ENTER OK 5 The system will detect the firmware and display the following information Select the firmware file 6 The selected firmware will show up Click Update 7 The Local update dialog message is displayed select Update ...

Страница 66: ...8 Select Update and the projector will restart the screen will turn black for a few minutes The update process takes about 5 to 10 minutes When finished it will take a few minutes to restart the projector ...

Страница 67: ...e settings will be grayed out and cannot be operated Menu Option Description Network internet Wi Fi Sets the Wifi settings and AP hotspot Portable hotspot VPN Prvate DNS Apps notifications You can browse the Apps set App permissions and notifications Storage Device storage You can check the storage status here Security location Device admin apps ...

Страница 68: ... server Set Date Available when Autmatic date time is disabled You can set the date time time zone Set Time Set time zone Automatic 24 hour format Shows the time in the 24 hour format Use 24 hour format Available when Autmatic 24 hour format is disabled When disabled the projector shows the time in the 12 hour format Reset options Reset Wi Fi mobile Buletooth You can reset the network settings App...

Страница 69: ...em to delete the log and apk files in the local storage and release the local storage space Accelerator Click this item to terminate the processes that are not system s This operation can be performed when there are many APPs running in the back ground and the system response speed is slow ...

Страница 70: ...to switch Operating conditions Temperature 0 C to 40 C 32 F to 104 F Humidity 0 to 90 non condensing Altitude 0 to 1 499 m at 0 C to 35 C 1 500 to 3 000 m at 0 C to 30 C Storage conditions Temperature 20 C to 60 C non condensing Humidity 0 to 90 non condensing Altitude 0 to 12 200 m at 30 C Dimensions Physical W x H x D 355 x 121 x 244 mm 14 x 4 8 x 9 6 355 x 121 x 251 mm 14 x 4 8 x 9 9 Weight Phy...

Страница 71: ...pect ratio Refresh rate Hz VGA 640 x 480 04 03 60 70 75 85 120 SVGA 800 x 600 04 03 60 70 75 85 120 XGA 1024 x 768 04 03 60 70 75 85 120 1152 x 864 04 03 75 WXGA 1280 x 768 15 09 60 1280 x 800 16 10 60 75 85 1360 x 768 16 09 60 1366 x 768 16 09 60 Quad VGA 1280 x 960 04 03 60 85 SXGA 1280 x 1024 05 04 60 75 85 SXGA 1400 x 1050 04 03 60 WXGA 1440 x 900 16 10 60 WSXGA 1680 x 1050 16 10 60 ...

Страница 72: ...x 576 4 3 16 9 50 4k 24P 3840 x 2160 16 09 24 4k 25P 3840 x 2160 16 09 25 4k 30P 3840 x 2160 16 09 30 4k 50P 3840 x 2160 16 09 50 4k 60P 3840 x 2160 16 09 60 HDMI 3D Signal Resolution dots Aspect ratio Refresh rate Hz In Frame Packing format 1080p 1920 x 1080 16 09 23 98 24 720p 1280 x 720 16 09 50 59 94 60 In Side by Side format 1080i 1920 x 1080 16 09 50 59 94 60 In Top Bottom format 1080p 1920 ...

Страница 73: ... 800 16 09 60 120 HDTV 1080p 1920 x 1080 16 09 60 for Video Signal SDTV 480i 720 x 480 4 3 16 9 60 NOTE 60Hz signals are supported for Side by Side Top Bottom and Frame Sequential formats 120 Hz signals are supported for Frame Sequential format only Video signal SDTV 480i is supported for Frame Sequential format only ...

Страница 74: ...correct source with the Source key on either the projector or the remote control The image is blurred Adjusting the Focus Ring will help correctly focus the projection lens Ensure the projector and screen are aligned properly If necessary adjust the height of the projector as well as the projection angle and direction The remote control does not work Ensure there are no obstacles between the remot...

Страница 75: ...and by mode Green Flashing Powering up Green Normal operation Red Downloading Orange Flashing Burn in off Red Flashing once per second Fan error Red Flashing once per 3 seconds Thermal and temperature error Green Red Flashing alternately Light source error ...

Страница 76: ...ft lint free dry cloth to remove dirt or dust If the case is still not clean apply a small amount of non ammonia non alcohol based mild non abrasive detergent onto a clean soft lint free cloth then wipe the surface CAUTION Never use wax alcohol benzene thinner or other chemical detergents Storing the Projector If you intend to store the Projector for an extended period of time Ensure the temperatu...

Страница 77: ...nd extends the light sources operational life Light Source Mode Description Normal Provides full light source brightness Eco Reduces light source power consumption by 20 and lowers brightness and decreases fan noise Dynamic Black 1 Reduces light source power consumption by up to 70 depending on the content s brightness level Dynamic Black 2 Reduces light source power consumption by up to 50 depend...

Отзывы: