background image

3.2

Assembly

3.2.1

Preparing mounting

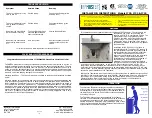
The locating surface for the cover plate must be mounted

flush with the finished wall surface.

Close water supply pipe to the Viega Eco Plus Universal shower WC
element.

Remove 

½

 inch plug.

Seal 

½

 inch flexible hose and then screw into the T-piece.

17

19

Handling

cover plate

9 from  15

Содержание 8040.18

Страница 1: ...suitable for Viega Eco Plus universal shower WC element model 8161 20 Model Year built 8040 18 from 08 2015 en_INT cover plate Instructions for Use ...

Страница 2: ...cover plate 2 from 15 ...

Страница 3: ...Standards and regulations 6 2 2 Intended use 6 2 2 1 Areas of use 6 2 3 Product description 7 2 3 1 Overview 7 3 Handling 8 3 1 Assembly information 8 3 1 1 Installation dimensions 8 3 1 2 Required tools 8 3 2 Assembly 9 3 2 1 Preparing mounting 9 3 2 2 Mounting the cover plate 13 3 2 3 Mounting WC ceramic 15 3 3 Disposal 15 Table of contents cover plate 3 from 15 ...

Страница 4: ...s not extend to possible operating instructions The installation of Viega products must take place in accordance with the general rules of engineering and the Viega instructions for use 1 2 Labelling of notes Warning and advisory texts are set aside from the remainder of the text and are labelled with the relevant pictographs DANGER This symbol warns of possible life threatening injury WARNING Thi...

Страница 5: ... and or in Germany e g DIN DVGW Some passages in the text may refer to technical codes in Europe Germany These should serve as recommendations in the absence of corresponding national regulations The relevant national laws stand ards regulations directives and other technical provisions take priority over the German European directives specified in this manual The information herein is not binding...

Страница 6: ...e 2 2 1 Areas of use This cover plate is only suitable for the Viega Eco Plus universal shower WC element model 8161 20 The cover plate can only be used in combination with the following shower WC models n Geberit AquaClean 8000 WC complete system article number 146 182 xx x n Geberit Aqua Clean 8000 plus WC complete system article number 180 100 xx x n Geberit AquaClean Tuma Comfort WC top articl...

Страница 7: ...iew 1 2 4 3 5 6 7 Fig 1 Components cover plate model 8040 18 1 cover frame 2 seal 3 cover plate 4 closing cap 5 flexible hose inch 6 ball valve inch 7 mounting bracket for the earthed wall socket Product information cover plate 7 from 15 ...

Страница 8: ...on dimensions Fig 2 Dimensions cover plate model 8040 18 3 1 2 Required tools The following tools are required for mounting n fork or ring spanner 17 mm 19 mm n flat blade screwdriver n Spirit level n Knife cutter n handsaw Handling cover plate 8 from 15 ...

Страница 9: ...e for the cover plate must be mounted flush with the finished wall surface Close water supply pipe to the Viega Eco Plus Universal shower WC element Remove inch plug Seal inch flexible hose and then screw into the T piece 17 19 Handling cover plate 9 from 15 ...

Страница 10: ...nnection to the Viega Eco Plus Universal shower WC from the mains Installation only by companies specialising in electrical work in compliance with the valid national regulations see Ä Reg ulations from section Preparing mounting on page 6 Lead the electrical connection for the shower WC into the junction box DANGER Risk of electrocution Disconnect the electrical connection to the Viega Eco Plus U...

Страница 11: ...finished wall surface by unscrewing and screwing the threaded screws Check the alignment with spirit level Tighten the rear nuts at all four points size 17 in the process secure the threaded screws with a slotted screwdriver Tighten the front nuts at all four points size 17 Check to ensure they are flush 17 17 17 Handling cover plate 11 from 15 ...

Страница 12: ...Unscrew the threaded rods for the fixing of the WC element to the required size and counter with nuts size 19 19 Handling cover plate 12 from 15 ...

Страница 13: ...ate Insert the seal on the front into the cover frame Apply the silicone seal to the rear of the cover frame Align the cover frame and attach it to the element by the supplied Phillips head screws Handling cover plate 13 from 15 ...

Страница 14: ...element Lead the flexible hose through the left hand notch in the cover plate Insert the earthing plug of the shower WC through the right hand opening of the cover plate and into the earthing socket Handling cover plate 14 from 15 ...

Страница 15: ...nstruc tions Use the connecting material supplied for the water and elec trical connection Open the water supply pipe to the Viega Eco Plus Universal shower WC element Open the ball valve of the shower WC shower WC top Connect the power supply to the concealed socket of the shower WC shower WC top Align and fix the shower WC ceramic Seal the gap between WC ceramic and cover plate with silicone 3 3...

Отзывы: