VDC Digital Recorder
Vdc601c.doc
25
13 Remote
Dial-Up
6
5
3
2
4
1
4
1
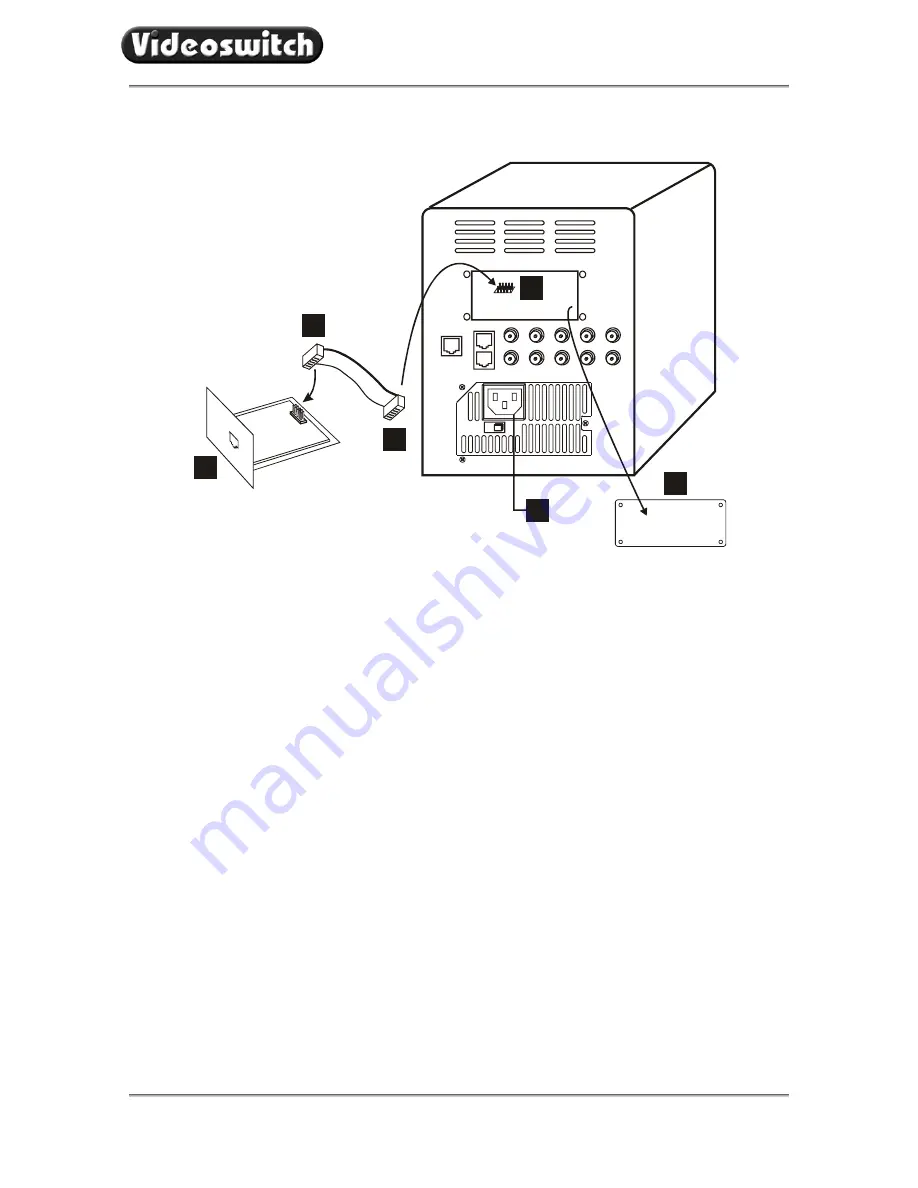
13.1 Fitting the VDC/PSTN or VDC/ISDN Option
1. Remove the mains power to the VDC digital recorder
2. Remove the options module blanking on the VDC digital recorder (4 screws)
3. Plug one end of the supplied ribbon cable into…
4. … the 10-pin header inside the VDC (make sure all the pins line up on both rows)
5. Plug the other end of the ribbon into 10-pin header on the VDC/PSTN or VDC/ISDN module (make
sure all the pins line up on both rows). Note that the module must be orientated with the metal
bracket at the bottom, PCB on top.
6. Carefully fit the modem module into the VDC digital recorder and replace the 4 screws (M2.5) to
securely fix it to the rear panel.
13.2 Using the VDC/PSTN or VDC/ISDN Option
1. Connect to a telephone (PSTN or ISDN) line using the cable provided.
2. Upgrade the firmware in the VDC digital recorder to the latest version (VDC001A5 or later). Make
sure that PSTN or ISDN is selected in the menu: [Setup][Remote Access][Dial-Up Type].
3. Install “VDM-Connect” (Issue VDM017i or later) onto the PC that is to be used for remote access.
4. Click on SITE on the VDM-Connect and add the phone number to the site list.
5. Click on “Connect”. Images should be displayed on the PC after connection with the VDC has been
established.
Intelligent Security and Fire Ltd


