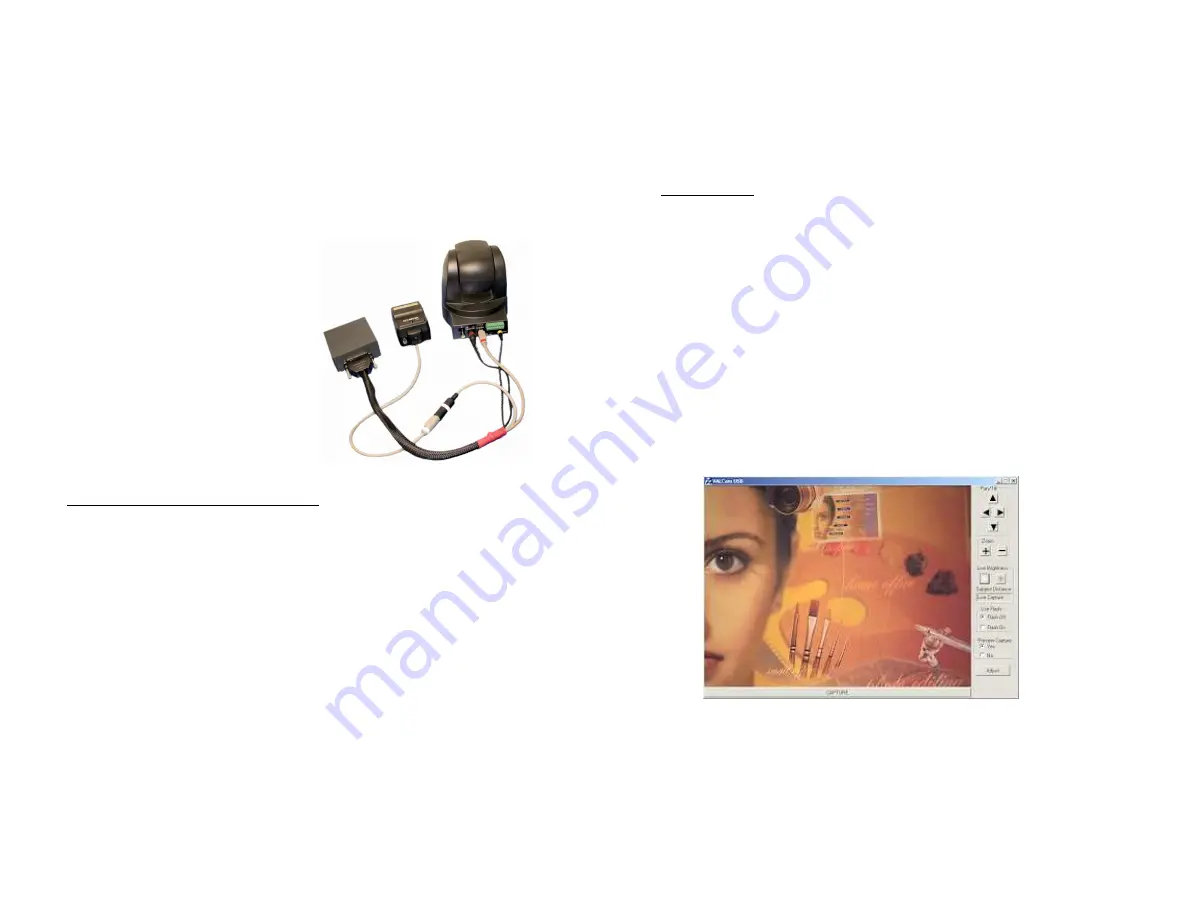
Video Associates Labs VALCam USB Скачать руководство пользователя страница 3


8.


Connect the 

yellow

 power connector to the matching 

yellow

 connector on 

the camera.  
 

9.


Connect the photoflash cable to the matching white connector on the multi-
cable. 


10.


Connect the 25-pin connector on the multi-connector to the USB converter 
box. 
 

11.


Connect the power supply to the 
USB converter box. 
 

12.


Connect the USB cable to the 
converter box. Do not connect the 
other end of the USB cable to the 
computer.


13.


If desired the external USB 
converter can be removed from the 
flash bracket. An extended 10 ft 
cable is available from Video 
Associates. 


Final Installation for Win XP and Win 2000 


1.


Run 

Setup VALCam USB.EXE

 located on the installation CD.  


2.


Verify that the camera is configured as described above. Make sure the 
power supply is connected and plugged in to a wall outlet. 
 

3.


Verify that the USB cable from the Zoom camera or the converter box is 
attached. Plug the USB cable to your computer USB port.  
 

4. 

The computer will find new hardware and install the device. Answer 

Yes

 or 

Continue

 if you are queried during the installation. 


5. 

The installation process will install 2 devices before the process is 
completed.   


6.


You can confirm the installation by opening Device Manager and noting the 

VALCam USB Camera

” listed under “

Imaging Devices

” 


NOTE: When upgrading software ALWAYS UNPLUG THE POWER 
SUPPLY CONNECTOR before installing the new software. Plug in the 


Power Supply Connector after the software upgrade is installed. 
Camera firmware will not be upgraded unless this procedure is 
followed. 


Basic Operation 


1.


Confirm that the display settings of your computer are set to 24 or 
32-bit color (16 bit is not recommended)

.  


2.


Click on 

START->PROGRAMS->VALCam USB 

and start the 

application. 


3.


The application will determine if the 

DirectX

 version installed on the 

computer is capable of using the camera. If the version needs to be 
upgraded, an error message will be displayed. The Microsoft DirectX 
upgrade is provided on the installation CD. If necessary run the 
DirectX upgrade and restart the camera application. 


4.


The 

VALCAM ID

 capture control box will appear. 

If you receive an 

error message or the capture control box does not appear 
displaying live video, consult the troubleshooting guide.  


Содержание VALCam USB

Страница 1: ...30 Austin TX 78758 1 800 331 0547 www VAL com 2 Features Include One Click Auto Centering on USB Professional Complete SDK available on request Complete USB hardware interface The only connection to t...

Страница 2: ...ter software installation 2 Mount the photoflash to the hot shoe connector on top of the camera 3 Connect the flash cable to the matching receptacle on the back of the camera 4 Connect the power adapt...

Страница 3: ...if you are queried during the installation 5 The installation process will install 2 devices before the process is completed 6 You can confirm the installation by opening Device Manager and noting the...

Страница 4: ...camera position 5 Hold down the cursor keys to move the camera continuously NOTE This feature can also be used to center scars and tattoos for law enforcement applications 8 Using the Click Drag and R...

Страница 5: ...Captures for more details on obtaining high quality captures 10 Sharpness Control 1 Click the Advanced tab on the Adjust Dialog box 2 The After Capture control adjusts post capture image enhancement...

Страница 6: ...d varying subject distances with no degradation of image quality Once the flash intensity is set for a given subject distance all captures will be identical even with different amounts of room light T...

Страница 7: ...ust the Flash Red and Flash Blue controls on the main dialog for color balance Use the Flash Color Correction setting that needs the smallest adjustment of the Red and Blue 6 If desired this process c...

Страница 8: ...run the VALCam executable as a standalone application and capture images directly to the Window s clipboard You can then paste these images into any applications that will support the Window s clipbo...

Страница 9: ...nd Blue controls on the main screen 18 Use the Flash Color Correction setting that has the lowest amount of correction You can also experiment with adjusting Flash Red and Flash Blue if desired Genera...

Страница 10: ...en using the Flash be sure to set the Flash Brightness for the correct distance and illumination Adjust the Flash Color Correction and Flash Colors for optimal color adjustment When not using the Flas...

Отзывы: