background image

LEER TODAS LAS INSTRUCCIONES SIGUIENTES ANTES DE
INTENTAR HACER FUNCIONAR EL HUMEDECEDOR. SEGUIR
ESTAS SIMPLES PAUTAS AYUDARÁ A OBTENER AÑOS
DE SERVICIO CONFIABLE Y EFICIENTE.

PAUTAS IMPORTANTES DE SEGURIDAD

ADVERTENCIA: DEBIDO A LA ALTA TEMPERATURA QUE SE GENERA EN 
ESTE HUMEDECEDOR ES NECESARIO SIEMPRE SEGUIR LAS 
PRECAUCIONES BÁSICAS DE SEGURIDAD, ESPECIALMENTE CUAN-
DO HAY NIÑOS PRESENTES.

AL USAR ARTEFACTOS ELÉCTRICOS, SE DEBEN SEGUIR ESTAS
PRECAUCIONES BÁSICAS DE SEGURIDAD.


1.  

NO OPERAR el humedecedor sin los tanques de agua.

2.  

SIEMPRE usar agua limpia y fría de la llave para llenar los tanques 


de agua.

3.   Para evitar el riesgo de fuego o choque eléctrico, 

NO USAR cordón


eléctrico de extensión.

4.  

NO MANIPULAR el humedecedor con las manos mojadas.

5.  

NUNCA inclinar, mover o intentar vaciar el humedecedor cuando 


esté funcionando o enchufada. Apagar el humedecedor, desconectar 


el enchufe y retirar el tanque de agua antes de mover el humedecedor. 

6.        

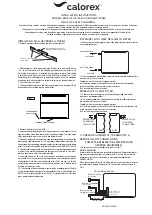
ADVERTENCIA: Pueden producirse lesiones a los ojos si se mira  


directamente a la luz del foco UV. NO energice la unidad cuando la com 


puerta del foco no esté instalada.

7. 

Colocar el humedecedor fuera del alcance de los niños.

8.  

NO COLOCAR el humedecedor circa a fuentes de calor tales como coci 


nas, estufas o rejilas de calefacción, ni directamente bajo los rayos del sol.

9.  

NO OPERAR el humedecedor AL AIRE LIBRE. Este humedecedor 


es solamente para uso en interiores.

10. 

NO PERMITIR que ingrese agua en los orificios para el aire que 


están en la parte inferior de la caja, ni dejar caer agua sobre el 


cordón o el enchufe.

11. 

NO ALMACENAR ni usar gasolina u otros líquidos o vapores in


flamables cerca del humedecedor.

12. 

SIEMPRE cerciorarse de que las tapas y empaquetaduras de los 


tanques estén firmemente colocadas.

13. 

NO TOCAR las superficies calientes.

14. 

SIEMPRE apagar el humedecedor cuando los tanques de agua 


estén vacíos o cuando el humedecedor no esté en uso. Si apaga el 


humedecedor por períodos largos, 

SIEMPRE desconectar el 


cordón del tomacorriente y vaciar el tanque de agua y la base.

15. 

SIEMPRE colocar el humedecedor sobre una superficie firme, 


plana, bien nivelada y que sea resistente al agua. También acomodar 


el cordón de manera que no haya riesgo de volcar el humedecedor.

16. 

NUNCA limpiar el humedecedor ni cambiar el foco UV (ultravioleta) 


sin desconectar el cordón del tomacorriente.

Содержание Germ-Free V790

Страница 1: ...Model V790 In English 1 10 En fran ais 11 20 En Espa ol 21 30 Instructions for Operation Care and Cleaning Limited Warranty READ AND SAVETHESE INSTRUCTIONS Printed in CHINA Imprim en CHINA Impreso en...

Страница 2: ...y viewing the light produced by UV bulb DO NOT energize unit while lamp door is removed 7 Place unit in an area where it is not accessible to children 8 DO NOT place the unit close to heated areas suc...

Страница 3: ...PAD during operation or within 15 minutes after the humidifier is turned to the OFF position and unplugged Serious injury may result MINERAL ABSORPTION PAD TOP HOUSING AND NOZZLE should only be remov...

Страница 4: ...ng action that takes place in the hot water reservoir just before the mist is distributed to the air in the room V790 PHOTO CONTROL PANEL POWER SWITCH ON POSITION When the push button switch is pushed...

Страница 5: ...position Lights may flicker momentarily Then turn the relative humidity knob clockwise until you hear a faint click It will be normal for the humidifier to take a few minutes to warm up and begin to...

Страница 6: ...ending on the mineral content of the water used In areas of moderate mineral content water supply the mineral absorption pad should be changed after approximately 3 weeks of continuous use If the wate...

Страница 7: ...used to scrape off the mineral deposits Be careful not to use any metal blade on any plastic parts DO NOT ALLOW WATER TO ENTER THE BOTTOM OF THE HUMIDIFIER BASE OR ANY OTHER OPENINGS OR IMMERSE THE CO...

Страница 8: ...be visible Pull the door out the minimum amount to have access to unscrew bulb from socket 8 Take a replacement 3 5W UV bulb that you purchased from Kaz Inc or another supplier and change the bulb To...

Страница 9: ...ES SOLUTION Unit does not mist Unit is not plugged in Plug in unit Power failure Check circuit breaker Water tanks empty Remove and refill Power switch not turned on Push switch to ON Unit not reset a...

Страница 10: ...of incidental or consequential damages or limitations on how long an implied warranty lasts so the above limitations or exclusions may not apply to you This warranty gives you specific legal rights a...

Страница 11: ...Instructions sur le fonctionnement l entretien et le nettoyage Garantie limit e LIRE ET CONSERVER CES INSTRUCTIONS Brevet Humidificateur vapeur ti de Germ FreeMC Mod le V790...

Страница 12: ...en marche si le panneau de l ampoule est ouvert 7 Placer l appareil dans un endroit qui est hors de port e des enfants 8 NE PAS PLACER l appareil dans un endroit chaud tel qu proximit d une cuisini re...

Страница 13: ...le fonctionnement de l appareil ou moins de 15 minutes apr s avoir teint et d branch l appareil en raison du risque de graves blessures LE BO TIER SUP RIEUR OU LES TAMPONS D ABSORPTION DES MIN RAUX n...

Страница 14: ...tape consiste en l bullition dans le contenant d eau chaude juste avant la pouss e des bruines dans la pi ce par le ventilateur V790 PHOTO TABLEAU DE COMMANDE BOUTON DE MISE EN MARCHE ARR T POSITION...

Страница 15: ...entation fermement en l ins rant fond dans la prise murale 4 Enfoncer le bouton de marche en position de marche Normalement l humidificateur prend quelques minutes pour se r chauffer avant de produire...

Страница 16: ...ipulation du tampon 2 La dur e de vie utile du tampon d absorption des min raux varie selon la teneur de min raux dans l eau utilis e Dans les r gions o l eau du robinet a une teneur en min raux moyen...

Страница 17: ...p ts de min raux S assurer de n utiliser aucune lame en m tal sur les pi ces en plastique VITER QUE L EAU P N TRE DANS LE SOCLE DE L HUMIDIFICATEUR OU DANS LES AUTRES OUVERTURES NE PAS PLONGER LE COR...

Страница 18: ...Tirer sur le panneau juste assez pour pouvoir d visser l ampoule de la douille 8 Prendre une ampoule de rechange UV de 3 5 W achet e chez Kaz Inc ou chez un autre fournisseur et remplacer l ampoule u...

Страница 19: ...courant V rifier le disjoncteur R servoirs d eau vide Retirer et remplir Bouton marche arr t n est Enfoncer le bouton pas allume en position de marche L appareil ne s est pas remis Replacer le r serv...

Страница 20: ...tie implicite par cons quent il est possible que ces limitations ou exclusions ne s appliquent pas dans votre cas Cette garantie vous conf re des droits pr cis reconnus par la loi Ces droits diff rent...

Страница 21: ...V790 PHOTO Instrucciones para la Operaci n Cuidado y Limpieza Garant a Limitada LEAY CONSERVE ESTAS INSTRUCCIONES Patentado Antig rmenesMR Humidificador de Vapor Tibio Modelo V790...

Страница 22: ...o la com puerta del foco no est instalada 7 Colocar el humedecedor fuera del alcance de los ni os 8 NO COLOCAR el humedecedor circa a fuentes de calor tales como coci nas estufas o rejilas de calefacc...

Страница 23: ...riores a haber colocado el interruptor en la posici n de OFF Apagado y haber desenchufado la unidad del tomacorriente porque pueden ocasionarse lesiones serias La C PULA DE VAPOR EL DIFUSOR DE VAPOR Y...

Страница 24: ...es la acci n de hervir el agua en el dep sito de agua caliente antes de distribuir el vapor en el aire de la habitaci n PANEL DE CONTROL INTERRUPTOR Posici n ON Encendido La unidad se enciende cuando...

Страница 25: ...medecedor 3 Conectar el enchufe del cord n el ctrico firme y completamente dentro del tomacorriente en la pared 4 Presionar el interruptor a la posici n ON Encendido las luces podr an parpadear moment...

Страница 26: ...el humedecedor ha estado funcionando el agua se CALIENTA y es necesario tener gran CUIDADO para manipular la almohadilla Lo mejor es permitir que el agua se enfr e y usar unas tenazas o pinzas largas...

Страница 27: ...ste mantenimiento Vaciar toda el agua inclinando el tanque Si quedasen residuos minerales en la taza met lica acero inoxidable de hervir puede usarse un instrumento met lico para rascar y sacar los de...

Страница 28: ...brir la compuerta hal ndola hacia adelante y se podr ver el foco UV Halar la compuerta el m nimo necesario para desenroscar el foco UV y sacarlo 8 Cambiar el foco UV por otro nuevo de 3 5W comprado a...

Страница 29: ...tanques de agua est n vac os Desmontarlos y llenarlos El interruptor est apagado Presionar el interruptor a la posici n ON Encendido No se oprimi el bot n de Reposicionar los tanques RESET despu s de...

Страница 30: ...iente es posible que estas limitaciones o exclusiones no se apliquen en su caso Esta garant a le confiere unos derechos precisos reconocidos por la ley Dichos derechos difieren de un lugar a otro y es...

Страница 31: ...icks Mail your order to the following address Phone 1 800 477 0457 Fax 508 481 0509 Kaz Inc Consumer Relations 250 Turnpike Road Southborough MA 01772 Please allow 10 days for shipping Order Informati...

Отзывы: