Quick Start Guide: FiberChek™ Sidewinder MPO Inspection Probe
Page 14
Document Num. 22122621, Rev. 100
December 2017
3
Chapter 3 Operation
To modify an Optical Setting on the Sidewinder
Step 1.
For best results, pan to the leftmost fiber in the Live Image mode.
Step 2.
From the Live Image mode, tap the touchscreen to enter the Menu.
Step 3.
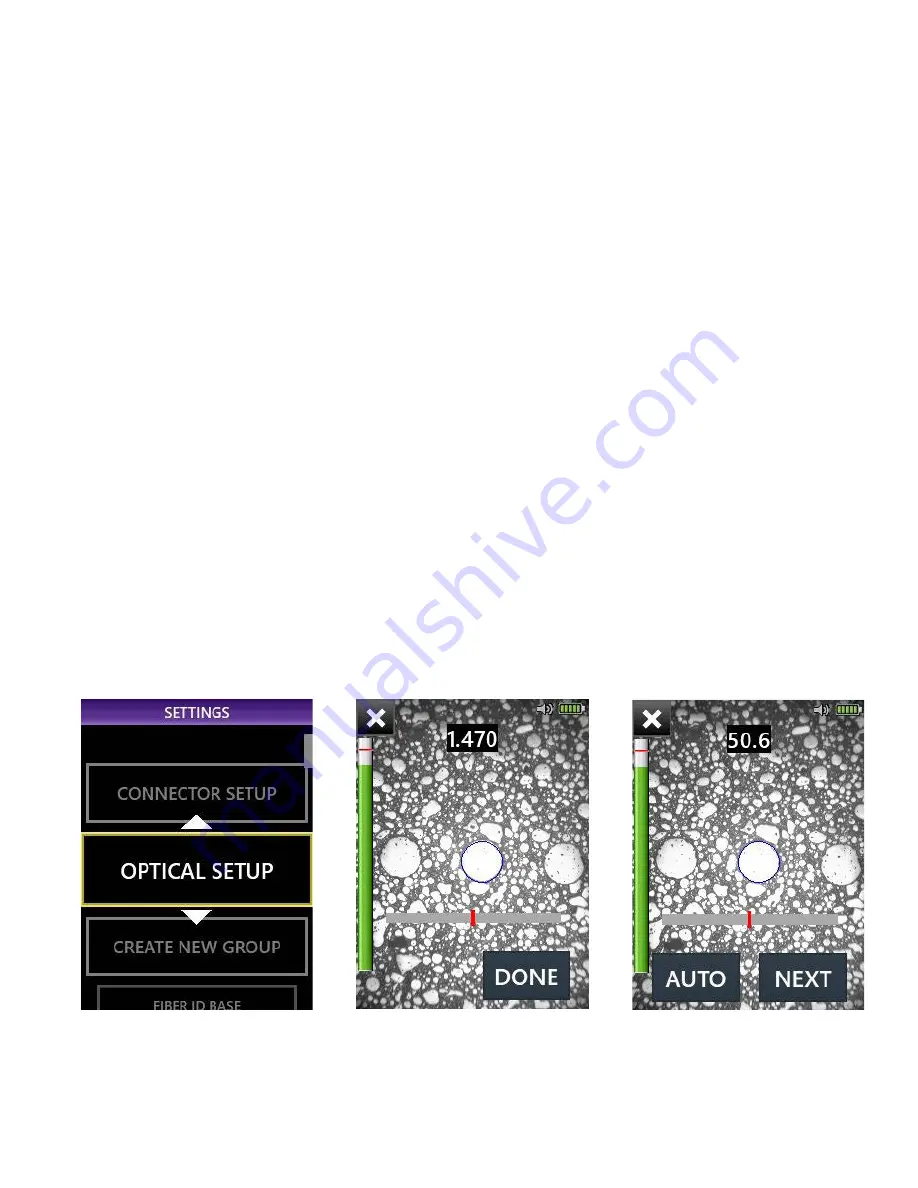
Scroll down to Optical Setup and press the Action Button, or tap the menu item to confirm (see
Figure 5).
Step 4.
Select either CREATE NEW Optical Setting or Cancel.
Step 5.
Sidewinder will locate a fiber in the array and place a blue circle around its circumference (see
Figure 6).
a.
The circle should be just inside the fiber’s edge
b.
To make the circle larger, push the focus wheel up or move the on-screen slider to the
right
c.
To make the circle smaller, push the focus wheel down or move the on-screen slider to
the left
Step 6.
Once the blue circle is aligned, press NEXT.
Step 7.
Press the AUTO button at the bottom-left of the screen; this will start the automatic lighting
adjustment (see Figure 7).
Step 8.
Sidewinder will search for the optimal lighting value; press DONE to finish.
Note:
You can discard your changes at any time by pressing the X in the upper-left corner of the screen.
Figure 5
Figure 6
Figure 7


