Rev. 3/19/2019
VDL-22.5, MANUAL
Copyright 2019 Vestil Manufacturing Corp.
Page 5 of 6
Record of Original Condition:
Before using the lifter for the first time, make a written record to document its appearance. Include
observations about all parts of the lifter: hardware/pins, chain, frame, lock components, chain loop plate, the
clamp arms, connecting arms, tags and labels. Thoroughly photograph the lifter, labels, and tags. Add the
photographs to the record. Attach the lifter to a drum by following the instructions in
Using the Lifter
on p. 4.
Describe how easily the chain loop plate slides up-and-down. This record establishes original condition. During
future inspections, compare your observations to the record to determine if the unit is in original condition. DO
NOT use the lifter unless it is in original condition. Purely cosmetic changes like damaged powder coat do not
constitute changes from normal condition. However, touchup paint should be applied wherever the finish is
damaged as soon as damage occurs.
Inspections & Maintenance:
Examine the following elements
before each use
1. Chain and chain loop plate: Check for cracks, warps, and severe wear. Check the plate for cracks, warps, and
thinning areas that could be produced by the chain rubbing against it. Lubricate the edges of the plate to allow it
to slide easily. Closely examine the pivot points where pins connect the plate to the connecting arms for changes.
Make sure that all links in the chain are undamaged.
2. Lock mechanism: Confirm that the lock works properly. Put the lifter in locked position. See
clamp arms should not be able to close (move towards each other) without first releasing the lock.
3. Frame, connecting arms, and clamp arms: Check welds and frame elements for breaks and severe wear.
Remove rust/corrosion with a brush or steel wool. Clean these areas and apply touchup paint. The frame should
be square and rigid.
4. Pivot points: Inspect all pivot points for severe wear, cracks, elongations, warps, etc. Lubricate pivot points
periodically.
5. Make a dated record of the inspection. Indicate whether each component inspected is in original condition.
Describe all repairs, adjustments and/or replacements. Only install manufacturer-approved replacement parts.
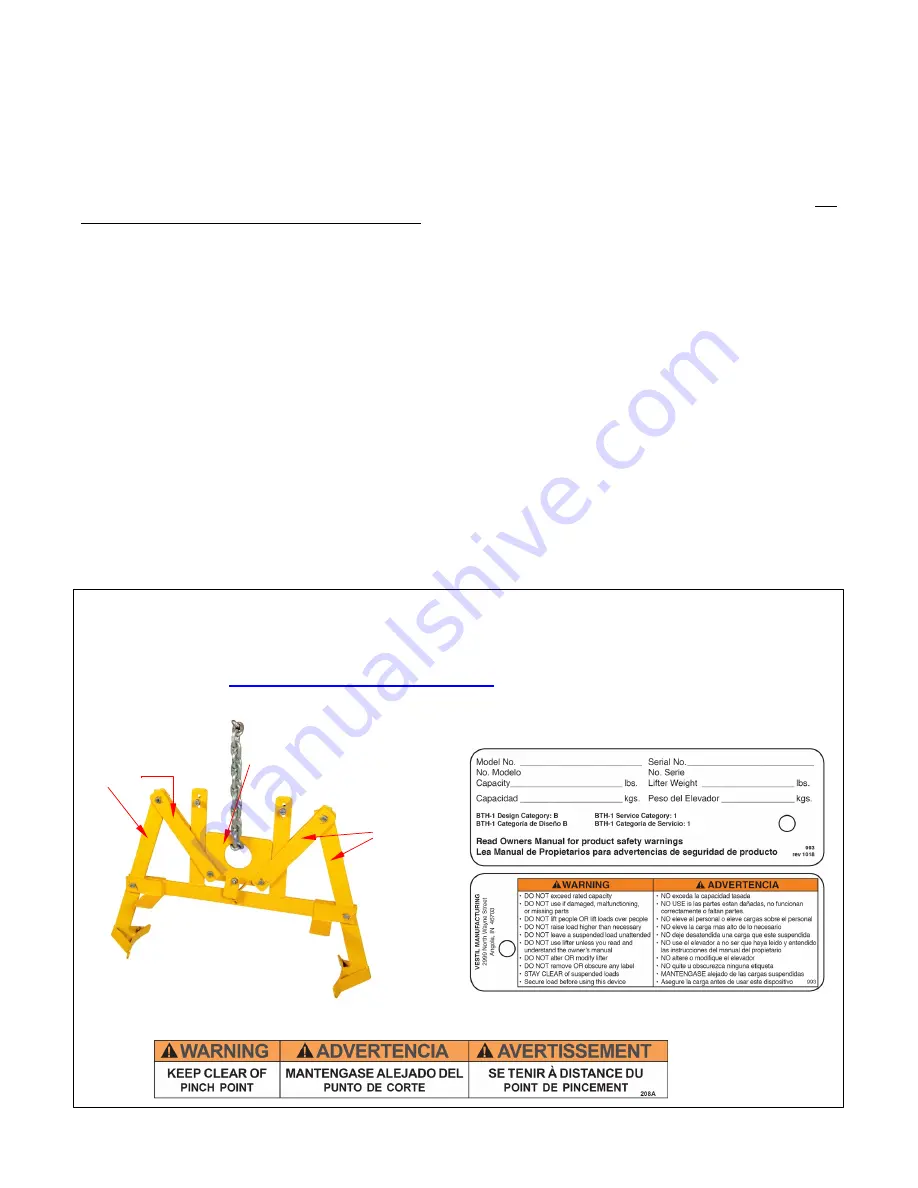
Labeling Diagram:
The unit should be labeled as shown in the diagram. However, label content and location are subject to
change so your product might not be labeled exactly as shown. Replace all labels that are damaged, missing, or
not easily readable (e.g. faded). Order replacement labels by contacting the
online at
http://www.vestilmfg.com/parts_info.htm
. Alternatively, you may request replacement parts
and/or service by calling (260) 665-7586 and asking the operator to connect you to the Parts Department.
A: Tag 993 (attached to chain loop plate with zip tie)
A
B (back
side of
connecting
arms)
B (front side
of connecting
arms)
B: Label 208 (applied to link arms)


