USER MANUAL
including:
Product Specifications
Installation Guide
Technical Setup Manual
Quality Care Instructions
Vertex
Страница 1: ...USER MANUAL including Product Specifications Installation Guide Technical Setup Manual Quality Care Instructions Vertex ...
Страница 2: ...nder copyright no part of this document may be reproduced stored in or introduced into a retrieval system or transmitted in any form or by any means electronic mechanical photocopying recording or otherwise or for any purpose without the express written permission of the author Product names mentioned in this document may be trademarks or registered trademarks of WipWare Inc or other hardware soft...
Страница 3: ...PAGE iii Contents Introduction 1 Product Specifications 2 Installation Guide 3 Technical Setup Manual 7 Quality Care Instructions 13 ...
Страница 4: ...strument for detecting oversize material or contamination on conveyor belts in real time without disrupting production This technology is autonomous and performs well in harsh industrial environments for process automation historical referencing or direct control With its rugged design and high rate of data collection you can analyze material as it passes through key areas of your process Using th...
Страница 5: ...A Consumption 20 W typical 30 W max Certification ESA Environmental Specifications Temperature 20 60 C 4 140 F Ingress IP66 NEMA 4 Shock 40 G Vibration 2 G rms 5 500 Hz Data Specifications Telemetry Oversize Particle Detection S or Material Colour Detection C Network Connection Ethernet Communication Protocols Modbus TCP OPC UA Analysis Rate 1800 images per hour File Types CSV Raw Data PDF PNG Rep...
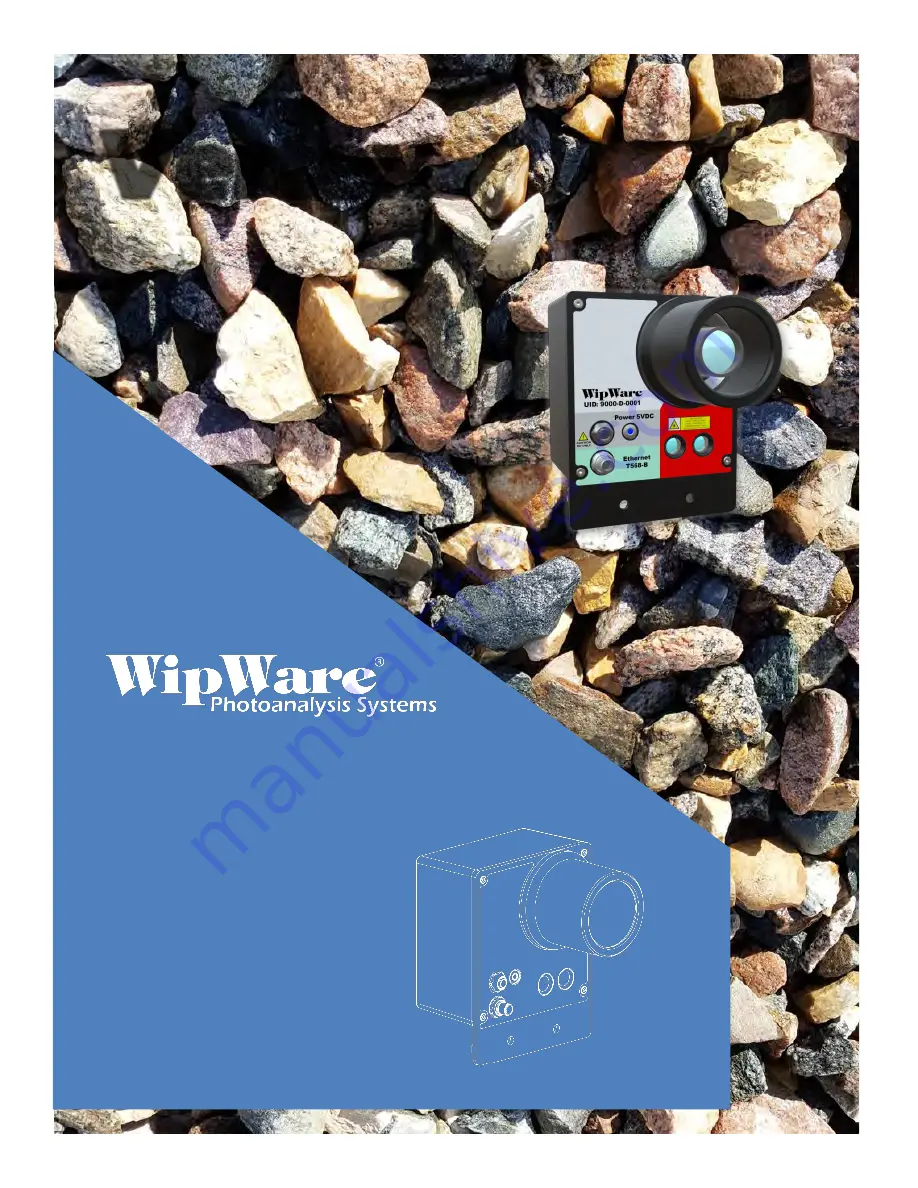
Страница 6: ... 2 Power receptacle 5VDC 3 Ethernet receptacle M12 connector 4 Mounting points 5 LIDAR distance sensor 6 Removable lens cover 7 Adjustable zoom focus aperture camera lens Included Components Item Description Quantity E 12 Field wired female DC power connector 4 pin 1 E 13 Field wired male Ethernet connector 8 pin 1 E 1 E 2 ...
Страница 7: ...r differentiation place the Vertex at the point in your process stream that you wish to monitor while avoiding dusty and non ideal conditions where possible When considering an installation location for your Vertex take into account the occasional service needed to the instrument to keep the unit s camera view free and clear of dust and debris If at all possible do not place the Vertex unit in an ...
Страница 8: ... must be at least 5V DC and must not exceed 5 125V DC Failure to meet these conditions can cause risk of fatal damage to the Vertex computer core The wiring diagram for this receptacle is below Ethernet The Vertex is network connected with standard Ethernet cable A field wired ingress protected connector is provided with the system in order to connect the Vertex to Ethernet Wire the provided conne...
Страница 9: ... constant as possible with a minimum material illumination of 10000 lux The required lumens will vary depending on the installation and sample area however typically 16000 lumens total 8000 per light will provide suitable lighting The goal of the lighting for Vertex C is to create even lighting and colour temperature across the entire sample area Each fixture that lights the material should have t...
Страница 10: ...ag on your preferred device It is recommended to use a Windows PC for first time setup 2 Open the Connect to System page in WipFrag 3 Your system should appear on the list of available systems If it doesn t appear use to add the system manually by its IP address and TCP port If this is the first connection the system name will be DELTA and its IP address will be 192 168 1 99 4 Simply tap on a syst...
Страница 11: ... settings while you monitor the image quality Do not touch the glass of the lens or lens cap throughout this procedure WARNING DO NOT ATTEMPT THIS PROCEDURE DURING HIGH WINDS RAIN OR OTHER WEATHER EVENTS AS THE SYSTEM S ENVIRONMENTAL PROTECTIONS ARE COMPROMISED WITHOUT THE LENS CAP ATTACHED 1 Carefully remove the lens cap from the Vertex by unscrewing it counter clockwise from the face of the came...
Страница 12: ...ture Set the aperture of the lens as high as possible closest to O while still maintaining good picture contrast and not creating bright white hot spots You want to see dark shadows around the edges of material particles but you still want to allow as much light as possible through the lens aperture Once you find a good aperture level carefully tighten the lock screw without changing your aperture...
Страница 13: ... Setup Wizard by clicking the Snap button to move forward This simple wizard will help you complete the configuration and get started with maximum size or material colour detection You can easily change the system configuration by running the wizard again Note When creating colour profiles for Vertex C systems you may find it helpful to adjust the red blue colour balance of the camera This is acce...
Страница 14: ...cess the various data files recorded by the system a If you wish to view these files copy them to a different location on your local computer before opening them b If you wish to remove these files from the system you may do so but the data will now be gone forever unless it has been backed up to another location c The system will automatically delete the oldest files to make room for new ones if ...
Страница 15: ...y find many resources and frequently asked questions on our website at www wipware com faqspage or contact us directly at WipWare Technical Support 685 Bloem Street North Bay Ontario Canada P1B 4Z5 Phone 705 472 2664 Monday to Friday 09 00 17 00 Eastern Time Fax 705 472 2645 Email support wipware com A Performance Guarantee can be given to installed systems at the discretion of a WipWare Technical...
Страница 16: ...s if the camera is located in an external location or exposed to low temperatures Alternatively an extremely damp microfiber cloth or paper towel is acceptable In this case after wiping the lens clean with a wet implement we suggest drying off the lens quickly to prevent dust from accumulating in the droplets left behind Using a micro fiber cloth or lightly drying the lens with paper towel works w...