background image

11

VX-520U O

PERATING

 M

ANUAL

Dual Watch

If you need to operate on a non-priority channel while still checking for
calls on the priority channel, the Dual Watch feature let’s you to do this
without using the scanner. When enabled, operation on any selected non-
priority remains normal as before, however, when a signal is received on
the priority channel or when you press the 

PTT

 switch, operation immedi-

ately shifts to the priority channel. The rate at which the Dual Watch fea-
ture samples the priority channel can be set by the user.

¦

To begin Dual Watch operation, first assign a priority channel as

described before, then select the non-priority channel you wish to
operate on.

¦

Press and hold the 

S/DW

 button until the second beep sounds,

DW

” (but not “

S

”) will appear at the top of the display.

¦

To manually shift to the priority channel, press the 

PTT

 switch. At

this time you make transmit, otherwise, if no signal is received within
2 seconds, operation will revert back to the other selected Dual Watch
channel.

¦

To turn off the Dual Watch Feature, press and hold the 

S/DW

 but-

ton again (“

DW

” will disappear in the display).

O

PERATION

ACENT – Revenda Autorizada VERTEX | Locação | Vendas | Assistência Técnica | VENDAS: 0800 77-55-200 ou [email protected]

www.radio-vertex.com.br

Содержание VX-520U

Страница 1: ...L 33166 U S A YAESU EUROPE B V P O Box 75525 1118 ZN Schiphol The Netherlands YAESU UK LTD Unit 12 Sun Valley Business Park Winnall Close Winchester Hampshire SO23 0LB U K YAESU GERMANY GmbH Am Kronberger Hang 2 D 65824 Schwalbach Germany VERTEX STANDARD HK LTD Unit 5 20 F Seaview Centre 139 141 Hoi Bun Road Kwun Tong Kowloon Hong Kong ACENT Revenda Autorizada VERTEX Locação Vendas Assistência Téc...

Страница 2: ...oss IMPORTANT NOTICE The following device operating configurations must be satisfied rThis radio is restricted to occupational use work related operations only where the radio operator must have the knowledge to control its RF exposure conditions rThe radio must be used with a maximum operating duty cycle not exceeding 50 in typical Push to Talk configurations rWhen transmitting hold the radio in ...

Страница 3: ...e a four mode display with channel name or number up right or inverted for easy viewing when on your belt selective channel scanning adjust able pause priority scanning and variable transmitter power output Other user selectable features include push button display illumination 2 tone decoder enable disable with optional F2D 5 Unit installed and manual squelch override The VX 520U is easily progra...

Страница 4: ... 2 seconds but less than 4 seconds activates functions as programmed by your dealer and determined by your system requirements See PRE PROGRAMMED FUNCTIONS page 13 Pressing and holding this button more than 4 seconds inverts the LCD display to either frontward or backward facing readout the back ward display is convenient for viewing when wearing the transceiver on your belt à A B Toggle Switch Th...

Страница 5: ...ts the operating channel If a channel is selected that is not available for operation is displayed accompanied by a rapid warning beeper 2 beeps sec Æ Antenna Jack This threaded type jack accepts the supplied flexible antenna Any other antenna types used here must be designed for the programmed operating frequencies Ç Liquid Crystal Display In addition the channel number name the display includes ...

Страница 6: ...hannel to be heard This may be used to hear weak stations whose signals would not normally open the squelch Do this to pre adjust the VOLume control before receiving calls With Selective Calling Option When the two tone sequential decoder unit F2D 5 is installed and a selective call has been received CALL indicator on pressing and holding this button more than 2 seconds but less than 4 seconds wil...

Страница 7: ...button Slide this button in the direction of the arrow upward for battery re moval Ä EAR and MIC Jacks These jacks primarily intended for use with the optional MH 45E2B Ex ternal Speaker Microphone An external earphone can be used in the larger jack in which case the internal speaker will be disabled When these jacks are not used make sure the plastic cap and its two screws are in place to protect...

Страница 8: ...ctive soft or hard case if used Grasp the transceiver with your left hand so your palm is over the speaker and your thumb is on the Battery Release Button Move the button in the direction indicated by the arrowhead while using your right hand to slide the battery pack toward the side with the button The battery pack should slide smoothly out of its track To replace the Ni Cd pack repeat the second...

Страница 9: ...yed along with a rapid 2 beeps sec beeping tone the selected channel position is not available for operation r To transmit wait until the channel is clear BUSY TX LED off then press in the PTT switch on the side of the transceiver while speaking across the face of the radio A clear normal voice will provide the best quality transmission For maximum battery life select low power output covered late...

Страница 10: ...above the channel indicating the scanner is still active but paused During this pause you can press the PTT switch and talk to the station Otherwise scanning will resume a few seconds after the signal is no longer present While scanning if you momentarily press the PTT switch opera tion automatically shifts to a default channel This default channel can be set to the priority channel both P and S D...

Страница 11: ...en on again to return to normal operation Low Battery Power Indication When the rechargeable Ni Cd battery pack voltage reaches a low level the indicator appears at the lower right corner of the LCD and the BUSY TX indicator will blinks red Immediately remove the Ni Cd pack and install a freshly charged battery pack or insert the radio into the charging stand for a complete recharge cycle If you p...

Страница 12: ...rner of the dis play whenever this channel is selected along with an accompanying beep If you wish to change the priority status 1 Delete the priority status by pressing and holding the S DW button more than 1 second 2 Rotate the CH knob to select the new priority channel then assign the priority status by pressing and holding the S DW button for more than 1 second After you have assigned the prio...

Страница 13: ...er To begin Dual Watch operation first assign a priority channel as described before then select the non priority channel you wish to operate on Press and hold the S DW button until the second beep sounds DW but not S will appear at the top of the display To manually shift to the priority channel press the PTT switch At this time you make transmit otherwise if no signal is received within 2 second...

Страница 14: ...o assist you in recognizing channels by name rather than by memorizing channel numbers and their assignments Talk Around This feature enables simplex operation on semi duplex channels the trans mit frequency becomes the same as the receive frequency regardless of any programmed offset for the channel Note This feature has no effect on simplex channels Optional Accessory Voice Encryption FVP 22 Whe...

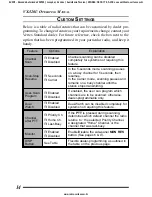
Страница 15: ...ference check the box next to the function that has been assigned to the button on your particular radio and keep it handy Press and Hold 2 seconds Press and Hold 4 seconds DISP Button r HI LOW TX Power r Alpha Tag r Talk Around r Accessory Voice Encryption r Accessory ENI Toggles the Top Panel LCD display between normal and inverted readout Press and Hold 2 second Press and Hold 4 second Press an...

Страница 16: ...y channel until the station stops transmitting User Scan Program r Enabled r Disabled If enabled the user can program which channels are to be scanned otherwise dealer programmable only Dual Watch r Enabled r Disabled Dual Watch can be disabled completely for systems not requiring this feature Channel after PTT r Priority Ch r Home Ch r Last Busy If the PTT is pressed during scanning determines wh...

Страница 17: ...s ac cording to the drawing below For example to limit CH selection to chan nels 1 4 insert one metal stop at the slot 15 Low channel edge channel 1 minus two position and the other at the slot 3 High channel edge channel 4 minus one position When done press the CH selector knob back on the shaft align the indicator of the CH knob to channel 1 then tighten the setscrew Note The use of mechanical s...

Страница 18: ...herefore be very poor under those conditions However if you must operate from indoors moving next to a window will improve communications In view of the factors just discussed you can easily see the potential benefit of holding the radio up high near your mouth while transmitting In this way the antenna is high and clear and coverage is best On final note regarding propagation is useful in improvi...

Страница 19: ...ehicular Charger VCM 1 Mobile Mounting Bracket for VAC 520 CS 500B Overnight Desktop Charger 120 VAC CS 500C Overnight Desktop Charger 240 VAC FBA 19 6 AA Size Battery Case FVP 22 Encryption Unit F2D 5A B Two Tone Sequential Decoder FTT 7D DTMF Keypad Tone Generator w Decoder VPL 1D Radio to Computer Programming Cable w Software VTP 20 VX Trunk II VX Trunking Portable Logic Board CLIP 4 Belt Clip ...

Страница 20: ...eserved No portion of this manual may be reproduced without the permission of VERTEX STANDARD CO LTD E C 0 2 1 U 1 0 0 0102A 0T ACENT Revenda Autorizada VERTEX Locação Vendas Assistência Técnica VENDAS 0800 77 55 200 ou acent radio vertex com br www radio vertex com br ...

Отзывы: