50
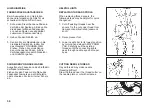
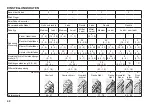
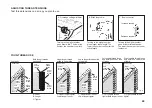
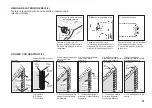
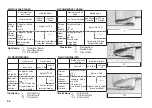
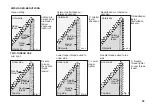
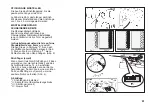
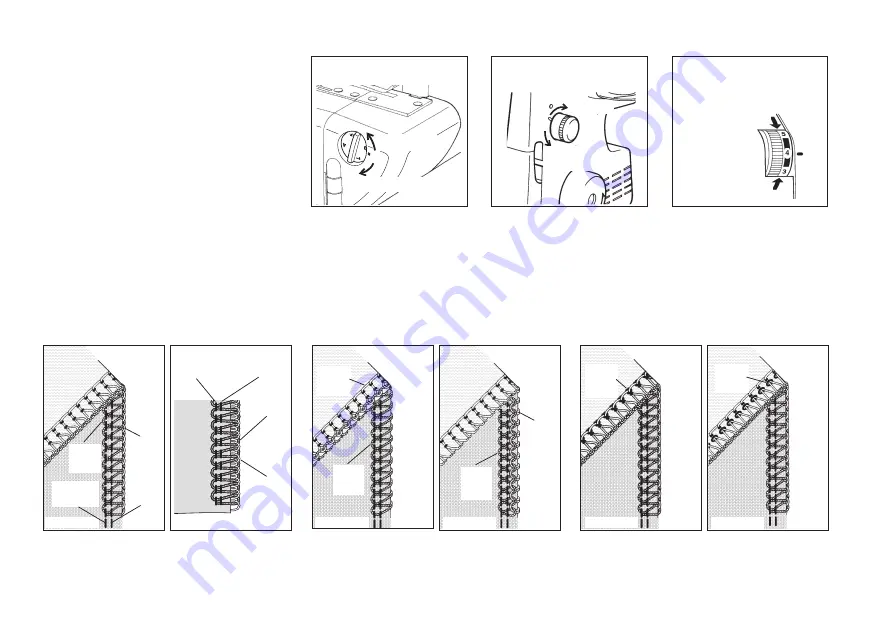
ADJUSTING THREAD TENSIONS
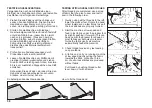
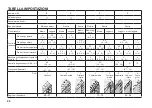
Test thread tensions on a scrap you plan to use.
FOUR-THREAD USE
Just right.
Fig. 2
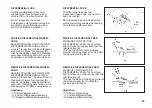
Fig. 3
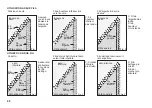
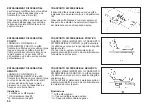
Fig. 4
Fig. 5
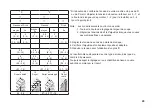
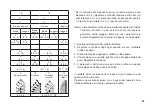
Upper looper thread pulled
to under side.
Both looper threads hanged
Lower looper thread pulled
to top side.
Left needle thread loose
and visible on under side of
fabric.
Right needle thread loose
and visible on under side of
fabric.
C: Upper looper tighter
Lower looper looser
A: Wider
B: Longer
C: Tighter
C: Upper looper looser
Lower looper tighter
C: Left needle thread tighter
Both looper looser
C : R i g h t n e e d l e t h r e a d
tighter
Under side
Top side
Upper
looper
thread
Lower
looper
thread
Left
needle
thread
Right
needle
thread
Under side
Top side
Upper
looper
thread
Lower
looper
thread
Under side
Top side
Under side
Top side
Upper
looper
thread
Lower
looper
thread
Left
needle
thread
Right
needle
thread
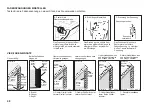
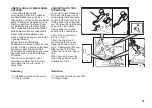
A. Overedge cutting width dial
B. Stitch length dial
Turning to the higher number gives
longer stitch length. The lower the
number, the shorter the stitch length.
Turning to the higher number gives
wider width. The lower the number,
the narrower the width.
Fig. 1
Under side
Top side
Upper
looper
thread
Lower
looper
thread
Left
needle
thread
Right
needle
thread
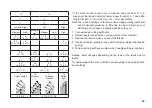
C. Tension control
Turning to the higher number gives a
tighter thread tension. The lower the
number, the looser the tension.
longer
shorter
narrower
wider
Decrease tension
Increase tension
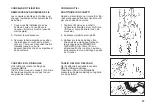
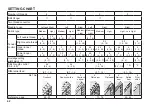
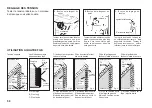
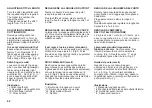
REGLAGE DES TENSION
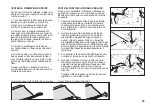
Tester la tension idéale sur un morceau
du tissu que vous allez
coudre.
UTILISATION A QUATRE FILS
Tension correcte
Fig. 2
Fig. 3
Fig. 4
Fig. 5
Fil du boucleur supérieur
tiré vers l’envers
Les fils des boucleurs
dépassent tous les 2
Fil du boucleur inférieur
tiré sur le dessus
Fil de l’aiguille gauche
lâche et visible a l’envers
Fil de l’aiguille droite
lâche et visible à l’envers
A: Plus large
B: Plus long
C: Plus tendu
Envers du tissu
Côté endroit
Fil-
crochet
droit
Fil-
crochet
gauche
Fil-
aiguille
gauche
Fil-
aiguille
droit
Envers du tissu
Côté endroit
Fil-
crochet
droit
Fil-
crochet
gauche
Envers du tissu
Côté endroit
Envers du tissu
Côté endroit
Fil-
crochet
droit
Fil-
crochet
gauche
Fil-aiguille
gauche
Fil-
aiguille
droit
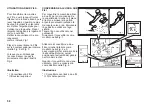
A. Bouton de la largeur du
surjet
B. Bouton de la longueur du
point
Tourner vers les numéros les plus
grand vous donnera de plus long
points. Vers les numéros plus
petits, votre longueur de points
sera plus courte.
Tourner vers les numéros les plus
grand vous donnera une plus
grande largeur de points. Vers les
numéros plus petits, votre largeur
de points sera plus étroite.
Fig. 1
Envers du tissu
Côté endroit
Fil-
crochet
droit
Fil-
crochet
gauche
Fil- aiguille
gauche
Fil-
aiguille
droit
Plus étroit
Plus large
Diminuer la tension
Augmenter la tension
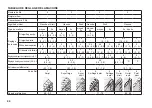
C. Bouton de réglage de
tension
Tourner le bouton de tension sur
un chiffre supérieur (vers le
bas)
augmente la tension. Tourner le
bouton de tension sur un
chiffre
inférieur (vers le haut) la diminue.
plus court
C: Plus de tension sur le
fil du boucleur supérieur
Moins de tension sur le fil
du boucleur inférieur
C: Moins de tension sur le
fil du boucleur supérieur
Plus de tension sur le fil
du boucleur inférieur
C: Plus de tension sur le
fil de l’aiguille gauche
Moins de tension sur les
2 boucleurs
C: Plus de tension sur le
fil de l’aiguille droite
plus long

