


K.
Stationary appliances not fitted with means for disconnection
from the supply mains having a contact separation in all
poles that provide full disconnection under over voltage
category III, the instructions state that means for
disconnection must be incorporated in the fixed wiring in
accordance with the wiring rules.
DESCRIPTION
The Eclipse 100mm axial extract fans are suitable for domestic bathrooms and W.C’s. The Eclipse
150mm axial extract fans are suitable for domestic kitchens and utility rooms. They are available as wall
or panel mounted models with shutter, pullcord & timer combinations.
ACCESSORIES
(not supplied)
WALL FITTING KIT
A range of 100mm and 150mm wall kits are available
for installing into most walls using telescopic liners
supplied.
A. INSTALLATION
PANEL MOUNTING
1. Cut a 105mm diameter hole for 100mm fans or a 155mm diameter hole for 150mm fans through the panel.
2. Remove the Inner Grille [A]. Insert a small bladed screwdriver between the bottom blade of the Inner Grille and
the Outer Bezel [B]. Gently lever the bottom grille blade upwards and away from the Outer Bezel.
3. Remove Outer Bezel. Remove the two screws retaining the Bezel to the Base Housing [D]. Please note that
the Outer Bezel is also secured into position via the central section and will require a small force to remove it.
4. Remove the Cable Grommet [C], and push the cable through the grommet including the outer core secondary
insulation. Please ensure the correct cable is used as outlined in
Section C WIRING
.
5. Slide the Base Housing into the hole in the panel and secure into position using screws and fixings provided.
6. Ensure the fan blade rotates freely.
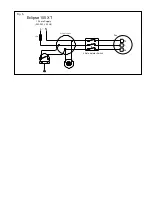
7. Select and follow the appropriate wiring diagram in
Section C WIRING
.
8. Replace the Outer Bezel ensuring the centre section positively clips into the Base Housing by carefully pushing
from the centre.
9. Switch the mains power supply on and check the fan is operating correctly.
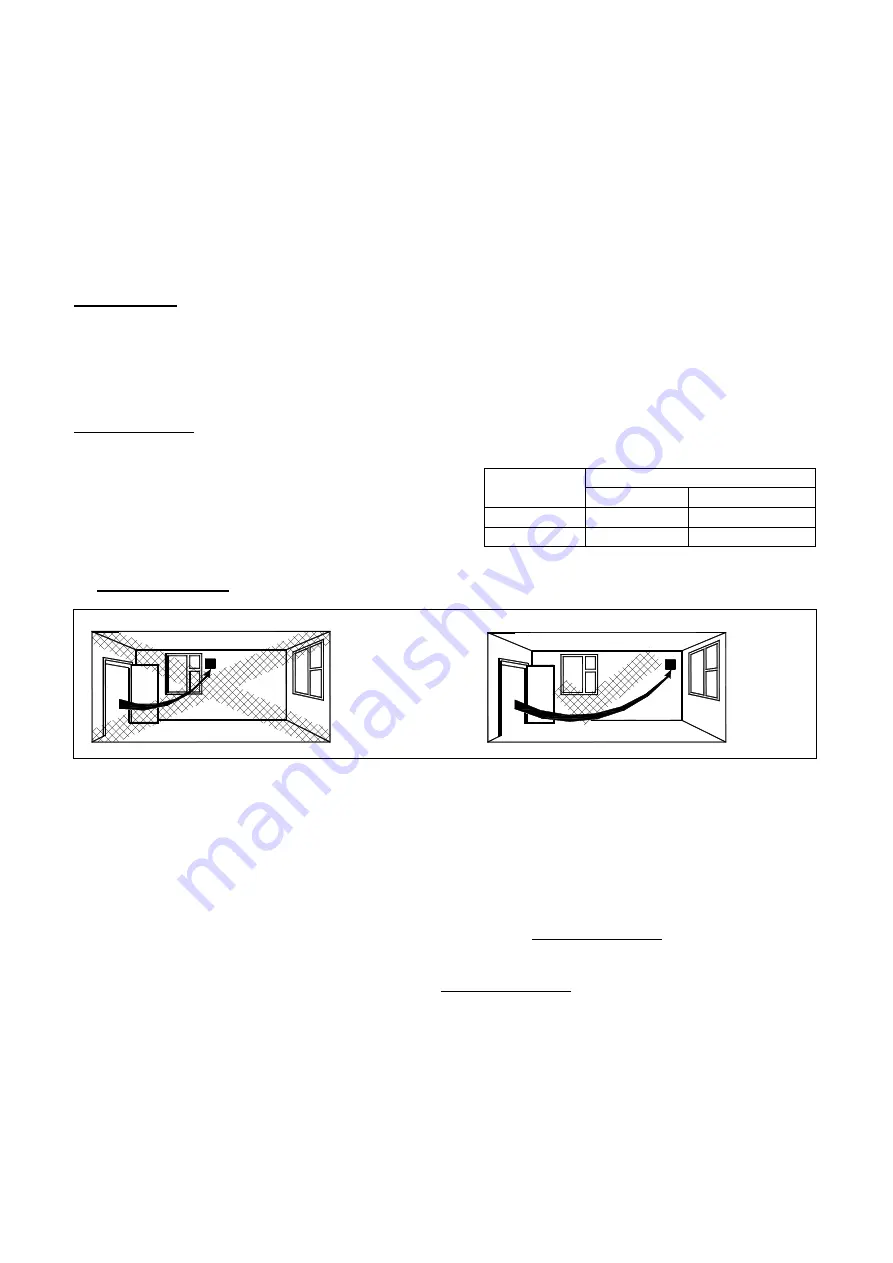
WALL MOUNTING
(For wall installations see accessories table for a suitable wall kit).
1. Cut a 115mm diameter hole for 100mm fans or a 170mm diameter hole for 150mm fans through the wall and
insert the wall sleeve and cement both ends into position flush with the wall faces. The wall sleeve should be
angled downwards away from the fan to allow any condensation to drain to the outside wall.
2. Fix the outer grille as required, ensuring the louvres are pointing downwards.
Fan
Size
Stock Reference
White
Brown
100mm
254102
254100
150mm
140902A
140903A
Содержание Eclipse 100X
Страница 7: ......