background image


VDPLP46B


11.01.2010


©Velleman nv


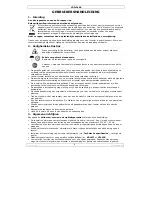
4.


Installation 

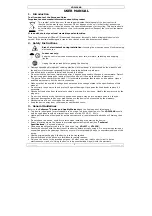
a) Fixture


Install the 

VDPLP46B

 in a suitable location. 


Disconnect the parcan if not used. 


The parcan is DMX-controlled through a 3-pin XLR (1 = ground; 2 = data-; 3 = data)+. 


b) Fuse


Only fit or replace a fuse when the device is unplugged from the mains. 


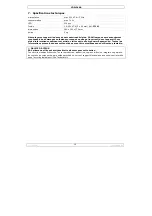
Replace a blown fuse with a fuse of the same type and rating (see “

Technical Specifications

”): 

1. Remove the fuse holder at the back using an appropriate screwdriver. 

2. Remove the old fuse and install a new one. 

3. Replace the fuse holder. 


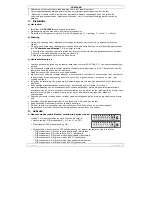
c) Mounting the Device 


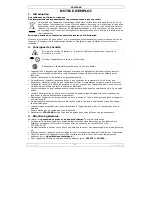
Have the device installed by a qualified person, respecting EN 60598-2-17 and all other applicable 

norms. 


The carrying construction must be able to support 10 times the weight of the device for 1 hour without 

deforming. 


The installation must always be secured with a secondary attachment e.g. a safety cable. 


Never stand directly below the device when it is being mounted, removed or serviced. Have a qualified 

technician check the device once a year and once before you bring it into service. 


Install the device in a location with few passers-by that is inaccessible to unauthorised persons. 


Overhead mounting requires extensive experience: calculating workload limits, determining the 

installation material to be used… Have the material and the device itself checked regularly. Do not 

attempt to install the device yourself if you lack these qualifications as improper installation may result 

in injuries. 


Adjust the desired inclination angle via the mounting bracket and tighten the bracket screws. 


Make sure there is no flammable material within a 0.5 m radius of the device. 


Have a qualified electrician carry out the electric connection. 


Connect the device to the mains with the power plug. Do not connect it to a dimming pack. 


The installation has to be approved by an expert before the device is taken into service. 

5.


Use 

a.


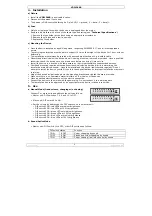
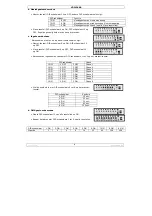
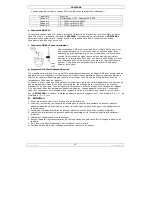
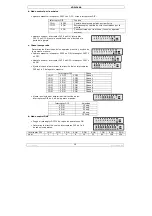
Manual Mode (fixed colours, changing w/o chasing) 


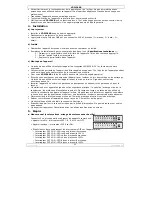
Connect 2 or more units and address the units as follows: 


Master unit: DIP switches 7, 8, 9 and 10 to OFF. 


Slave unit: DIP switch 9 to ON. 


Set the colours by addressing the DIP switches on the master unit: 

o


DIP switch 1 ON: red LEDs at medium brightness. 

o


DIP switch 2 ON: red LEDs at 100% brightness. 

o


DIP switch 3 ON: green LEDs at medium brightness. 

o


DIP switch 4 ON: green LEDs at 100% brightness. 

o


DIP switch 5 ON: blue LEDs at medium brightness. 

o


DIP switch 6 ON: blue LEDs at 100% brightness. 


b.


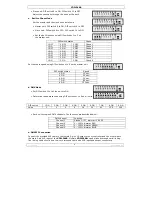
Sound-Active Mode 


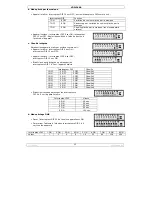
Master unit: DIP switch 10 to OFF; other DIP switches as follows: 


DIP switch status 

Function 

7 ON 

8 OFF 

Colour changing by sound 

7 OFF 

8 ON 

Strobe and colour changing by sound 

7 ON 

8 ON 

Colour chasing (in all slave units) by sound 


Содержание PAR46

Страница 1: ...GHT LED PAR46 ULTRAHELDERE LED PAR46 PAR46 À LED ULTRABRILLANTES PAR46 CON LEDs ULTRABRILLANTES SEHR HELLER LED PAR46 USER MANUAL 2 GEBRUIKERSHANDLEIDING 6 NOTICE D EMPLOI 11 MANUAL DEL USUARIO 16 BEDIENUNGSANLEITUNG 21 ...

Страница 2: ...e electric connection Make sure that the available voltage does not exceed the voltage stated in the specifications of this manual Do not crimp the power cord and protect it against damage Have an authorised dealer replace it if necessary Disconnect the device from the mains to clean it or when it is not in use Handle the power cord by the plug only Do not look directly at the light source as sens...

Страница 3: ...he installation material to be used Have the material and the device itself checked regularly Do not attempt to install the device yourself if you lack these qualifications as improper installation may result in injuries Adjust the desired inclination angle via the mounting bracket and tighten the bracket screws Make sure there is no flammable material within a 0 5 m radius of the device Have a qu...

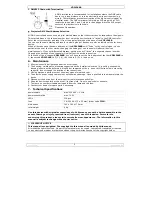
Страница 4: ...ll units Each unit occupies 4 DMX channels The functions are described below DMX channel Function Channel 1 Strobe 1 127 dimmer 128 255 Channel 2 0 100 dimmer RED Channel 3 0 100 dimmer GREEN Channel 4 0 100 dimmer BLUE e DMX512 Connection Connect the provided XLR cable to the female 3 pin XLR output of your controller and the other side to the male 3 pin XLR input of the VDPLP46B Multiple VDPLP46...

Страница 5: ...cond VDPLP46B to 5 1 4 the third to 9 5 4 and so on 6 Maintenance 1 All screws should be tightened and free of corrosion 2 The housing visible parts mounting supports and the installation location e g ceiling suspension trussing should not be deformed modified or tampered with e g do not drill extra holes in mounting supports do not change the location of the connections 3 Moving mechanic parts mu...

Страница 6: ...steld aan temperatuurschommelingen Wacht tot het toestel op kamertemperatuur gekomen is Dit toestel valt onder beschermingsklasse I wat wil zeggen dat het toestel geaard moet zijn Een geschoolde technicus moet de elektrische aansluiting verzorgen De beschikbare netspanning mag niet hoger zijn dan de spanning in de specificaties achteraan de handleiding De voedingskabel mag niet omgeplooid of besch...

Страница 7: ...et toestel controleren door een geschoolde technicus voor u het in gebruik neemt en laat het 1 x per jaar volledig nakijken Installeer dit toestel op een plaats waar niemand langs moet lopen kan neerzitten of het toestel kan aanraken Een degelijke praktijkervaring is vereist voor de plaatsing van dit toestel U moet de maximumbelasting van de draagconstructie kunnen berekenen weten welk constructie...

Страница 8: ...op OFF Slave toestel DIP schakelaar 9 op OFF DIP schakelaar 10 op ON Adresseer de ingebouwde chase met DIP schakelaars 1 tot 3 op het master toestel DIP schakelaar Chase 1 OFF 2 OFF 3 OFF Chase 1 1 ON 2 OFF 3 OFF Chase 2 1 OFF 2 ON 3 OFF Chase 3 1 ON 2 ON 3 OFF Chase 4 1 OFF 2 OFF 3 ON Chase 5 1 ON 2 OFF 3 ON Chase 6 1 OFF 2 ON 3 ON Chase 7 1 ON 2 ON 3 ON Chase 8 Stel de snelheid in met DIP schake...

Страница 9: ...n en lees het af op de display onderaan uw VDPLP46B U kunt één enkel startadres gebruiken voor een groep toestellen of u kunt per toestel een nieuw startadres ingeven Wanneer u één enkel startadres instelt zullen alle toestellen luisteren naar hetzelfde kanaal Met andere woorden wanneer u de instellingen voor 1 kanaal verandert zullen alle toestellen er tegelijk op reageren Wanneer u verschillende...

Страница 10: ... verkeerd gebruik van dit toestel Voor meer informatie over dit product zie www hqpower eu De informatie in deze handleiding kan te allen tijde worden gewijzigd zonder voorafgaande kennisgeving AUTEURSRECHT Velleman nv heeft het auteursrecht voor deze handleiding Alle wereldwijde rechten voorbehouden Het is niet toegestaan om deze handleiding of gedeelten ervan over te nemen te kopiëren te vertale...

Страница 11: ...r des dommages attendre jusqu à ce que l appareil ait atteint la température ambiante avant de l utiliser Cet appareil ressort à la classe de protection I ce qui implique que l appareil doit être mis à la terre Un technicien qualifié doit établir la connexion électrique La tension réseau ne peut pas dépasser la tension mentionnée dans les spécifications à la fin de cette notice Le câble d alimenta...

Страница 12: ...reil pour l enlever ou lors du montage ou du nettoyage Un technicien qualifié doit réviser l appareil avant la mise en service Organiser une révision minutieuse annuelle Installer l appareil à un endroit où personne ne peut passer ou s asseoir et où personne ne peut le toucher L installation de cet appareil exige une solide expérience pratique le calcul de la charge max de la construction les maté...

Страница 13: ...sur OFF Appareil esclave interrupteur DIP 9 sur OFF interrupteur DIP 10 sur ON Établir la chenille intégrée en adressant les interrupteurs DIP 1 à 3 sur l appareil maître Interrupteur DIP Chenille 1 OFF 2 OFF 3 OFF Chenille 1 1 ON 2 OFF 3 OFF Chenille 2 1 OFF 2 ON 3 OFF Chenille 3 1 ON 2 ON 3 OFF Chenille 4 1 OFF 2 OFF 3 ON Chenille 5 1 ON 2 OFF 3 ON Chenille 6 1 OFF 2 ON 3 ON Chenille 7 1 ON 2 ON...

Страница 14: ...esse de départ numérique indique le numéro de canal sur lequel l appareil écoute le contrôleur DMX Déterminez cette adresse avec les interrupteurs DIP au dos de l appareil Vous avez le choix entre une seule adresse de départ pour toute une série d appareils ou une adresse de départ par appareil Dans le cas d une seule adresse tous les appareils écouteront les mêmes signaux sur un seul canal Tous l...

Страница 15: ...incorrect de cet appareil Pour plus d information concernant cet article visitez notre site web www hqpower eu Toutes les informations présentées dans cette notice peuvent être modifiées sans notification préalable DROITS D AUTEUR SA Velleman est l ayant droit des droits d auteur pour cette notice Tous droits mondiaux réservés Toute reproduction traduction copie ou diffusion intégrale ou partielle...

Страница 16: ...ayor que la tensión indicada en las especificaciones No aplaste el cable de alimentación y protéjalo contra posibles daños causados por algún tipo de superficie afilada Si es necesario pida a su distribuidor reemplazar el cable de alimentación Desconecte siempre el aparato si no va a usarlo durante un largo período de tiempo o antes de limpiarlo Tire siempre del enchufe para desconectar el cable d...

Страница 17: ... de este aparato exige una sólida experiencia práctica debe poder calcular la carga máx del soporte debe conocer los materiales necesarios para la instalación etc De vez en cuando una verificación de la estructura y del aparato mismo debe ser llevada a cabo por un técnico especializado No intente instalar este aparato si no tiene las cualificaciones requeridas una instalación incorrecta puede caus...

Страница 18: ...P 10 en OFF Aparato esclavo interruptor DIP 9 en OFF interruptor DIP 10 en ON Ajuste el chase al determinar la dirección de los interruptores DIP de 1 a 3 del aparato maestro Interruptor DIP Chase 1 OFF 2 OFF 3 OFF Chase 1 1 ON 2 OFF 3 OFF Chase 2 1 OFF 2 ON 3 OFF Chase 3 1 ON 2 ON 3 OFF Chase 4 1 OFF 2 OFF 3 ON Chase 5 1 ON 2 OFF 3 ON Chase 6 1 OFF 2 ON 3 ON Chase 7 1 ON 2 ON 3 ON Chase 8 Ajuste ...

Страница 19: ...to reaccionará a las señales DMX del controlador DMX Determine esta función con los interruptores DIP de la parte trasera del aparato Es posible elegir entre una sola dirección inicial para toda una serie de aparatos o una dirección inicial por aparato Con una sola dirección inicial para una serie de aparatos todos los aparatos reaccionarán sincronizadamente a la misma señal Por lo tanto cambiar l...

Страница 20: ...es causados por un uso indebido de este aparato Para más información sobre este producto visite nuestra página www hqpower eu Se pueden modificar las especificaciones y el contenido de este manual sin previo aviso DERECHOS DE AUTOR Velleman NV dispone de los derechos de autor para este manual del usuario Todos los derechos mundiales reservados Está estrictamente prohibido reproducir traducir copia...

Страница 21: ...rät solange ausgeschaltet bis es die Zimmertemperatur erreicht hat Der Aufbau des Gerätes entspricht der Schutzklasse I Gemäß den Vorschriften muss das Gerät geerdet sein Der elektrische Anschluss darf nur von einer Fachkraft durchgeführt werden Vergewissern Sie sich dass die anzuschließende Netzspannung nicht höher ist als die Netzspannung beschrieben in dieser Bedienungsanleitung Achten Sie dara...

Страница 22: ...en Normen installieren Die Konstruktion muss während einer Stunde eine Punktlast von maximal 10 x dem Gewicht des Gerätes tragen können ohne dass Verformung verursacht wird Das Gerät muss immer mit einer zweiten Befestigung z B mit einem Sicherheitskabel gesichert werden Stehen Sie während der Montage Entfernung oder Wartung nie direkt unter dem Gerät Lassen Sie das Gerät jährlich und vor der Inbe...

Страница 23: ...t dem Schalter auf der Rückseite c Eingebautes Chase Definieren Sie die Adresse der Master und Slave Geräte wie folgt Master Gerät DIP Schalter 9 auf ON DIP Schalter 10 auf OFF Slave Gerät DIP Schalter 9 auf OFF DIP Schalter 10 auf ON Definieren Sie die Adresse des eingebauten Chases mit DIP Schaltern 1 bis 3 am Master Gerät DIP Schalter Chase 1 OFF 2 OFF 3 OFF Chase 1 1 ON 2 OFF 3 OFF Chase 2 1 O...

Страница 24: ...e sie vom Display auf dem Fuß des VDPLP46B Sie können mehrere Geräte auf eine einzelne Startadresse definieren oder Sie können pro Gerät eine neue Startadresse eingeben Werden mehrere Geräte auf eine Startadresse definiert so funktionieren alle Geräte synchron Mit anderen Worten wenn Sie die Einstellungen für 1 Kanal verändern ändern sich die Einstellungen aller Kanäle Definieren Sie mehrere Adres...

Страница 25: ...Haftung für Schaden oder Verletzungen bei falscher Anwendung dieses Gerätes Für mehr Informationen zu diesem Produkt siehe www hqpower eu Alle Änderungen ohne vorherige Ankündigung vorbehalten URHEBERRECHT Velleman NV besitzt das Urheberrecht für diese Bedienungsanleitung Alle weltweiten Rechte vorbehalten Ohne vorherige schriftliche Genehmigung des Urhebers ist es nicht gestattet diese Bedienungs...

Страница 26: ...ij ontdekking van een gebrek tot één jaar na aankoop en levering of een vervangend product tegen 50 van de kostprijs of terugbetaling van 50 bij ontdekking na één jaar tot 2 jaar Valt niet onder waarborg alle rechtstreekse of onrechtstreekse schade na de levering veroorzaakt aan het toestel bv door oxidatie schokken val stof vuil vocht en door het toestel alsook zijn inhoud bv verlies van data ver...

Страница 27: ...m Original Kaufbeleg vor Fügen Sie eine deutliche Fehlerumschreibung hinzu Hinweis Um Kosten und Zeit zu sparen lesen Sie die Bedienungsanleitung nochmals und überprüfen Sie ob es keinen auf de Hand liegenden Grund gibt ehe Sie das Gerät zur Reparatur zurückschicken Stellt sich bei der Überprüfung des Geräts heraus dass kein Geräteschaden vorliegt könnte dem Kunden eine Untersuchungspauschale bere...

Отзывы: