


NVR3
V. 01 – 07/08/2013
5
©Velleman nv
Rear panel
eSATA
Connect to a storage device that supports the eSATA interface. For example, an external hard
disk or a disk array.
Note:
Make sure that the disk array supports Linux® to ensure proper functioning.
HDMI
Connect to a monitor that supports high-definition video output (HDMI port).
Note:
Use an appropriate adapter (not incl.) to connect a monitor with VGA or composite
connectors.
INTERNET
(WAN)
Connect to internet via an 8P8C network cable.
1 – 4 (LAN)
Connect to local IP cameras via an 8P8C network cable. The LAN ports support PoE (Power over
Ethernet), therefore no power adapters are required for the cameras.
On/off switch. Set to I to switch the NVR on. Set to O to switch off.
DC48V IN
Connect to the power supply adapter (incl.).
7.
Connection Diagram
Refer to the illustrations on page 2 of this manual.
Note
: This configuration method applies to ETS cameras.
The NVR will automatically configure the IP address of an ETS camera connected by LAN if:
The default IP configuration method of the camera is
DHCP
.
The camera is powered on
before
the NVR is powered on.
You can connect up to 4 IP cameras.
A
IP camera
F
Install a HDD in the NVR before connecting it to
the IP cameras.
B
Alarm I/O + magnetic contact. Refer to the user
manual of the IP camera for connection.
G
external hard disk or disk array (eSATA)
C
8P8C network cable
H
HDMI monitor
D
remote control
I
IP camera, laptop, iPhone, iPad, Android device,
etc. via internet
E
on/off switch
J
48 VDC power adapter
Connecting the IP Camera (Plug and Play)
1.
Connect the camera to a LAN port. Make sure the camera is switched on.
2.
Switch on
[E]
the NVR.
3.
Wait until the camera is configured automatically and the images appear on the monitor.
8.
User Interface
8.1
NVR Access
1.
Connect a USB mouse (included) to the mouse port
on the NVR front panel, and check if there is a
mouse icon on the screen, indicating the USB mouse is detected properly.
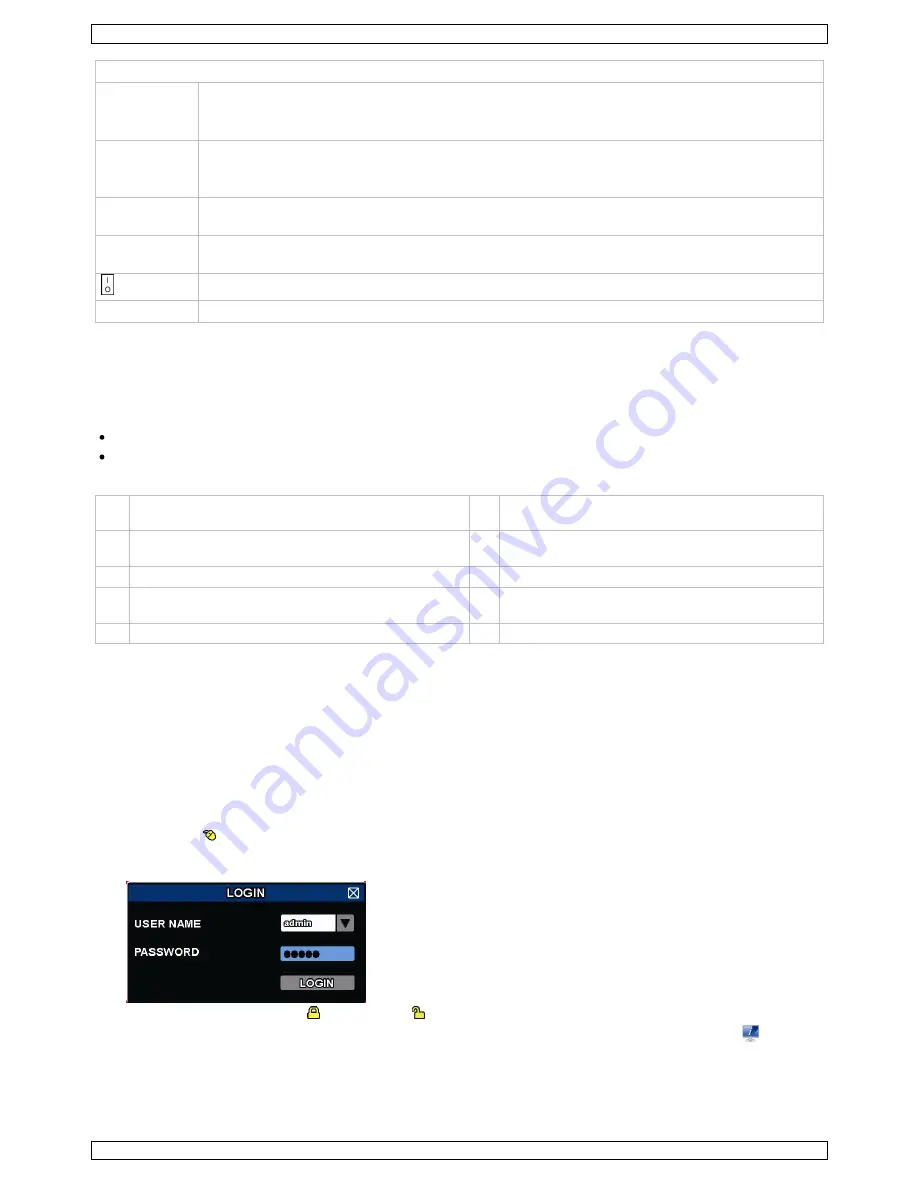
2.
Move your mouse to enter the DVR password with the password keypad. The default user name and
password are both
admin
.
The status will change from (key lock) to (unlock).
Note:
You can configure four different user levels with different access privileges in the main menu
(SYSTEM) > ACCOUNT. For more information, refer to the full user manual on the included CD-ROM.


