CCTVPROM15
V. 1.0 – 07/12/2012
8
©Velleman nv
Record settings
1.
Press the MENU button and enter the password to go into the menu list.
2.
Select the QUICK START menu item.
3.
Select the GENERAL menu item using the navigation button.
4.
Set the image size, image quality and images per second for recording.
5.
Refer to the full user manual on the included CD-ROM for more details.
Audio playback
Press the SLOW and ZOOM button simultaneously to select the desired audio channel or use the quick menu
bar (see below). The current audio channel is indicated in the status bar.
Switch users
1.
The DVR can be accessed as administrator (
) or operator (
), icons are indicated in the status bar.
2.
To switch between users, click on the user icon (
or
) to lock the current session (
).
3.
Press on the key lock icon (
) than enter the password of the desired profile.
8.
Push video configuration
If you have iPhone, iPad or Android mobile device, you can use the DVR's push video function: the DVR will
send a notification to your device when an alarm event occurs.
To do so, you need to install an app called EagleEyes on your mobile device (see Installing the EagleEyes app
below).
Note: Only certain alarm-in pins support the push video function.
8.1
PIN Connection
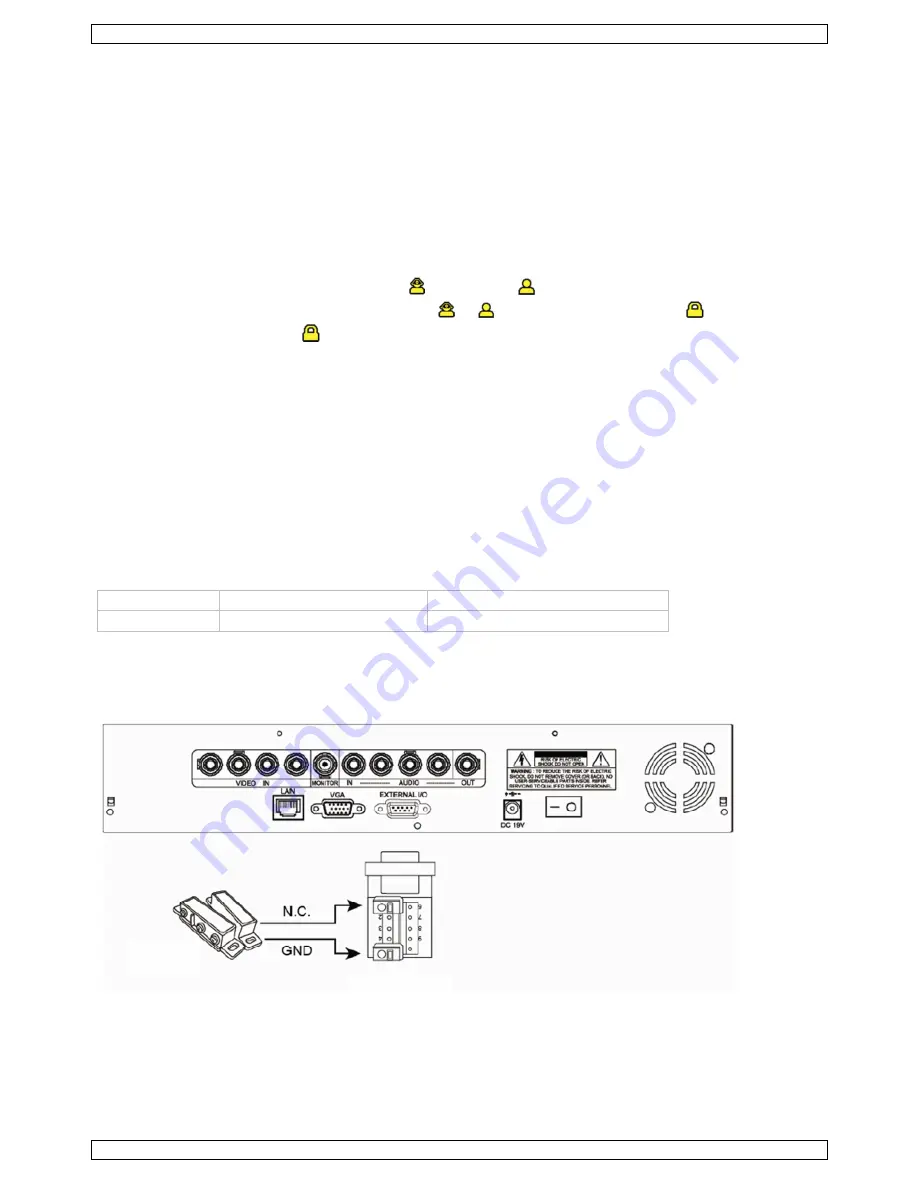
An I/O board is supplied with this DVR to help you quickly know which pin supports push video (see table
below).
PIN
Corresponding video channel
4CH Model
PIN1
CH1
Connect the alarm sensor (for example as magnetic contacts), to the I/O pin supporting push video. You can
use any type of sensor provided it has a dry contact.


