AVMOD16N / AVMOD16CCN
- 3 -
VELLEMAN
To connect your camera, connect the plug of the power adapter (8) to the power jack (4) of the camera. Insert the
power adapter into the mains. The camera is now ready for use. Adjust the image definition via the knurled screw at
the lens. Make sure not to touch the lens.
6. Installing and Connecting the Receiver
Install the receiver approximately 1m above ground for better reception.
Make sure there is a power outlet in the vicinity. Place the receiver on a
stable surface only. Sensitive surfaces may become damaged. Use a
suitable underlay.
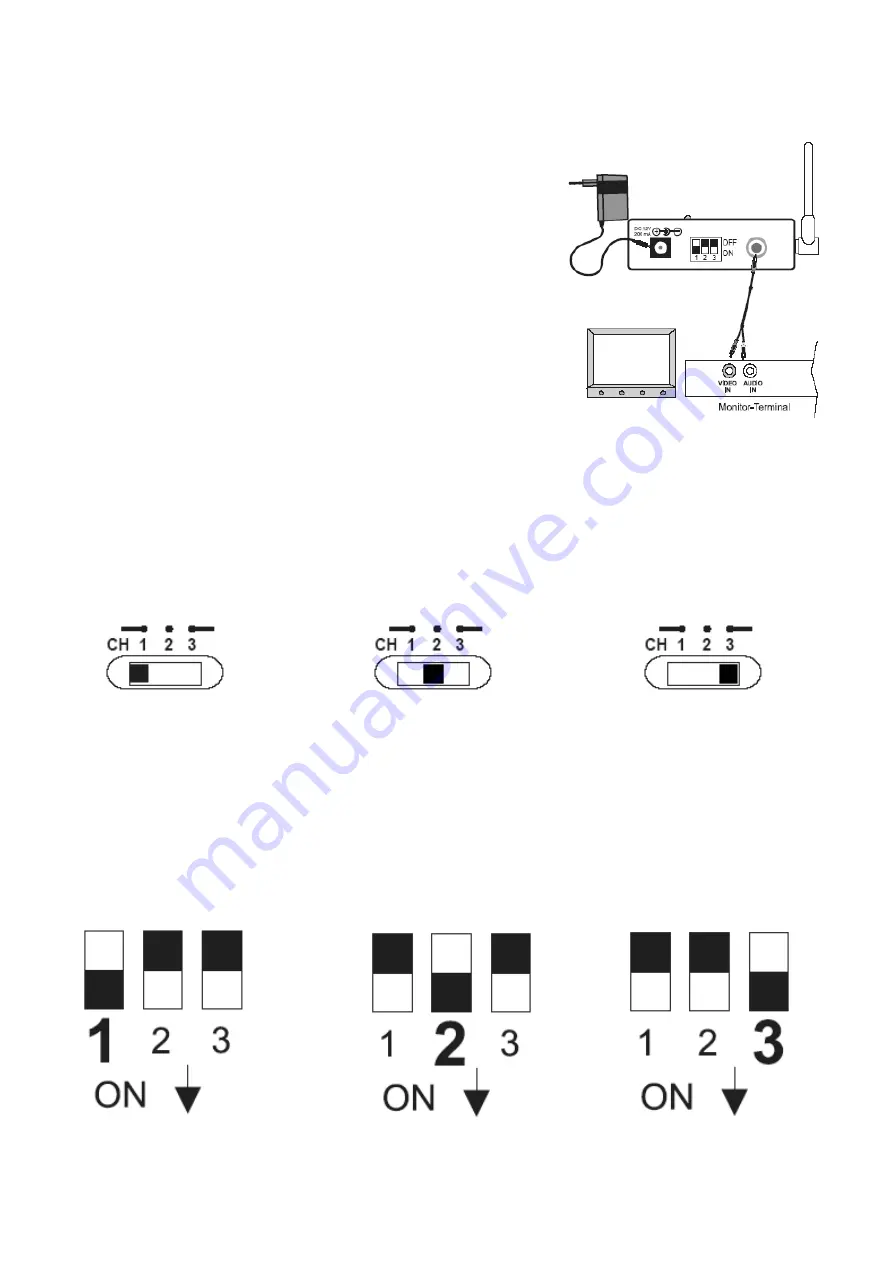
To connect your AV receiver, connect the AV cable (7) as depicted to a
suitable monitor or TV system (white plug = mono audio, yellow plug =
video). Connect the plug of the power adapter (6) to the DC input jack (3)
of the receiver. Insert the power adapter into the mains. The receiver is
now ready for use.
7. System Installation
Select the channel to be used on both the camera and receiver. Make sure the camera and the receiver are set to
the same channel (1, 2 or 3).
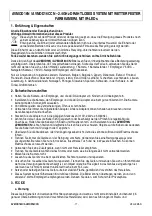
Channel Selection on the Camera
To set the channel on the camera, place the switch to the desired channel using a pointed object (e.g. ballpoint pen).
The selected channel always remains active. Only one channel may be activated at one time.
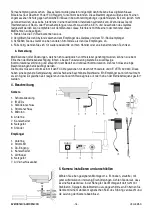
Channel Selection on the Receiver
The receiver can receive up to three cameras, even in scan mode.
a.
Manual Channel Selection
Set the channel on the receiver using a pointed object (e.g. ballpoint pen). The selected channel always remains
active. Only one channel may be activated at one time. Make sure the camera and the receiver are set to the same
channel (1, 2 or 3).
Camera set to channel 1
Camera set to channel 2
Camera set to channel 3
Receiver set to channel 1
Receiver set to channel 2
Receiver set to channel 3


