10
11
Calibration
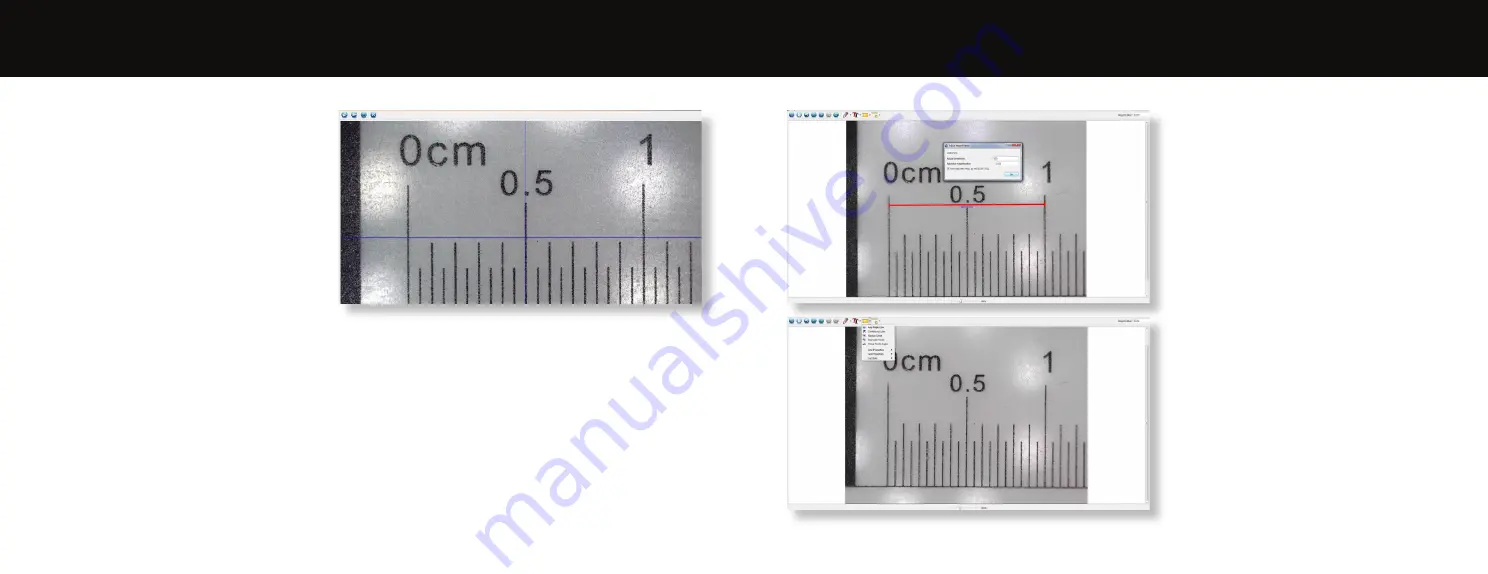
Ensure ‘Display Crossing’ is turn on, go to
‘Options > XY Guide > On/Off’.
The microscope will default to crossing
‘On’, we recommend that this is left on.
Step 1
Focus the microscope on the
supplied calibration ruler, adjust the
magnification wheel until the picture is
clear. Take a picture of the selected area
when the ruler lines are parallel to the
blue XY guides, as shown in the image.
Step 2
Double-click on the image
captured to enter the measurement
interface.
Step 3
Once the image is open, click on
the calibration icon. Using the mouse,
click on the beginning and ending points;
you must know the distance between the
points (using the ruler). A dialogue box
will pop up, enter the exact value of the
measurement into ‘Actual dimension’.
The software will automatically calibrate
the magnification rate. Click ‘OK’ and the
adjusted magnification rate will show in
the upper right corner.
Step 4
Now using ‘Any Angle Line’,
under the measurement icon, measure
the same distance again. If the value
measured is approximately the same as
the actual value, then calibration has
been successful.
Calibration & Measurements
Содержание DISCOVERY DX-1
Страница 1: ...VMS 006 DX1 User Manual...


