Replacing The CPU Board
Before Turning Off Power
10
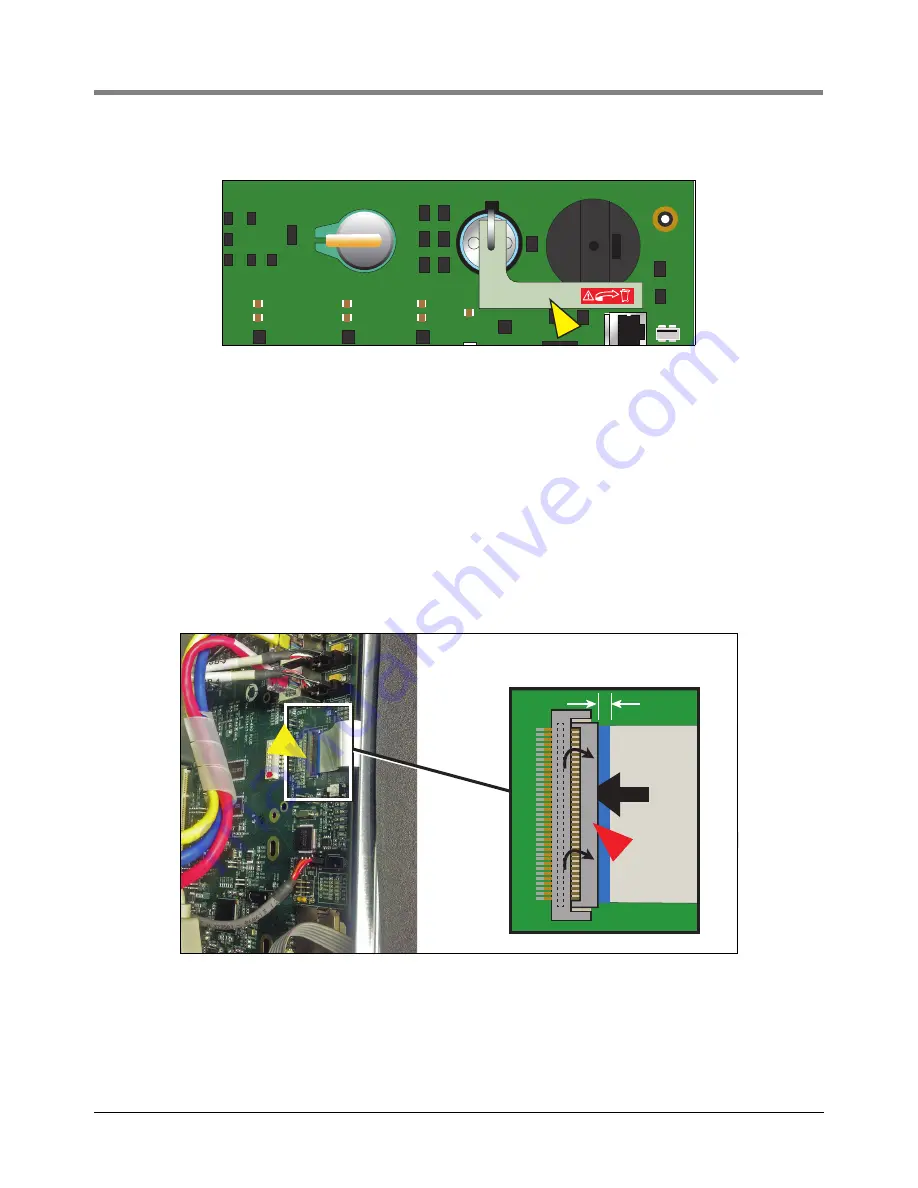
20.Remove the battery isolator strip from under the battery hold-down clip (see Figure 15).
Figure 15. Remove TLS-450PLUS CPU Board Battery Isolator Strip
21.Reconnect the three Ethernet Module cables ENET2 (blue), ENET1 (yellow) and ENET0 (red) from the CPU
22.Reconnect the optional Printer, LED Backlight and Wireless cables (ref. Figure 5).
23.For right doors with an Acknowledge Switch panel, reconnect its cable to connector (J502) on the CPU board
For right doors with the optional touch display, connect the Display Data cable to its CPU connector. If neces-
sary rotate the Display Data cable’s locking flap (1a in Figure 23) up from the CPU connector and insert end of
the Display Data ribbon cable fully into the connector then push down on the flap (1a) until it rests against the
connector. Verify the Display Data ribbon cable is securely seated in the connector and that the flap is down
against the connector as shown in the enlarged section. If inserted fully, the blue end of the cable will be no
more than 1/16” (2mm) out of the connector as shown (see Figure 16).
Figure 16. Inserting Data Display Cable End Into CPU Board Connector
24.Replace the Display door using the two hinge shoulder screws removed earlier (see Figure 7)
25.Replace the ground wire to the Display door (see Figure 6).
+
+
1a
1/16”
1


